A couple people have posted some great tie-down designs in the forum since I made my original tie-down video, and after several attempts at combining their ideas with my no-sewing policy, the following tie-down design was born.
(I don’t have anything against sewing – it’s great if you have the skills and tools – I just want the DIY Packraft designs to be as accessible to as many people as possible.)
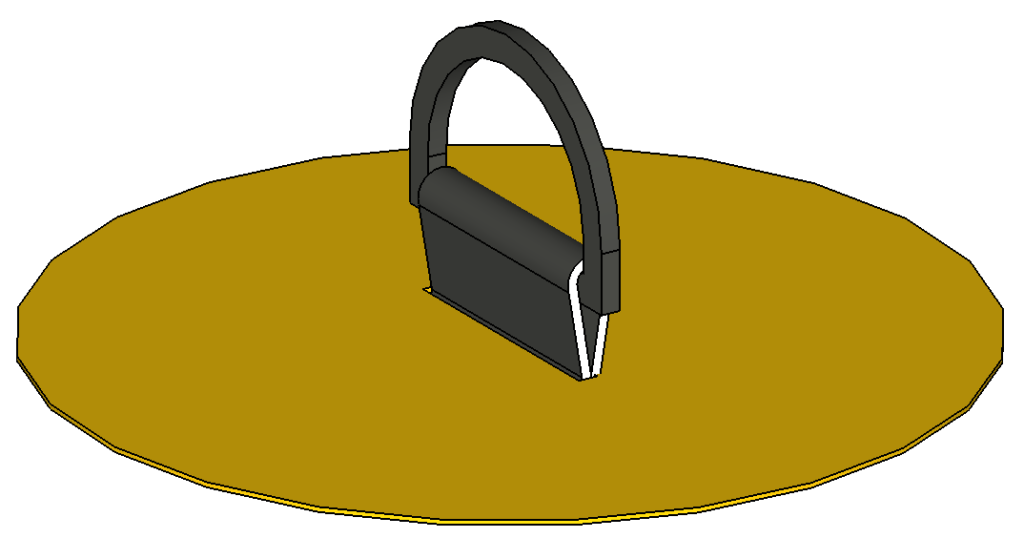
I got a bit carried away when I was doing the drawings this evening; usually I just bang out a simple plan view, add some dimensions, and leave it at that. Sometimes when I’m listening to a good podcast I zone out and you get images like this one in puke yellow:
That would have been a lot quicker to make with a camera – I literally have a tie-down sitting on my desk in front of me and a camera in my pocket… so here’s another drawing:
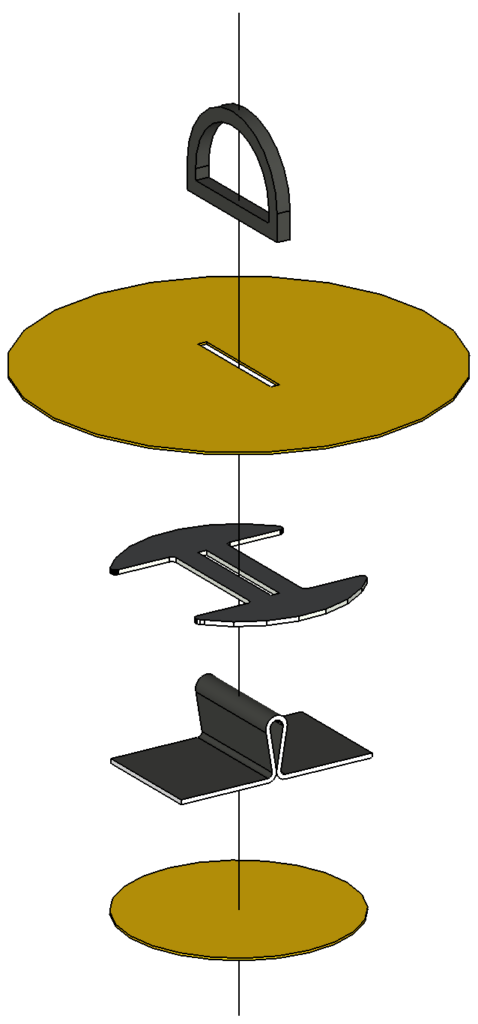
The exploded view above shows:
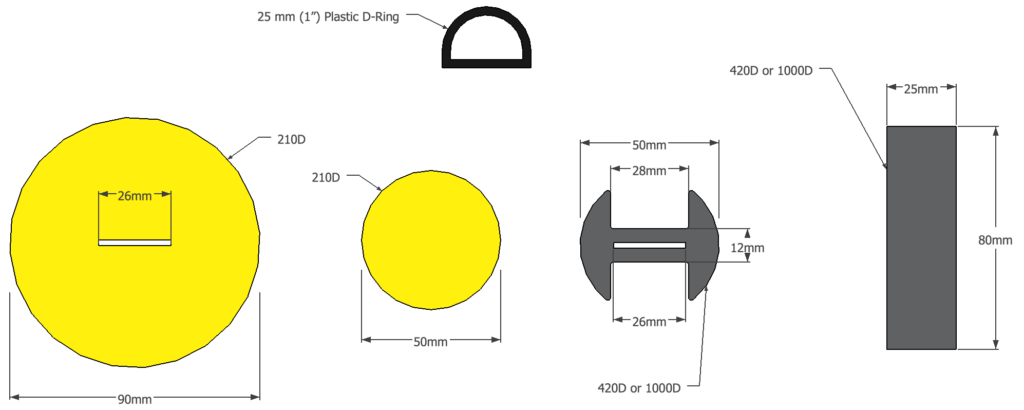
- A 25 mm (1″) plastic D-ring.
- A circle of 210D heat sealable fabric, TPU side down. This holds everything together and attaches to the packraft’s tube fabric by heat sealing.
- A vaguely H-shaped piece of 420D or 1000D fabric with TPU on both sides. This reinforces the tie-down, making it much stronger. It’s cut from a 50 mm (2″) circle of fabric.
- A strip of black fabric, which is inserted through the D-ring, folded in half, and then slid through the slots in the two layers of fabric above.
- A circle of 210D fabric, TPU side up, completes the sandwich.
When all the pieces are heat sealed together, it creates a very strong tie-down that can be pulled in all directions without tearing, and it only weighs about 5 grams.
The plastic D-rings are surprisingly strong, but you can use metal if you want. Steel will rust though and it’s relatively heavy, and titanium D-rings tend to have sharp edges. I haven’t found any 1″ aluminum D-rings, but that could also be an option.

Components with dimensions and labels indicating what each is made from. The 210D fabric has TPU on one side, while the 420D or 1000D fabrics have TPU on both sides. The slots in the fabric are 2 mm wide.


0 Comments