Assembly time: approximately 1 hour.
Note: This page is shared between different instructions sets; use the back button to return to your kit’s instructions. The fabric shown in the video and pictures below may be different from the fabric in your kit, but the assembly procedures are the same.
Important: cut reinforcing strips for the baffle from the colored scrap fabric that surrounds the packraft’s tube pieces – don’t use the black seam strips or the black zipper rectangle (unless you’re not adding a zipper) or any of the pre-scored pieces in the sheet of tube fabric!
Note: If you intend to use this backrest as a camping pillow, I recommend adding velcro stickers to the finished backrest and to your camping mattress so the pillow won’t slide around at night. Also note that the backrest is more comfortable (both as a backrest and as a pillow) when it’s only partially inflated.
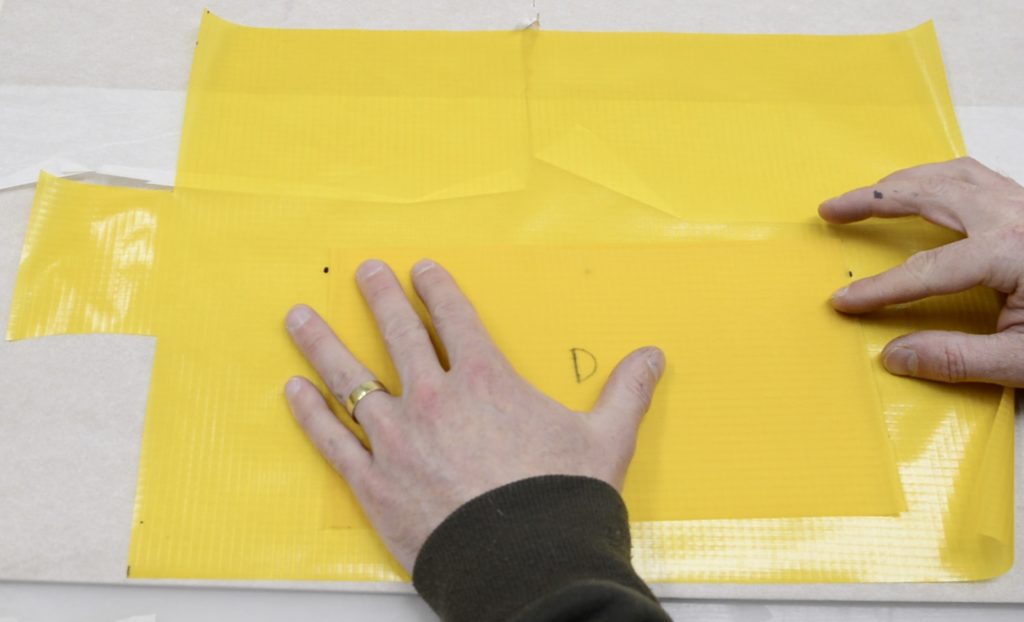
Gather Fabric Pieces:
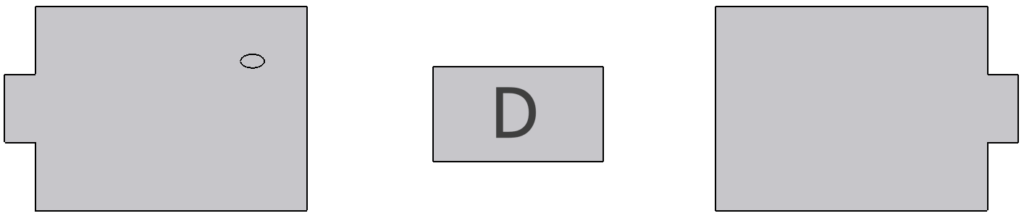
The backrest is composed of three fabric pieces:
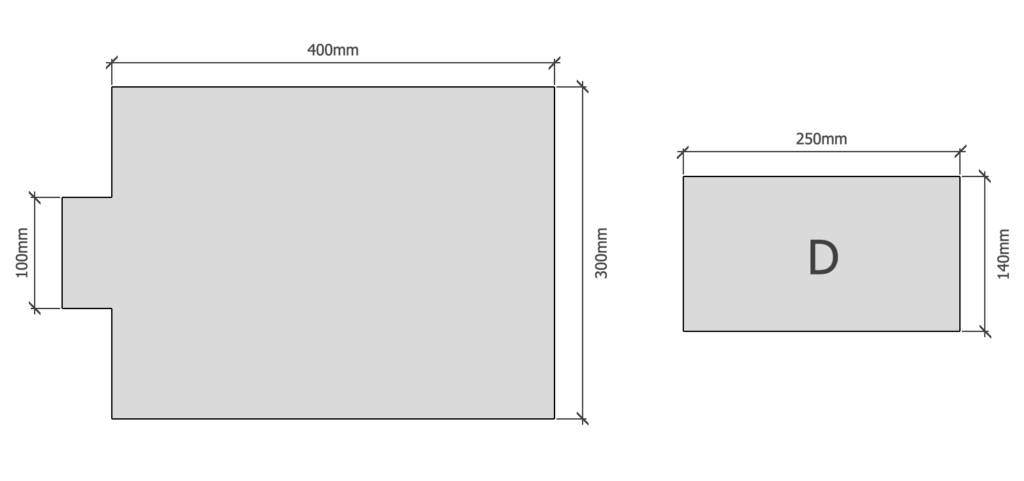
Important: In newer kits baffle D is 180 mm (7″) tall instead of 140 mm (5.5″) to allow you to use the full width of your iron to weld it to the backrest front and back.
Assemble:
After you’ve separated and identified the fabric parts, set aside all but the three backrest parts.
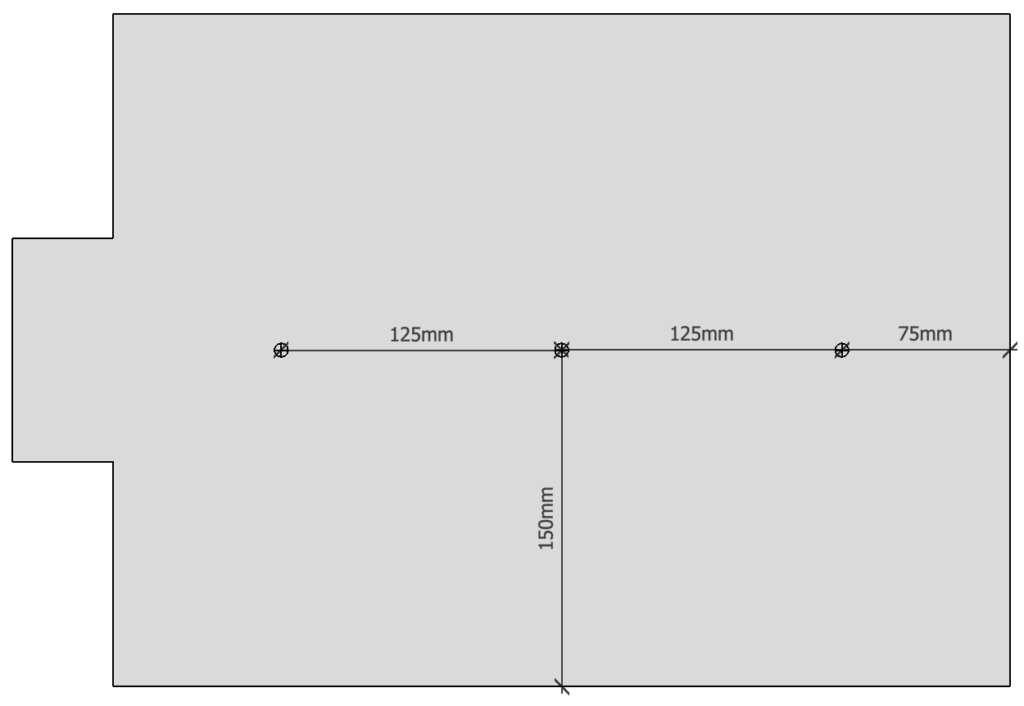
Lay out the two larger pieces with the shiny TPU sides facing up, and then use a ruler to mark three dots on each piece as shown in the diagrams below:

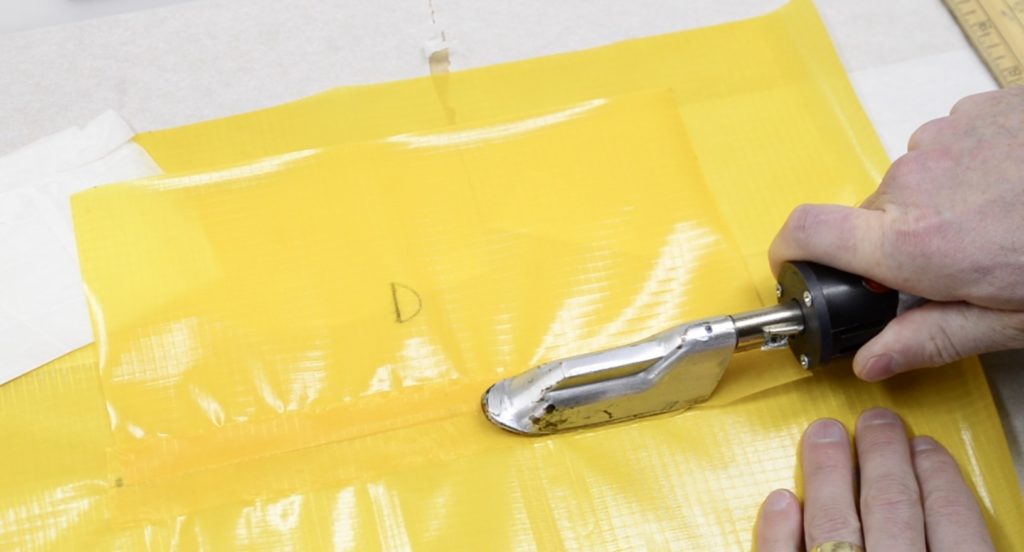
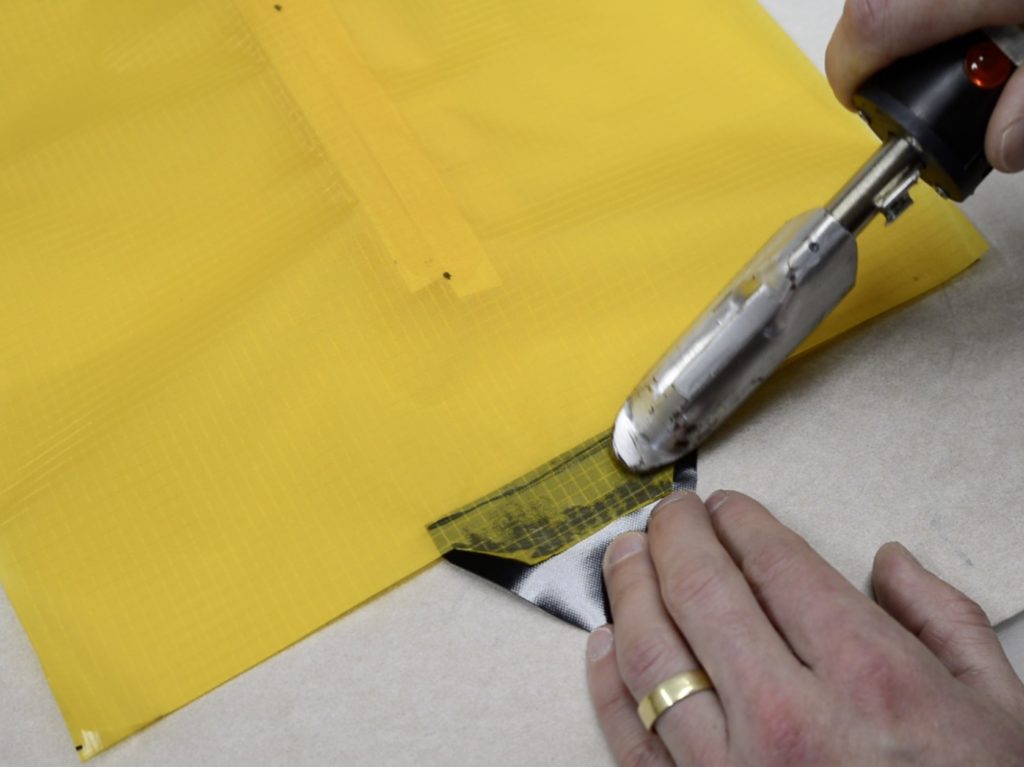
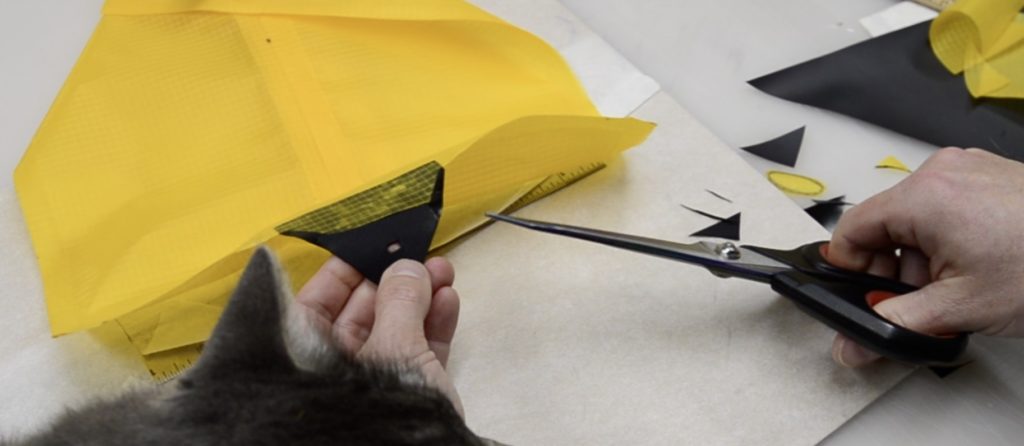
Align Baffle D with the three dots on one of the fabric pieces, with the TPU side of the baffle facing the TPU side of the larger piece. Slide the edge of Baffle D about 1.5 cm or ¾” over the dots:
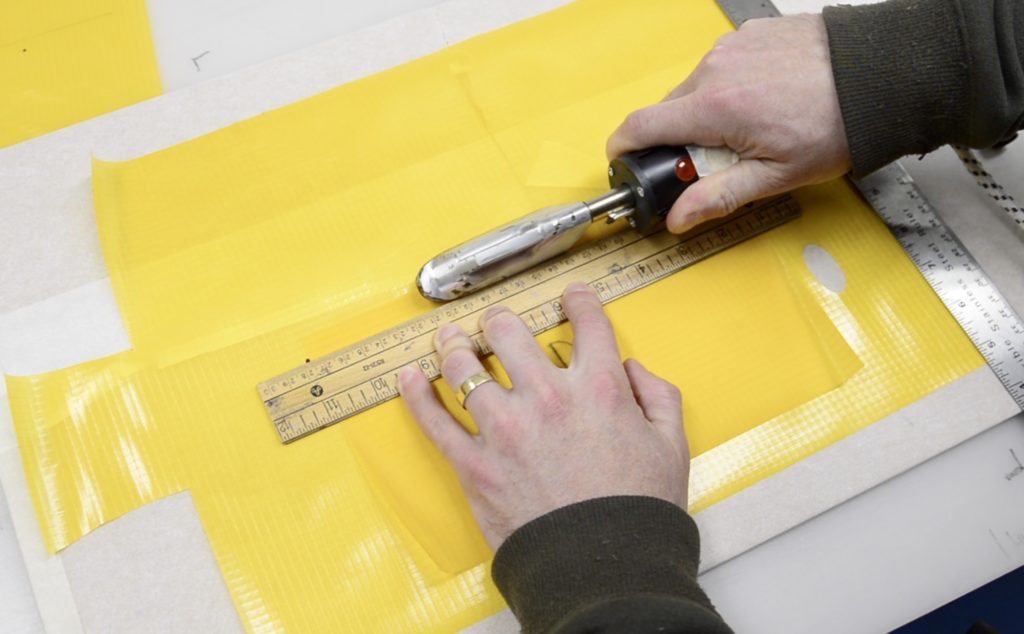
Use the edge of your iron to tack the baffle to the seat fabric in a straight line between the dots. Use a ruler here to make sure the line is straight:
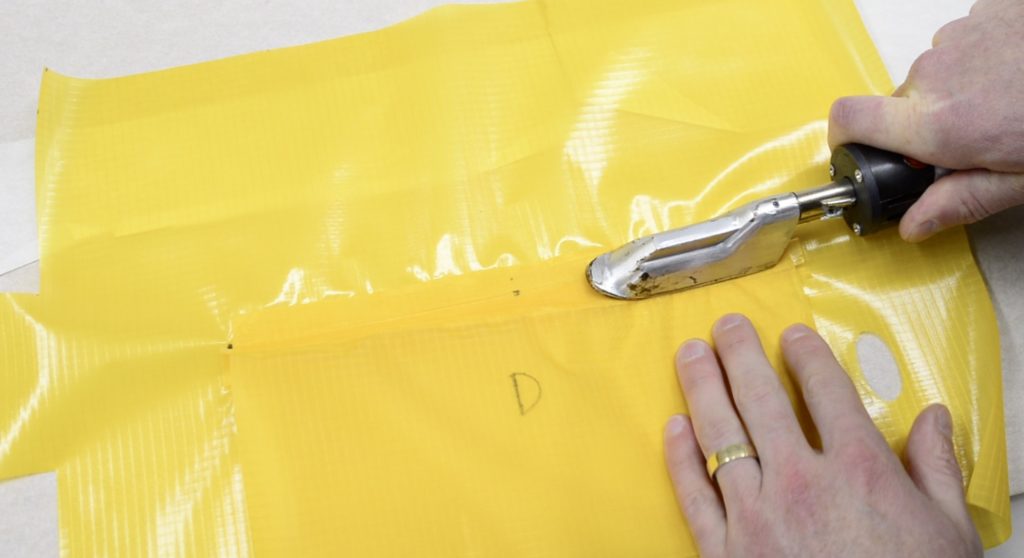
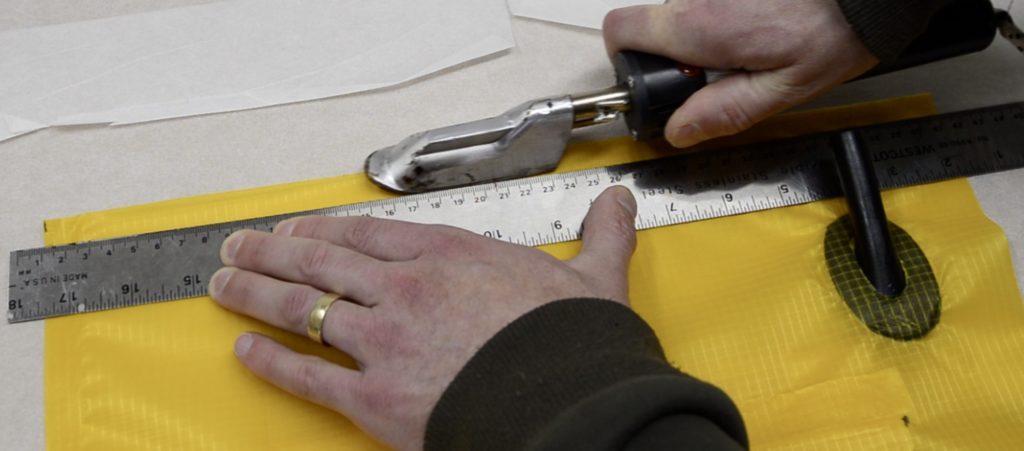
Then fold the baffle back over itself and cut a reinforcing strip slightly longer than the baffle and about the width of your iron (note: cut reinforcing strips from the colored scrap fabric around the scored packraft tube pieces – don’t use the black seam strips!):
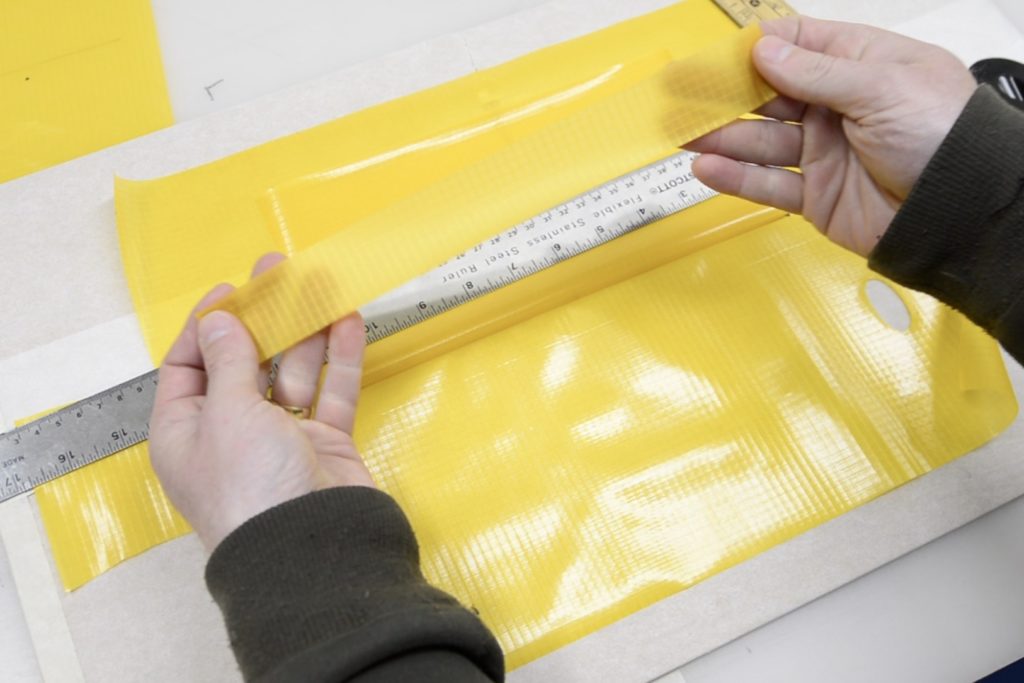
Center the reinforcing strip over the folded edge of the baffle and seal it in place. Force the edge of your iron into the fold to make sure it’s sealed very well there:
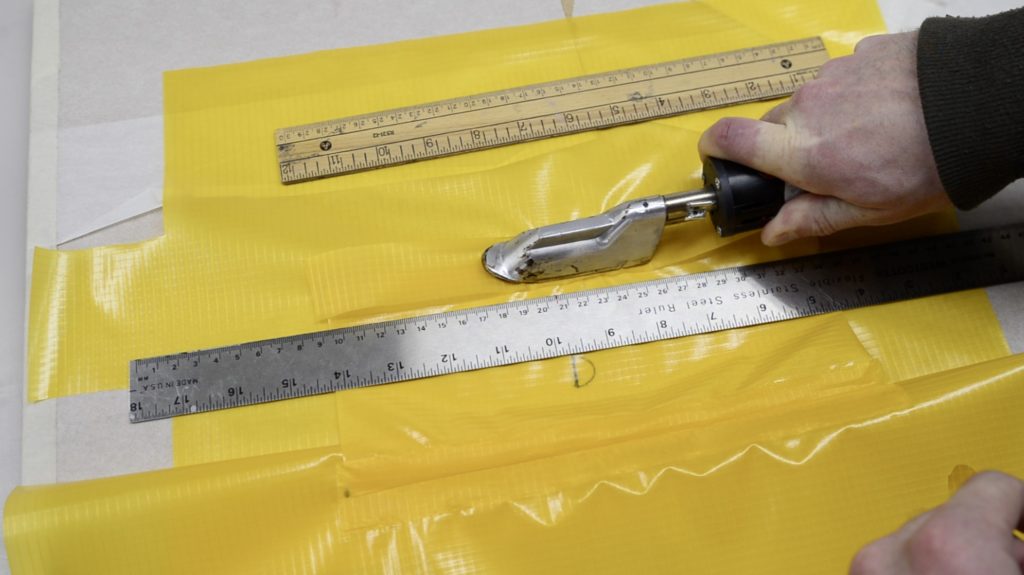
Note that the reinforcing strips and baffle edges don’t necessarily need to be welded all the way to their edges; it’s the part along the fold line that holds the fabric in place, so that’s where you should concentrate your efforts.
Flip the baffle over and iron it from this side too, welding the baffle to both the reinforcing strip and the larger fabric piece. You can slide some parchment paper under the baffle if you’re concerned about accidentally sealing the free end to the larger piece:
Next, seal Baffle D to the other larger piece following the same procedure, making sure the tabs on the ends of the two larger rectangles both point in the same direction:
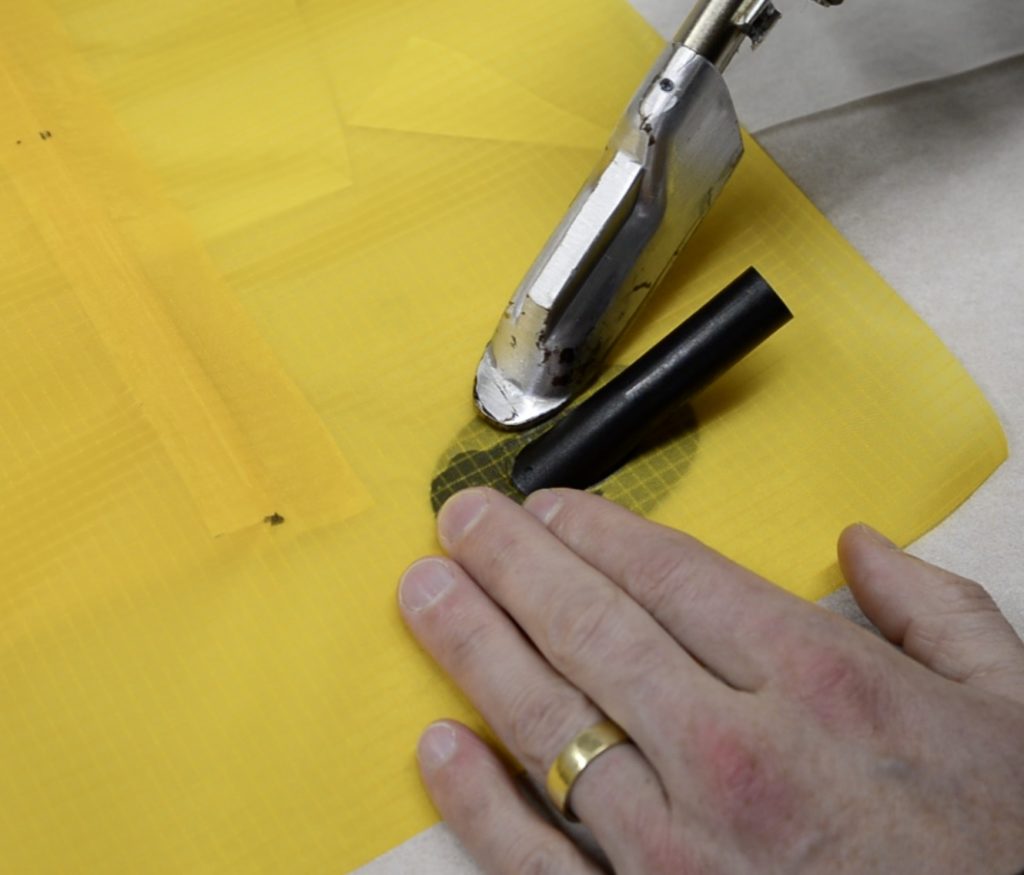
Examine your welds to make sure the TPU layers are fused together between the fabric layers, and the TPU isn’t damaged beyond the ends of the welds. The TPU is what makes the fabric airtight, so if there’s an area that looks like it could have been damaged by an accidental iron touch, seal a small scrap of fabric over it.
When you’re satisfied that the baffle is securely attached to both of the larger pieces, insert a top-up valve stem through the oval hole, oriented so the stem points toward the corner of the fabric piece. Use your iron to heat seal the fabric to the valve stem. Bend the stem out of your way, and try not to touch it with your iron or it will melt. You can wrap it in masking tape to prevent this from happening:
Avoid ironing beyond the edge of the flange or you might damage the airtight TPU layer there. If that happens, you can seal a ring of scrap fabric to the bottom of the flange as well, as shown in the seat bottom assembly video.
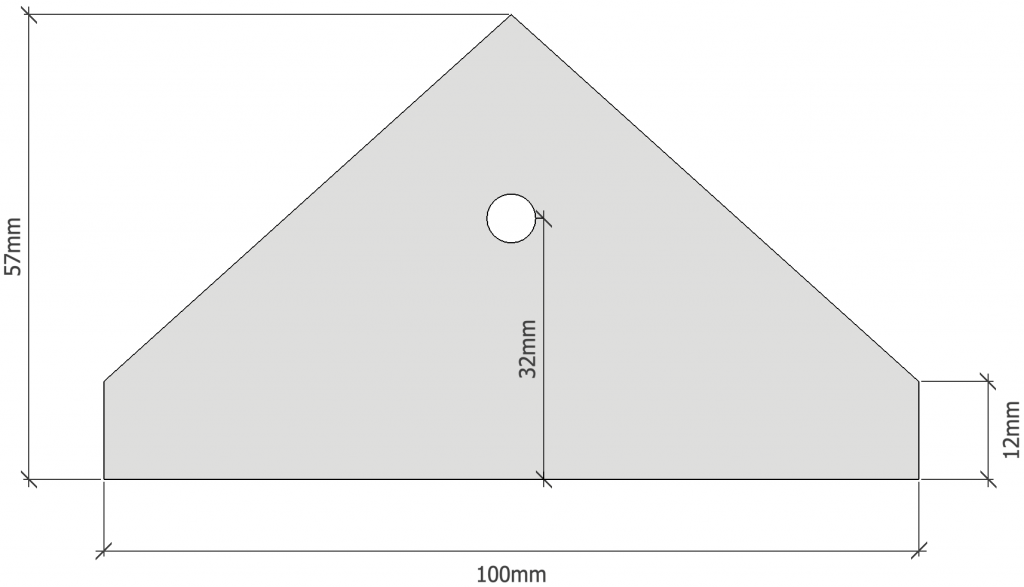
Cut out a scrap of packraft floor fabric, as shown, to make an attachment point for tying the backrest to the packraft. The exact dimensions aren’t critical, but here are the approximate measurements I use:
Trim the tabs on the larger fabric rectangles to fit over the attachment point, and then sandwich the attachment point between the tabs and seal the two tabs to it:
Line up the edges of the larger rectangles and iron them together in a weld approximately 15 mm or ¾ of an inch wide. The actual width of the weld is not as important as keeping the lines straight; anything wider than about 1 cm or half an inch will be strong enough. Seal all the way around the perimeter, being careful to keep the edges and corners aligned so no wrinkles or folds are sealed into the fabric:
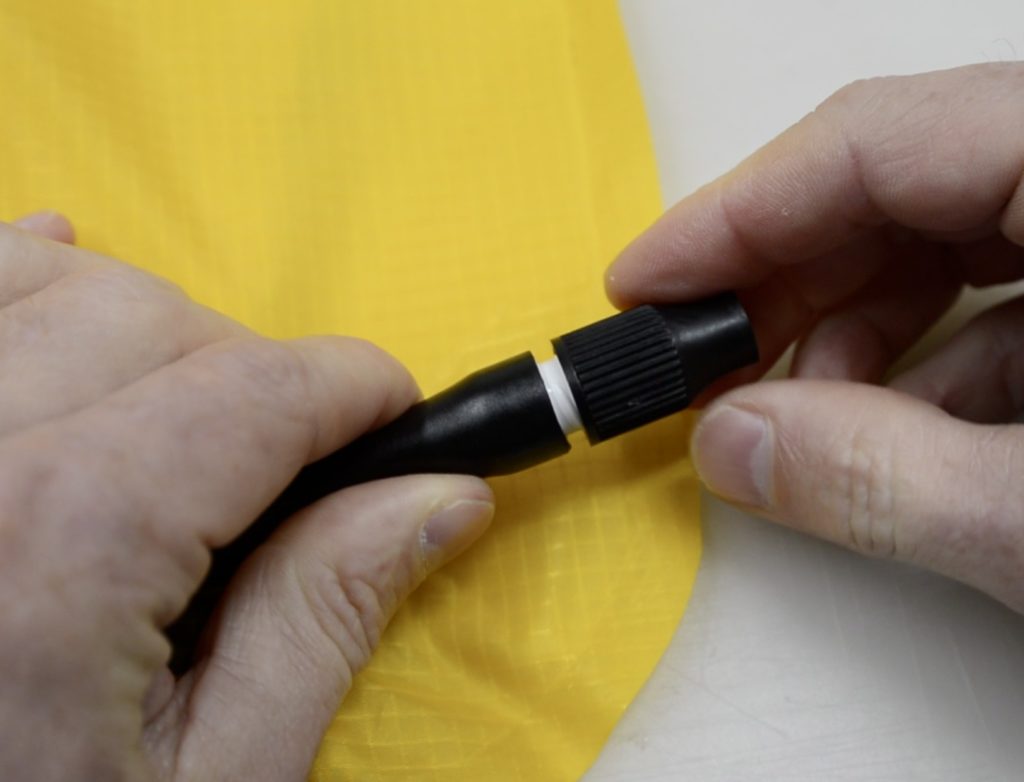
Roughen the inside of the valve stem and the white part of the inflation valve, coat the white part with a small amount of Seam Grip+WP or Aquaseal, and push it into the valve stem. Allow it to cure for at least eight hours:
If you haven’t already, cut a hole in the attachment point. It’s also a good idea to reinforce both sides of the attachment point by sealing scraps of tube fabric to it. Alternatively, you could add a plastic grommet here:
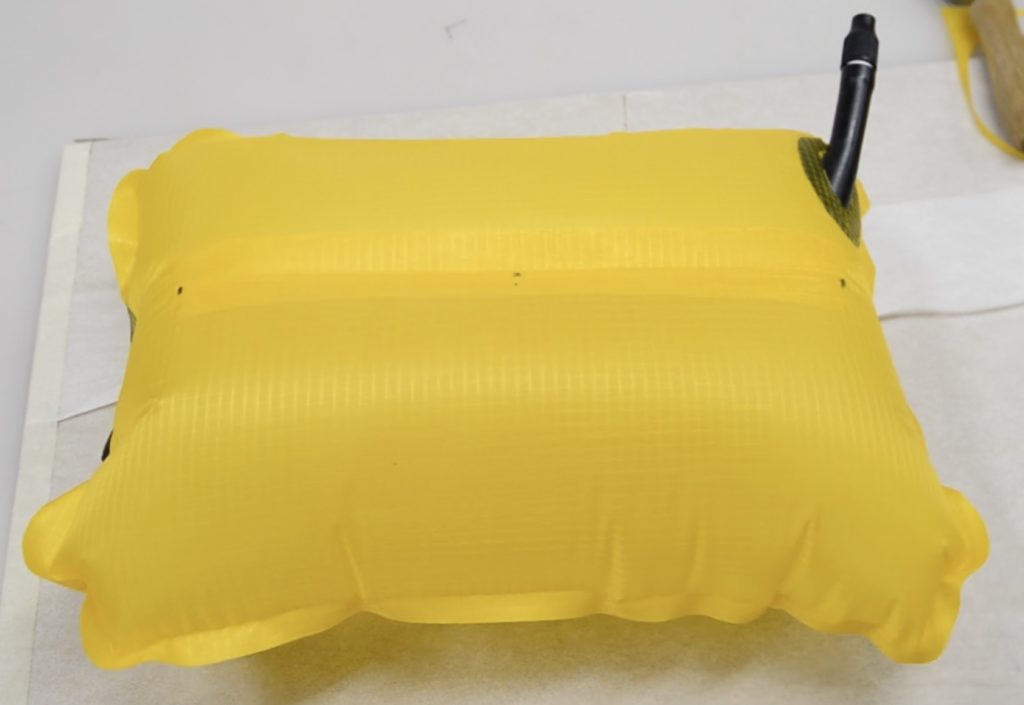
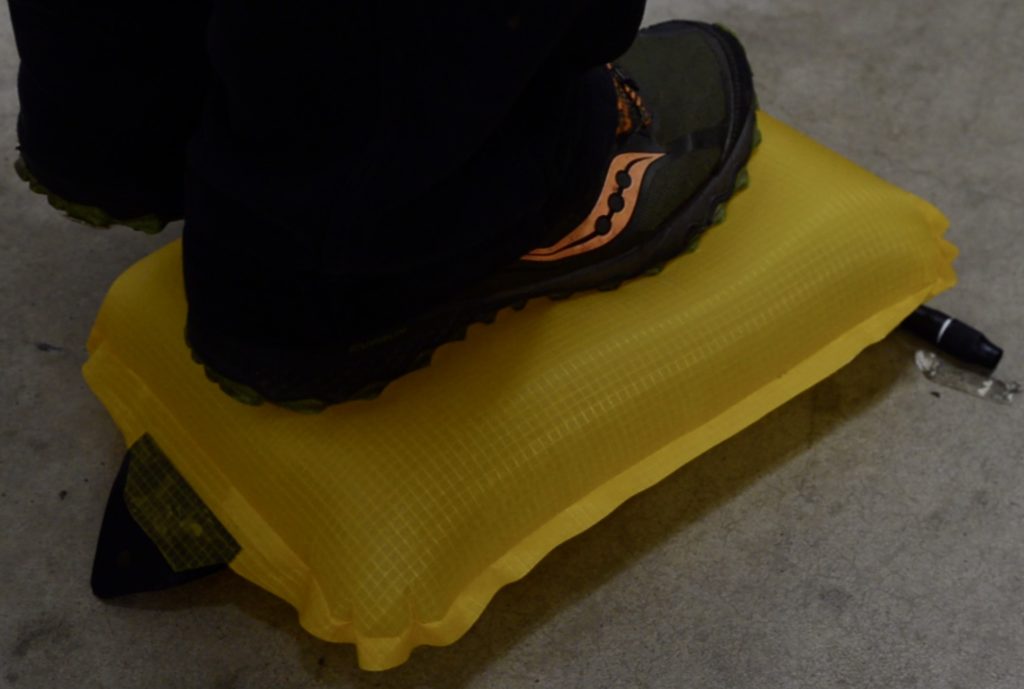
Inflate the backrest and test for leaks. Re-iron any areas that leak or begin to separate under pressure:
When you’re satisfied that the backrest does not leak, you can trim the edges with scissors so the front and back pieces align perfectly. You can also round off the corners, if you like.
Details about how I attach the seat and backrest to the packraft are posted in Step 11.
Questions? Leave a comment below!
12 Comments