Note: This page is shared between more than one set of packraft instructions. Use the back button to return to your kit’s instructions.
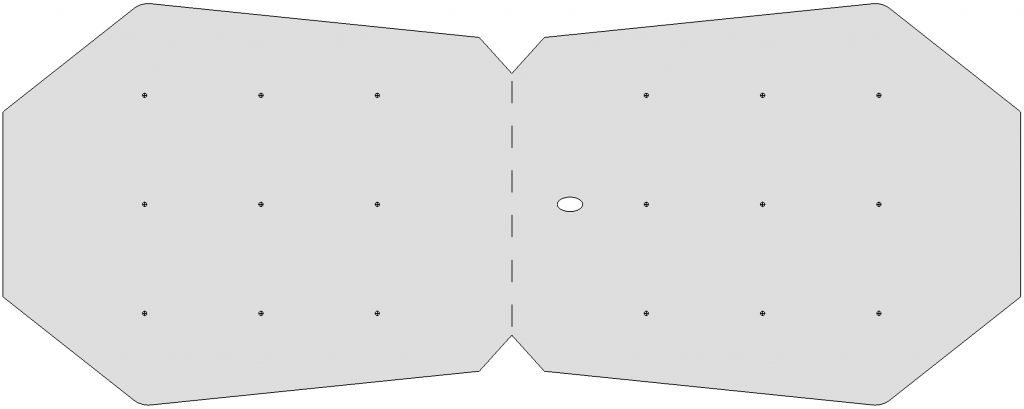
Important: cut reinforcing strips from the colored scrap fabric around the packraft tubes – don’t use the black seam strips or the zipper rectangle!
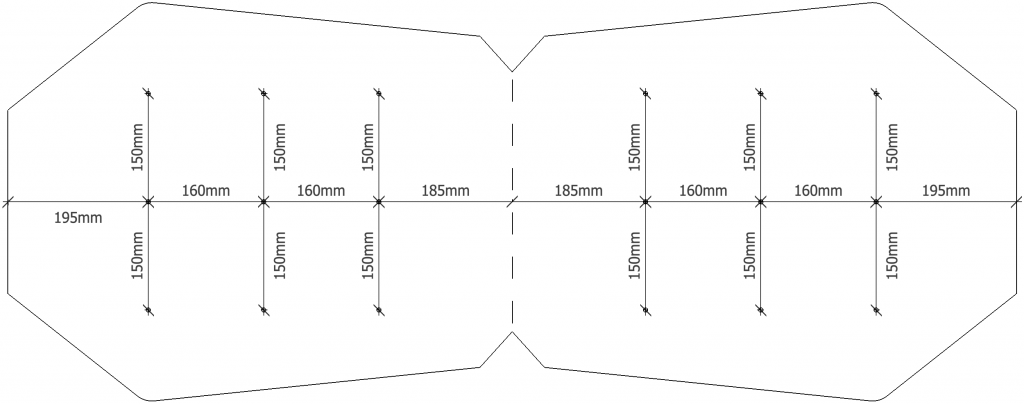
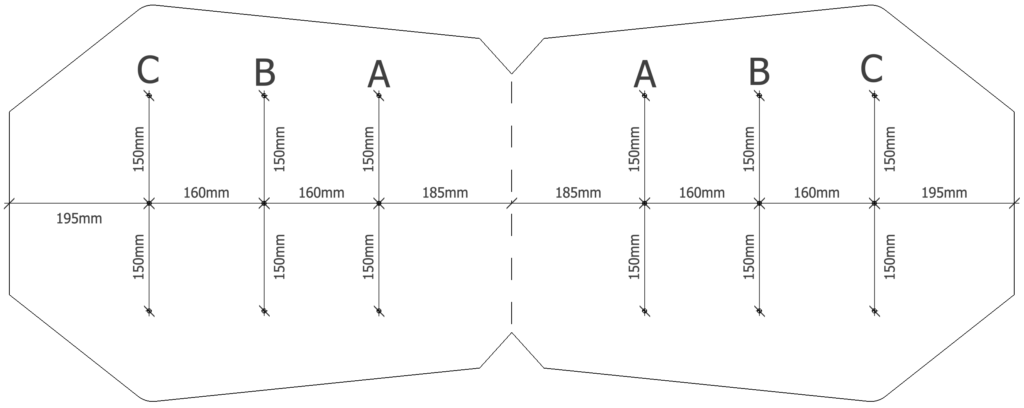
Important: Depending on when your kit was made, baffles A, B, and C might be taller than those shown in the video – this is to allow you to weld wider strips to the seat top and bottom using the full width of your iron instead of 15 mm strips as in the video above (e.g. at 2:00 in the video above).
| Baffle: | A | B | C |
| Old: | 15 cm (5.9″) | 18 cm (7.1″) | 16 (6.3″) |
| New: | 19 cm (7.5″) | 22 cm (8.7″) | 20 (7.9″) |

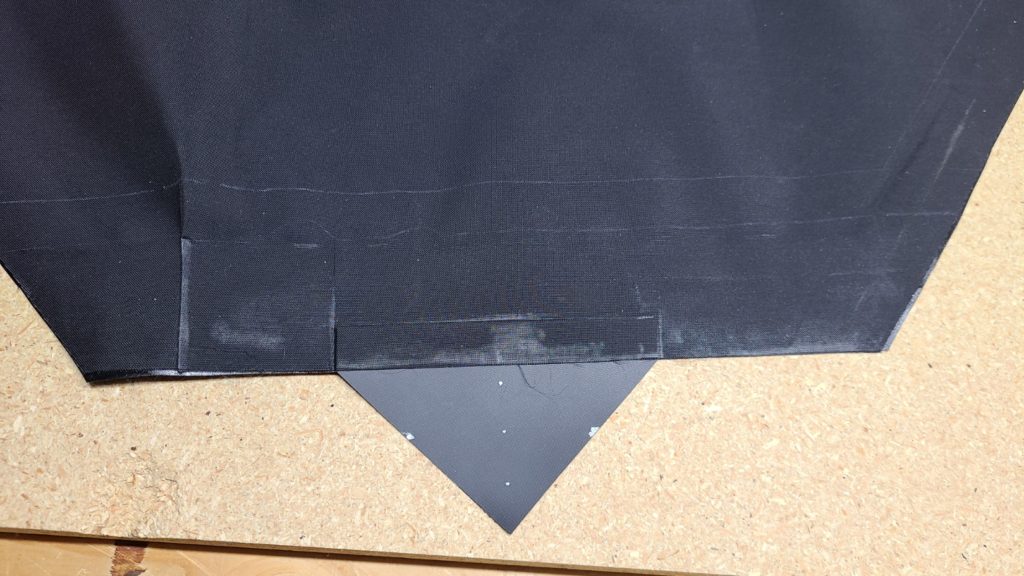
Note: Depending on when your kit was made, there may be a ~10 cm (4″) gap in the scored lines at the rear of the seat piece (in the diagrams above and below, the rear of the seat is represented by the vertical lines at the left and right edges of the drawings). This is to allow you to extend a tab of fabric outwards so more surface area can be welded to the attachment point.
Tip: Instead of ironing the last reinforcing strips from the outside of the seat with a parchment paper-covered block inside the seat (as at ~6:18 in the video above), you may find it easier to turn the seat inside out so you can iron the reinforcing strip directly. (You’ll have to turn each “cell” inside out, one after the other, by pulling the seat fabric through the tunnel formed between two adjacent baffles.) Thanks to Steven for this tip!
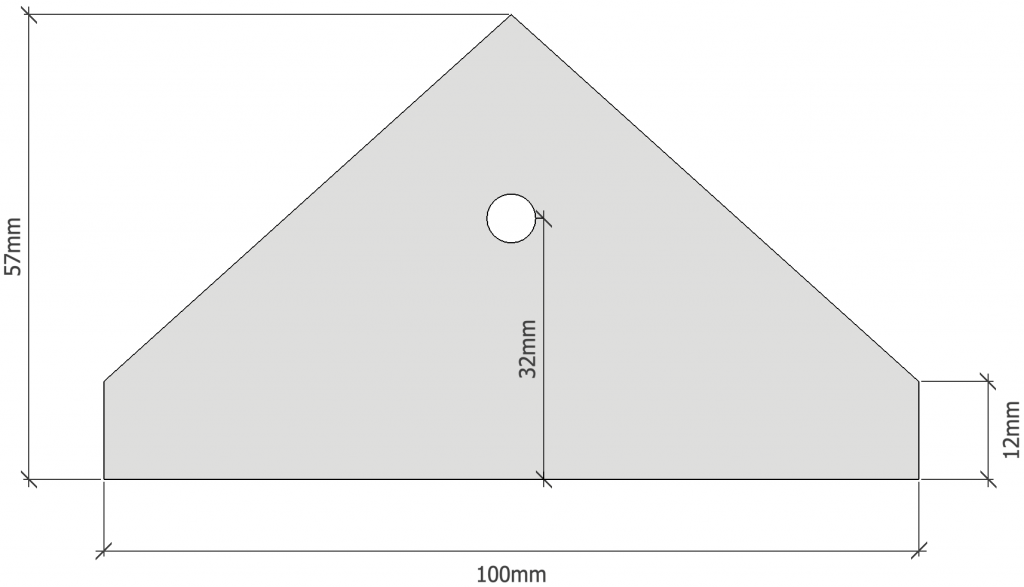
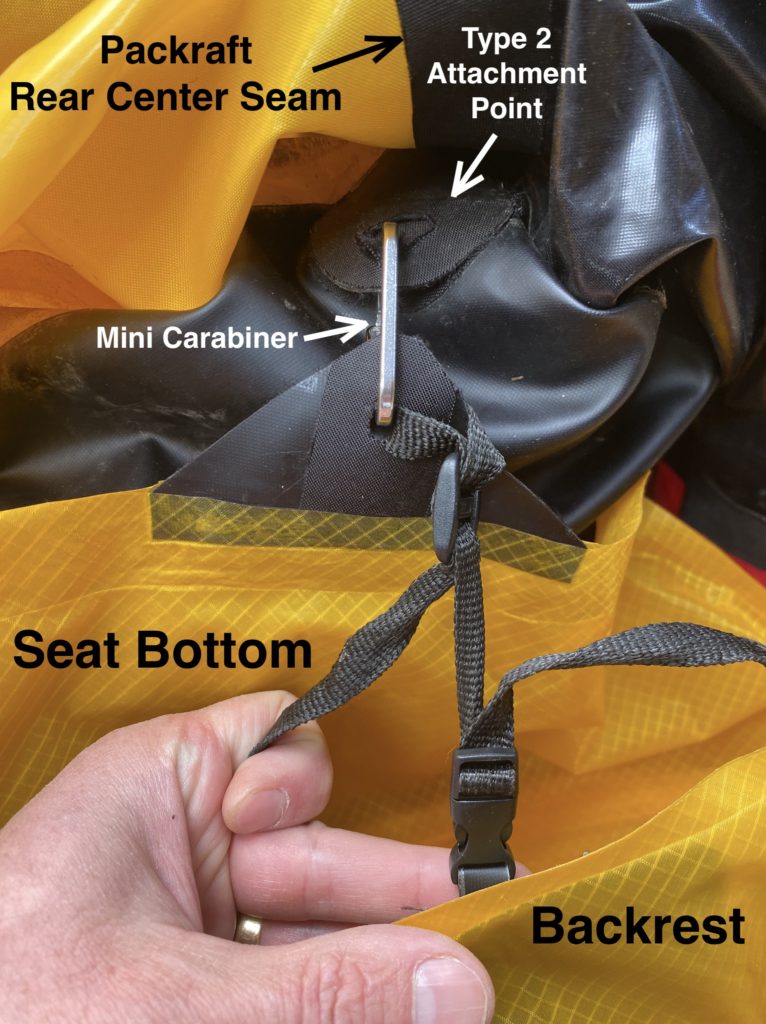
To attach the seat bottom and backrest to the packraft, I install a Type 2 attachment point at the back of the cockpit floor.

Seat Attachment:
The image below shows how I attach my seat and backrest to the packraft – this is just one possible method. I install a “Type 2” attachment point at the center-rear of the cockpit floor and use a mini carabiner to link the seat bottom to it. I then attach the backrest to the seat bottom with a piece of 1 cm (3/8″) webbing and a plastic buckle, to make it easily removable (because I also use the backrest as a camping pillow). You can see that the attachment point is frayed after a lot of use, so installing a plastic grommet in the hole might be a good idea.
Caution – Avoid “Extra” Fabric on the Seat Top or Bottom:

To avoid this outcome, do not iron both the left and right sides of the seat before ironing the rear.
Instead, you can either:
- Iron the rear seam first and then work your way forward from there on each side, ending at the front of the seat where the fabric is folded
or
- Copy what I did in the video above, which is to start at one front corner of the seat and then work your way back from there, then continue ironing across the rear seam, and then iron forward along the other side (i.e. make it one continuous seam).
Either way, by finishing the weld at the front of the seat where the fabric is folded, any excess length on the top or bottom can be compensated for by simply moving the fold.
Tacking the fabric in place with the edge of your iron can help keep things lined up, but don’t worry if the edges of the seat top and bottom don’t line up perfectly – after they’re welded together you can trim them to make a nice neat edge.

Tip: Avoid starting any seam at both ends and working towards the middle or you will likely end up in the above scenario.
Baffle facing the wrong direction?
If you mistakenly weld one of the baffles facing the wrong direction, it’s not a big deal – here’s how you can fix it:
Cut off half of the baffle, and then cut a rectangle of scrap fabric the same length as the baffle and 2-3 centimeters (~1 inch) wider than the part you cut off (the width of your iron). Then weld the new piece to the part of the baffle that is already attached to the seat fabric. Overlap the pieces with the TPU sides facing each other, and make the overlap wide enough so that the resulting baffle will be the same size as the original. That will effectively flip the TPU from one side of the baffle to the other and will allow you to carry on following the instructions without having to make any other changes.
Questions? Leave a comment below!
44 Comments