In this step, I’m going to show you how to add an optional second floor layer to your packraft for increased strength. If you’ve chosen not to add one, you can skip down to the Reinforcing the Tube-to-Floor Joint section.
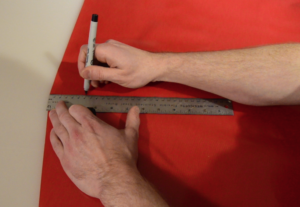
First, measure 6 cm in from the corners of the floor piece, in line with the dots that are already there, and make new marks with a pen.
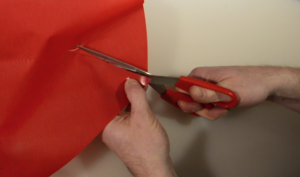
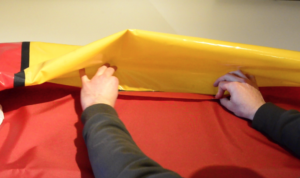
Then cut the fabric between the new marks and the corners. These cuts will allow the fabric to fold up and under the packraft’s tubes where the tubes are bonded to the first (bottom) floor layer.
Note: there is no need to make a cut at the dot that marks the center of the rear of the floor – only cut at the nine corners.
Now you can lay the second floor piece over the first, TPU side down. Smooth out the wrinkles and make sure all the corners are positioned properly.
Instead of using your heat-sealing iron to laminate the large floor area, use your household iron for better and faster results. Start by setting the temperature so it is just hot enough to create a weak bond between the layers that can be peeled apart without damaging the TPU (test using scraps first). That way you can make sure the fabric is aligned correctly and wrinkle-free before increasing the temperature for a permanent bond (thanks to Luke in Australia for this great tip!).
Note: leave small areas unsealed around the front and rear center seams so you will be able to bond the narrow strip to the floor in Step 6.
Reinforcing the Tube-to-Floor Joint
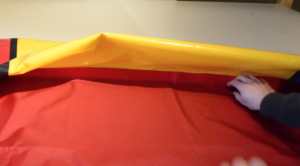
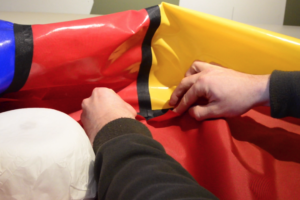
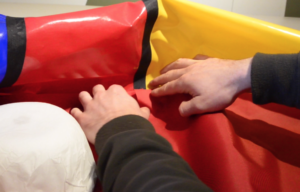
Once the floor layers are bonded together, there will be excess fabric around the edges of the floor folded up under the tubes.
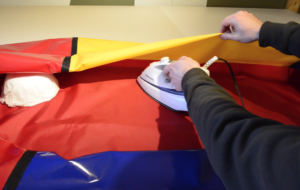
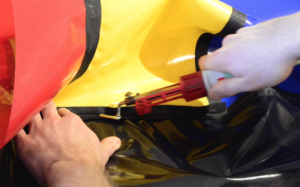
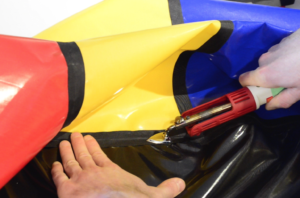
These areas can be bonded to the tubes to increase the strength of the tube-to-floor bond. You can iron it either from the floor fabric side, or from inside the tube – whichever is easier.
Where the flaps overlap the seam fabric in the corners of the packraft, you can cut the excess floor fabric away or bond the fabric together with glue. (The TPU will not bond well to the non-TPU side of the fabric.)
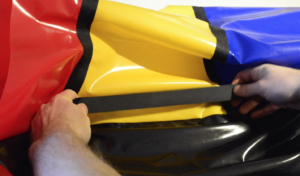
If you’re not installing a second floor layer, I recommend that you still reinforce the tube-to-floor joint by bonding thin strips of fabric across the floor-tube joint.
For each tube segment, cut a strip of fabric 2.5 cm (1”) wide and the same length as the joint you’re reinforcing.
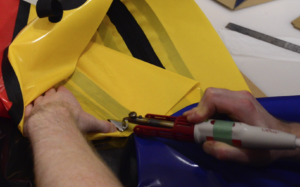
Fold the strip into the joint and then use the edge of your heat-sealing iron to tack it in place along the length of the seam.
Then you can either fold the fabric flat and seal the entire width of the strip all at the same time, or fold the strip in half and heat seal it both from inside the tube and through the bottom of the floor – whichever is easier.
The ends of the strip won’t bond well to the non-TPU coated side of the seam fabric, so you can trim away the overlap, or bond it with glue, or just leave it there unsealed – it’s not critical and these areas won’t be visible when the tubes are inflated.
That’s all for this step. Questions? Please post a comment below.
4 Comments
David · January 19, 2017 at 1:41 pm
Instead of sealing the two layers completely flat, what do you think about leaving unattached sections along the way? Then insert an inflation valve, and blow up those baffles? The the floor can serve double purpose as a inflated seat, and possible provide an air cushion to maybe resist puncture? Maybe with some extra air in the floor, this can provide tiny extra margin for safety?
Matt (Admin) · January 19, 2017 at 1:45 pm
Hi David,
I have been thinking of trying something along the same lines, and I think it’s a good idea. If you get to it before I do, please let us know how it goes!
Cheers
Quincy · January 6, 2017 at 11:17 am
Just a thought: Do you think it would be easier to attach and iron on the second floor in the very beginning, leaving a 6-10cm parameter unsealed to attach to the tubes later? I imagine it might be fairly difficult to get the two floor pieces aligned properly once all the tubes are attached even using the low temp iron trick. However, having not tried it yet I can’t speak to the difficulty of the process you describe or the feasibility of my idea. Thanks for your input!
Matt (Admin) · January 6, 2017 at 2:32 pm
Yep, that sounds like a good idea to try – the final word is by no means in on the most efficient order of assembly, and I’m constantly improving my designs and methods, so I welcome ideas like this, especially if you give it a try and report back so others can learn from your experience. I see no reason why this wouldn’t work, and it might make things easier later on, as you suggest. The only other thing you’ll have to do is fold back the unsealed perimeter and tape it out of the way so it won’t interfere as you attach the tubes to the bottom floor layer.
Thanks!