Home Forums DIY Packrafts Rod holder insert

  • Creator
    Topic
  • #6956
    gustav.kraft
    Participant

    Hi!

    Just order my first kit and eager to start. Since 9/10 times I use my packraft a Rod Holder is high on the wish list of modification.

    Most types I have seen are external, as for example “the packraft table”.

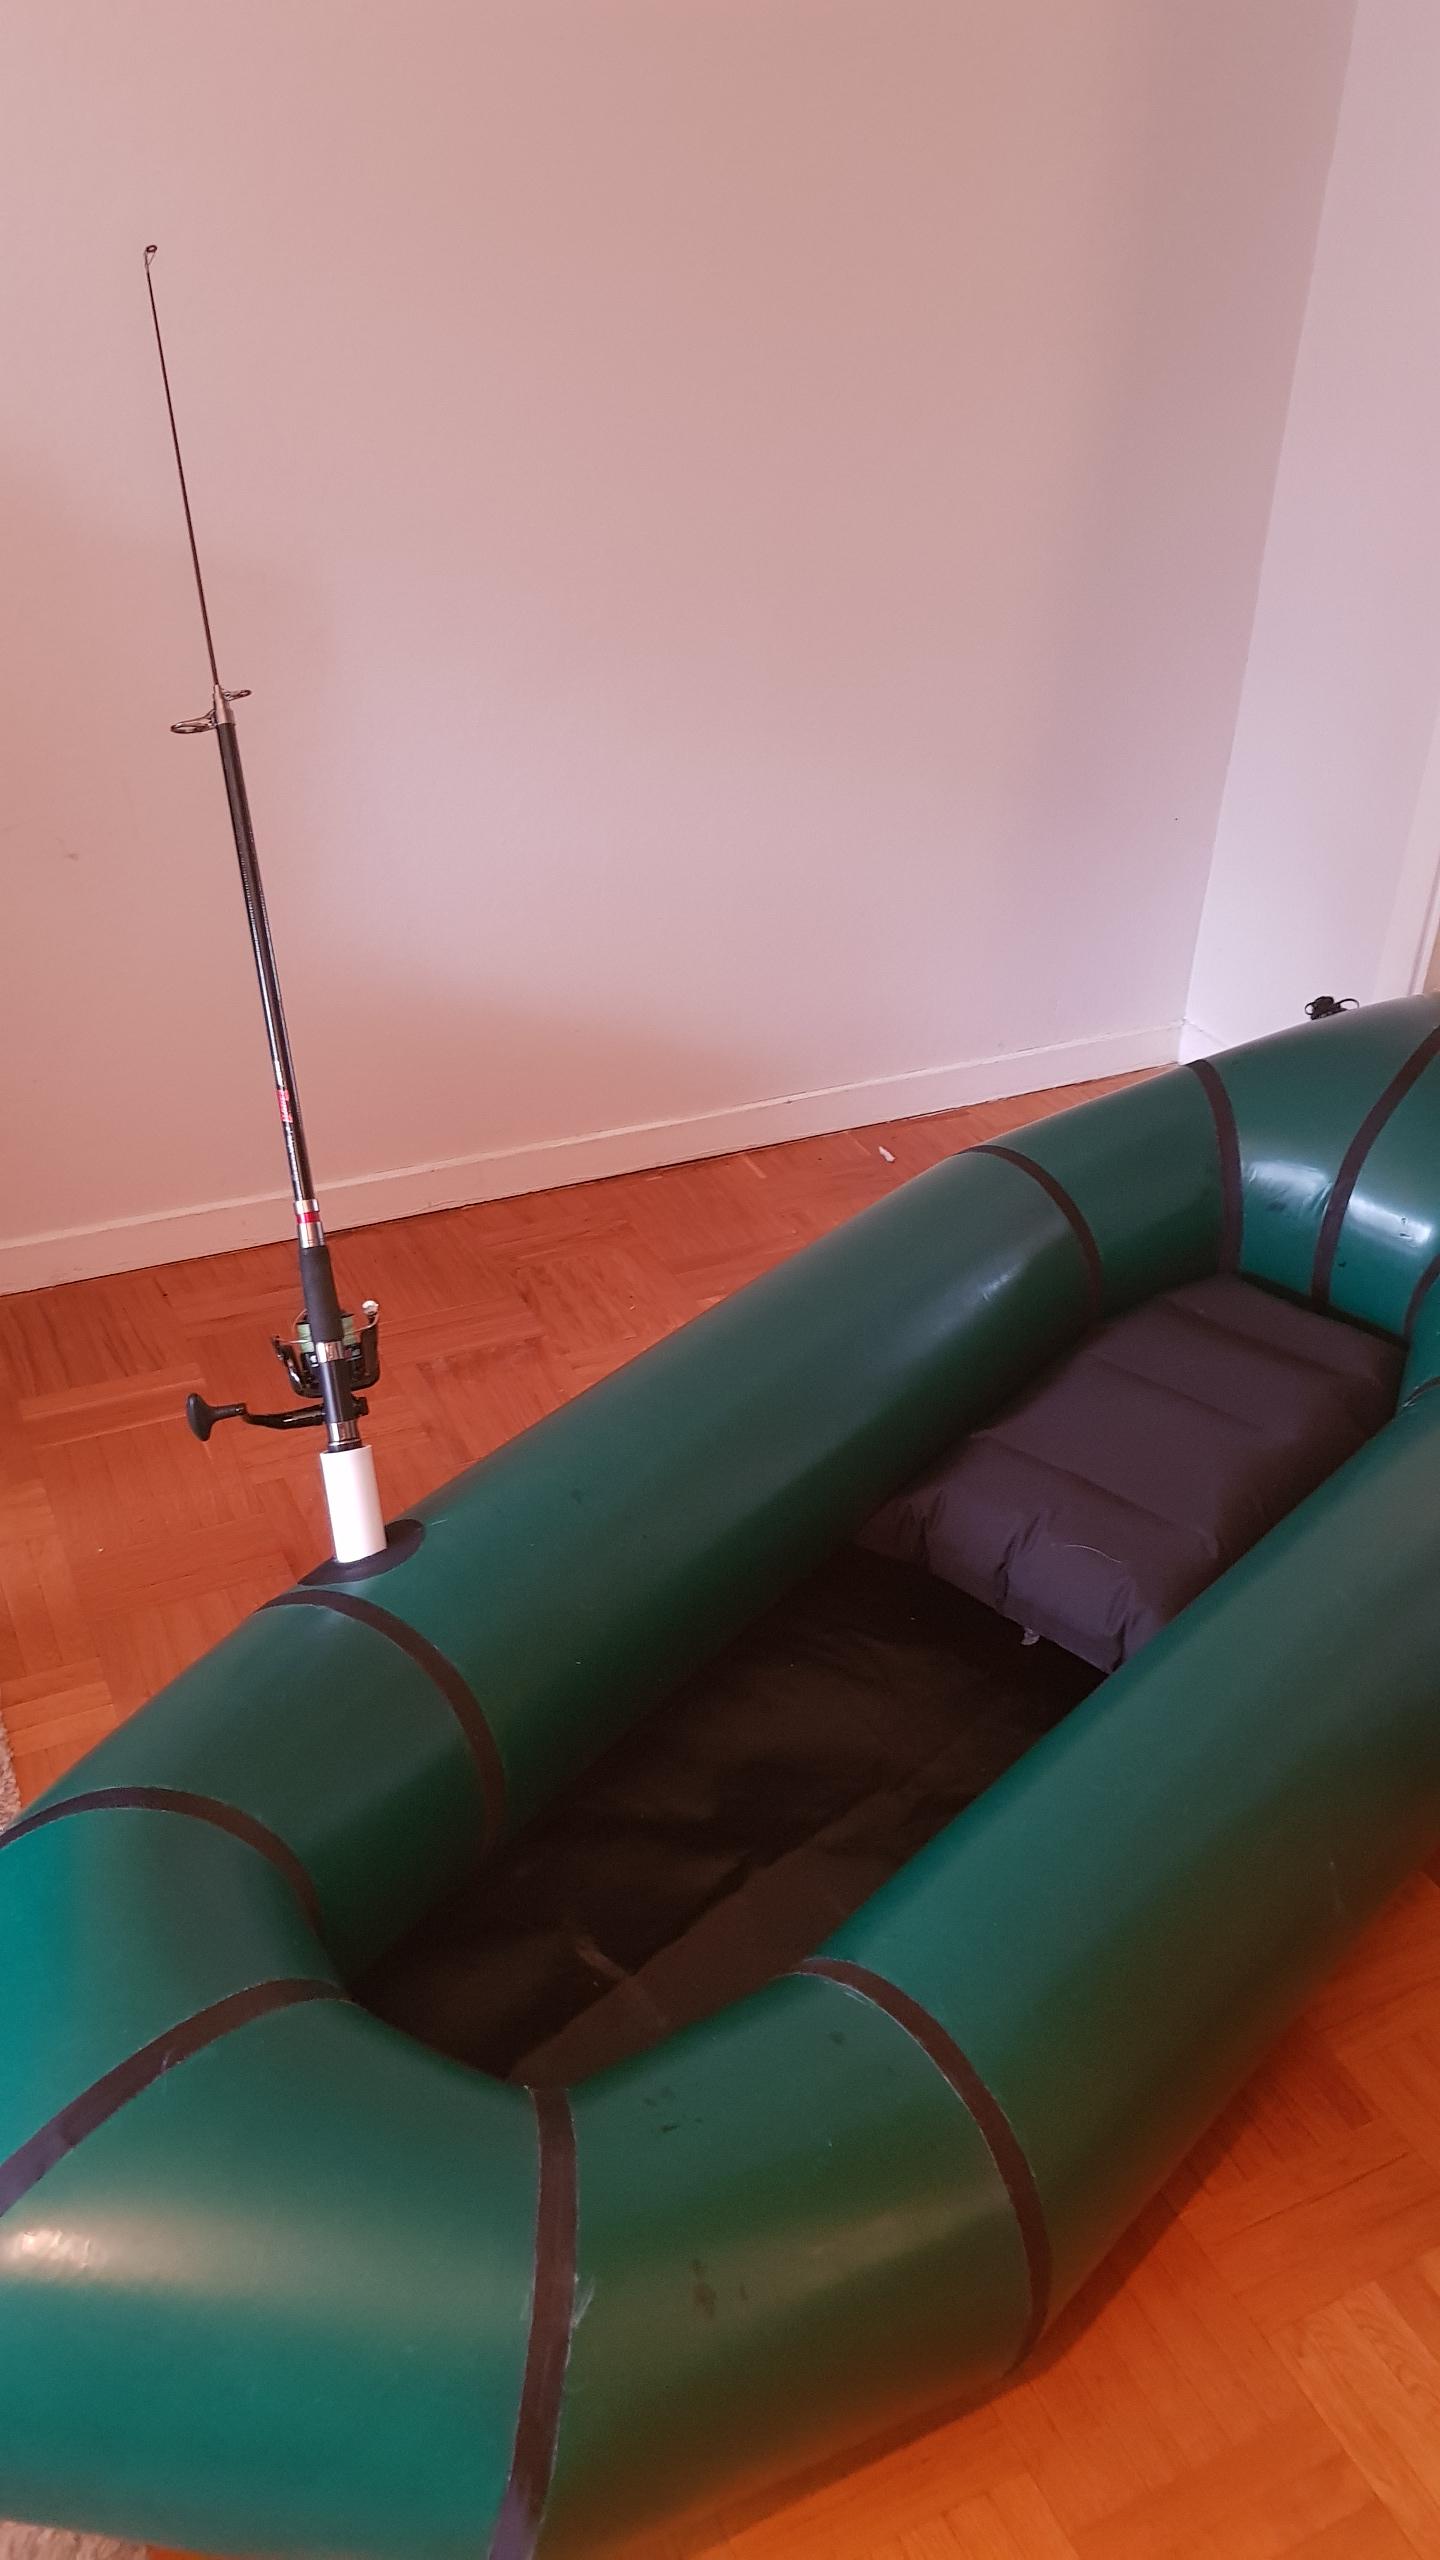
    I was thinking of making an internal rod holder, similar to this:

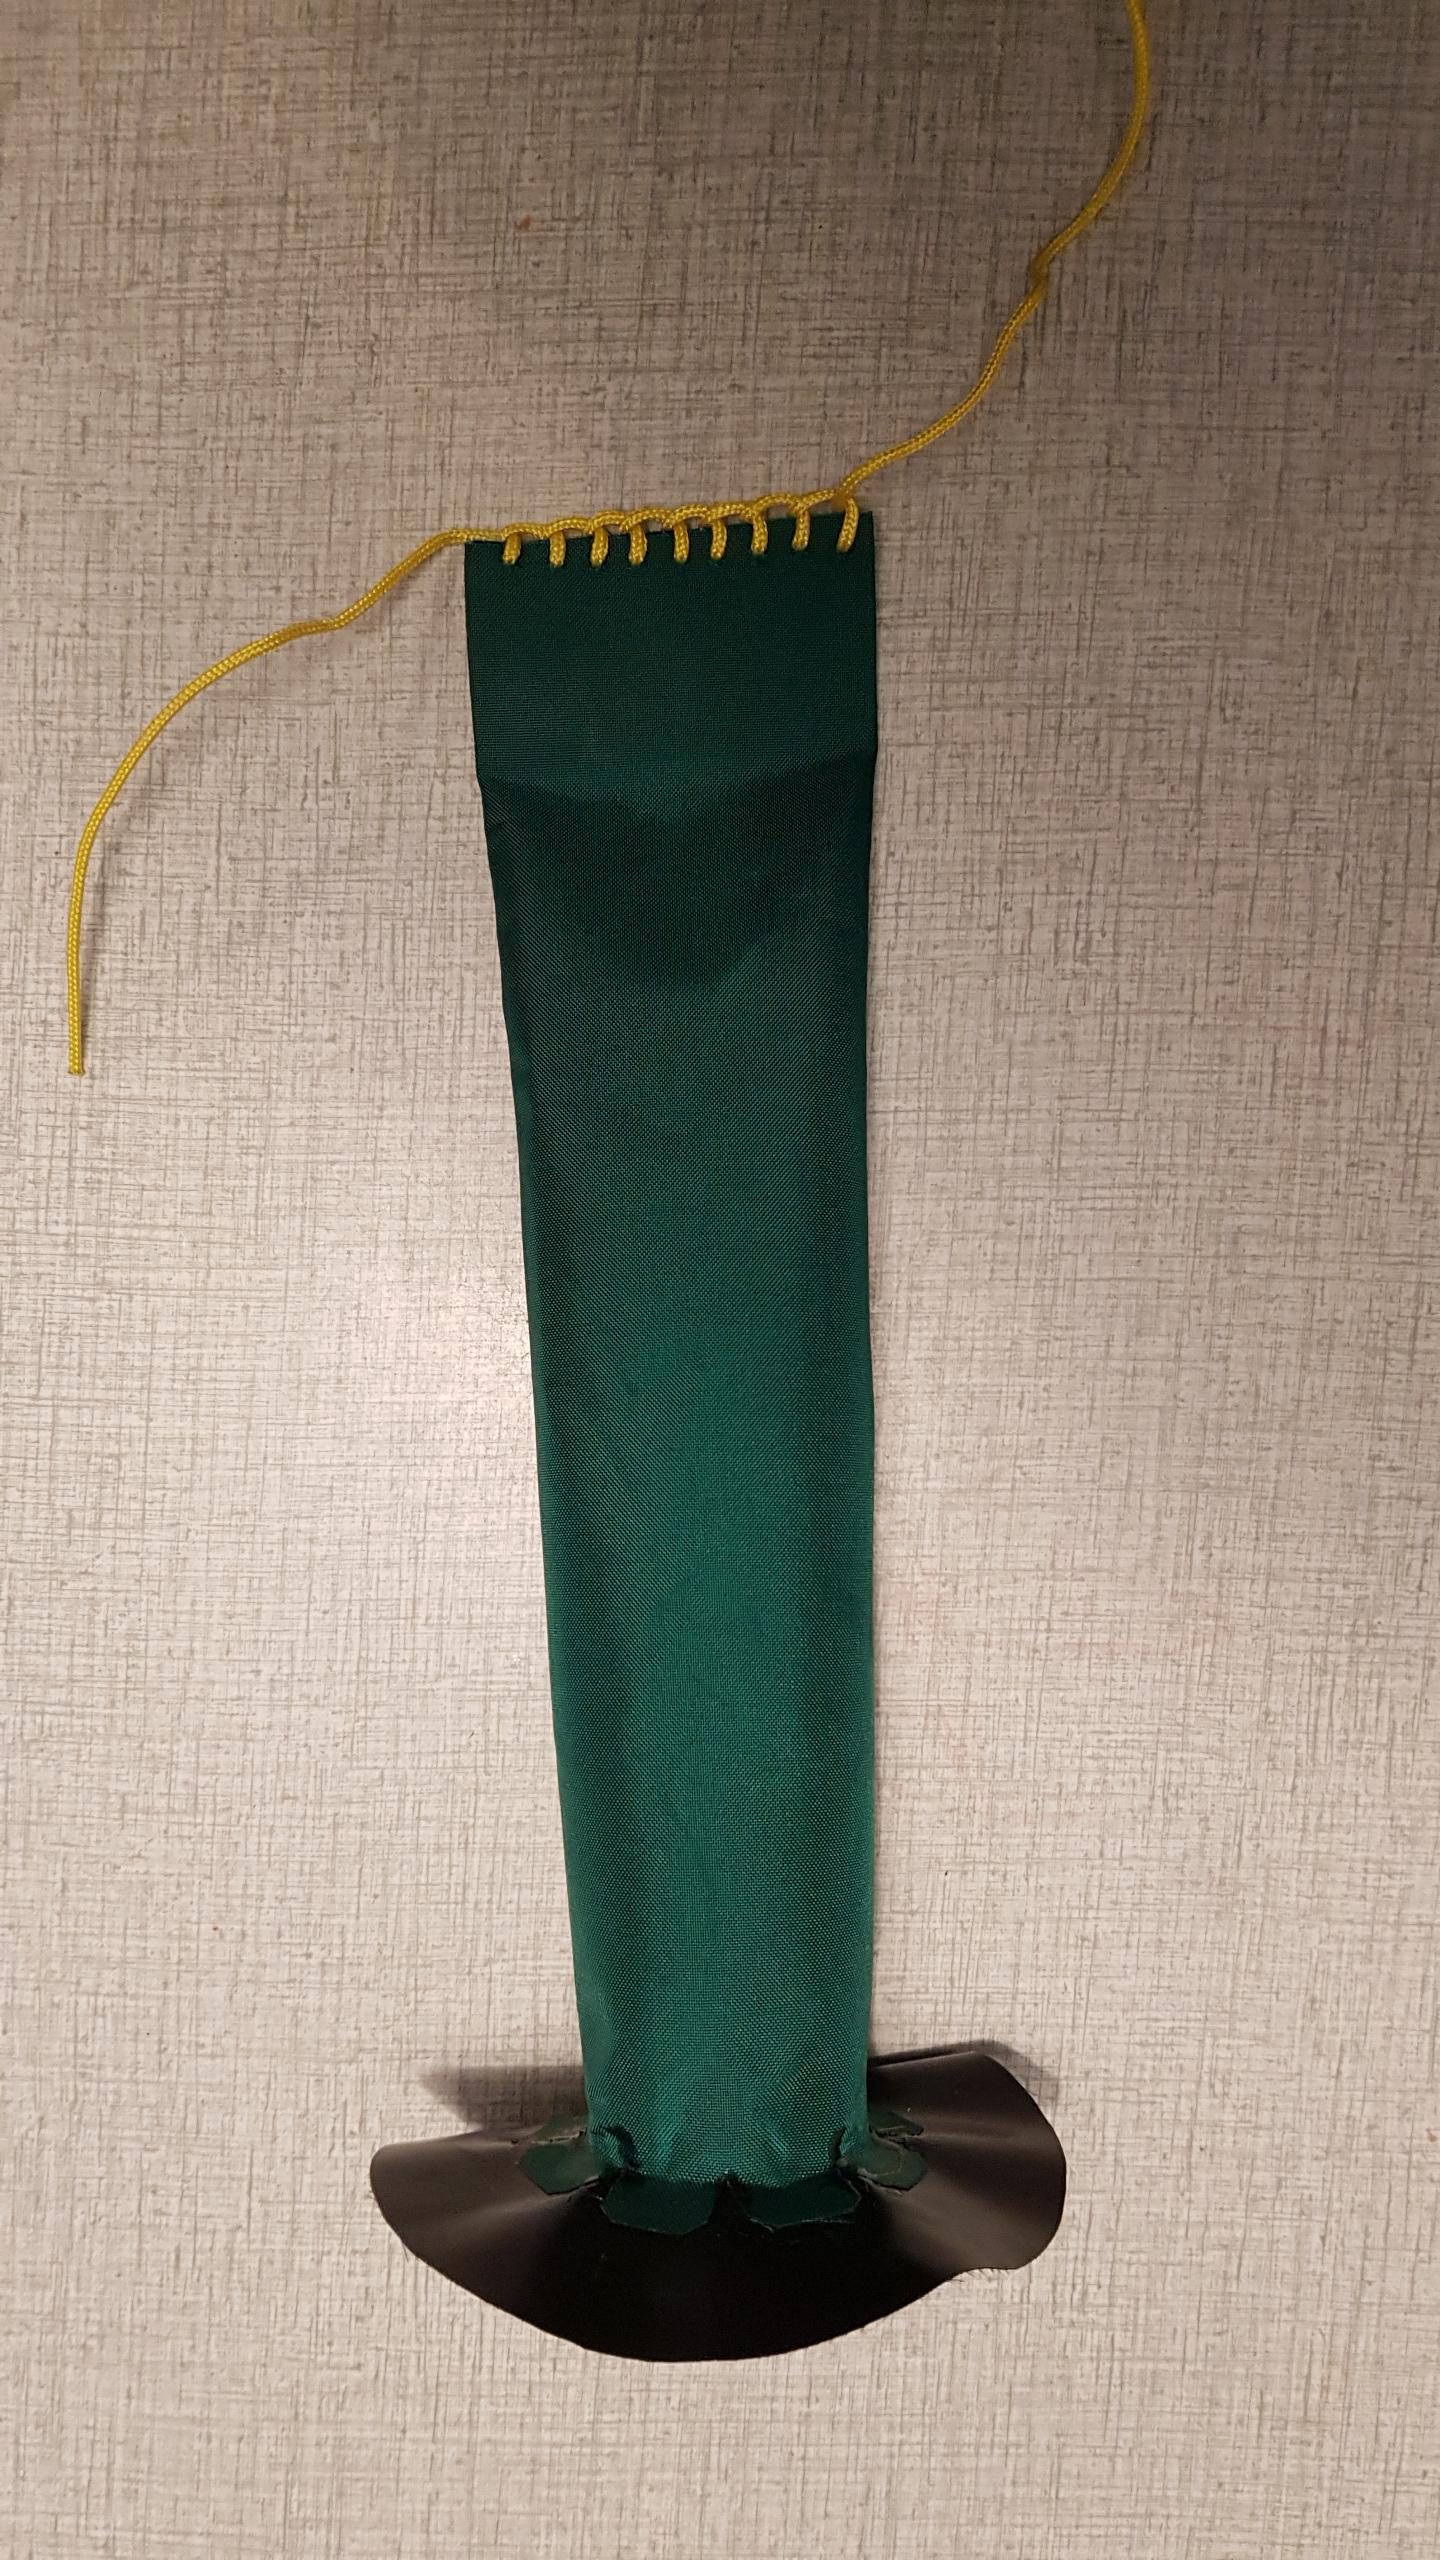
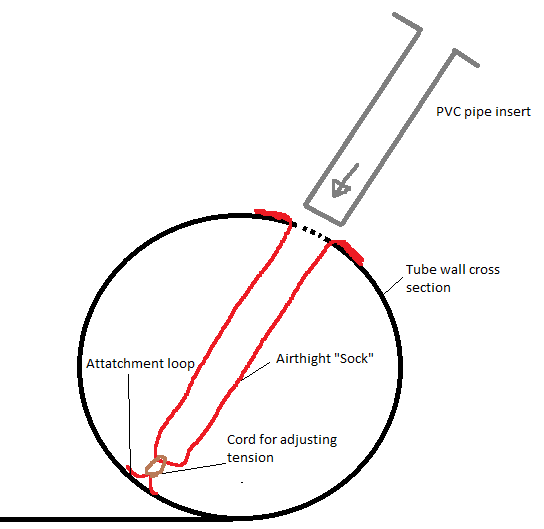
    To do that on an inflatable my plan is to make a “sock” of nylon that is attached to the top of the tubes, with an opening on the top and completely airtight. On the bottom it will have a cord attached that is secured on the bottom of the tube (the cord will be adjustable so I can find the correct tension). The sock will be almost all the way down to the other end of the tube.

    Before inflating the packraft a fitting pvc pipe will be inserted in the sock to make it stiff. the pipe will be very smooth and have a flat top, similar to those in the picture above. I assume friction from the sock that will be pressed on to the pipe on inflation will hold it in place.

    I will be using a zipper on my packraft (otherwise I think this is close to impossible) and the placement of the holder will probably be in the forth section close to the front, the angle towards the tube walls will be close to 90 degrees but lean somewhat outwards from the raft. So the in tube bottom attachment will probably be on the inside of the raft close to the floor.

    I need to sketch up a good placement plan the get the correct heat-seal order and layout. And maybe needs to explain this in a sketch so you can understand.

    Do you think these type of rod holders are possible? Risk of creating week points?

    /Gustav

Viewing 2 reply threads
  • Author
    Replies
    • #8944
      gustav.kraft
      Participant

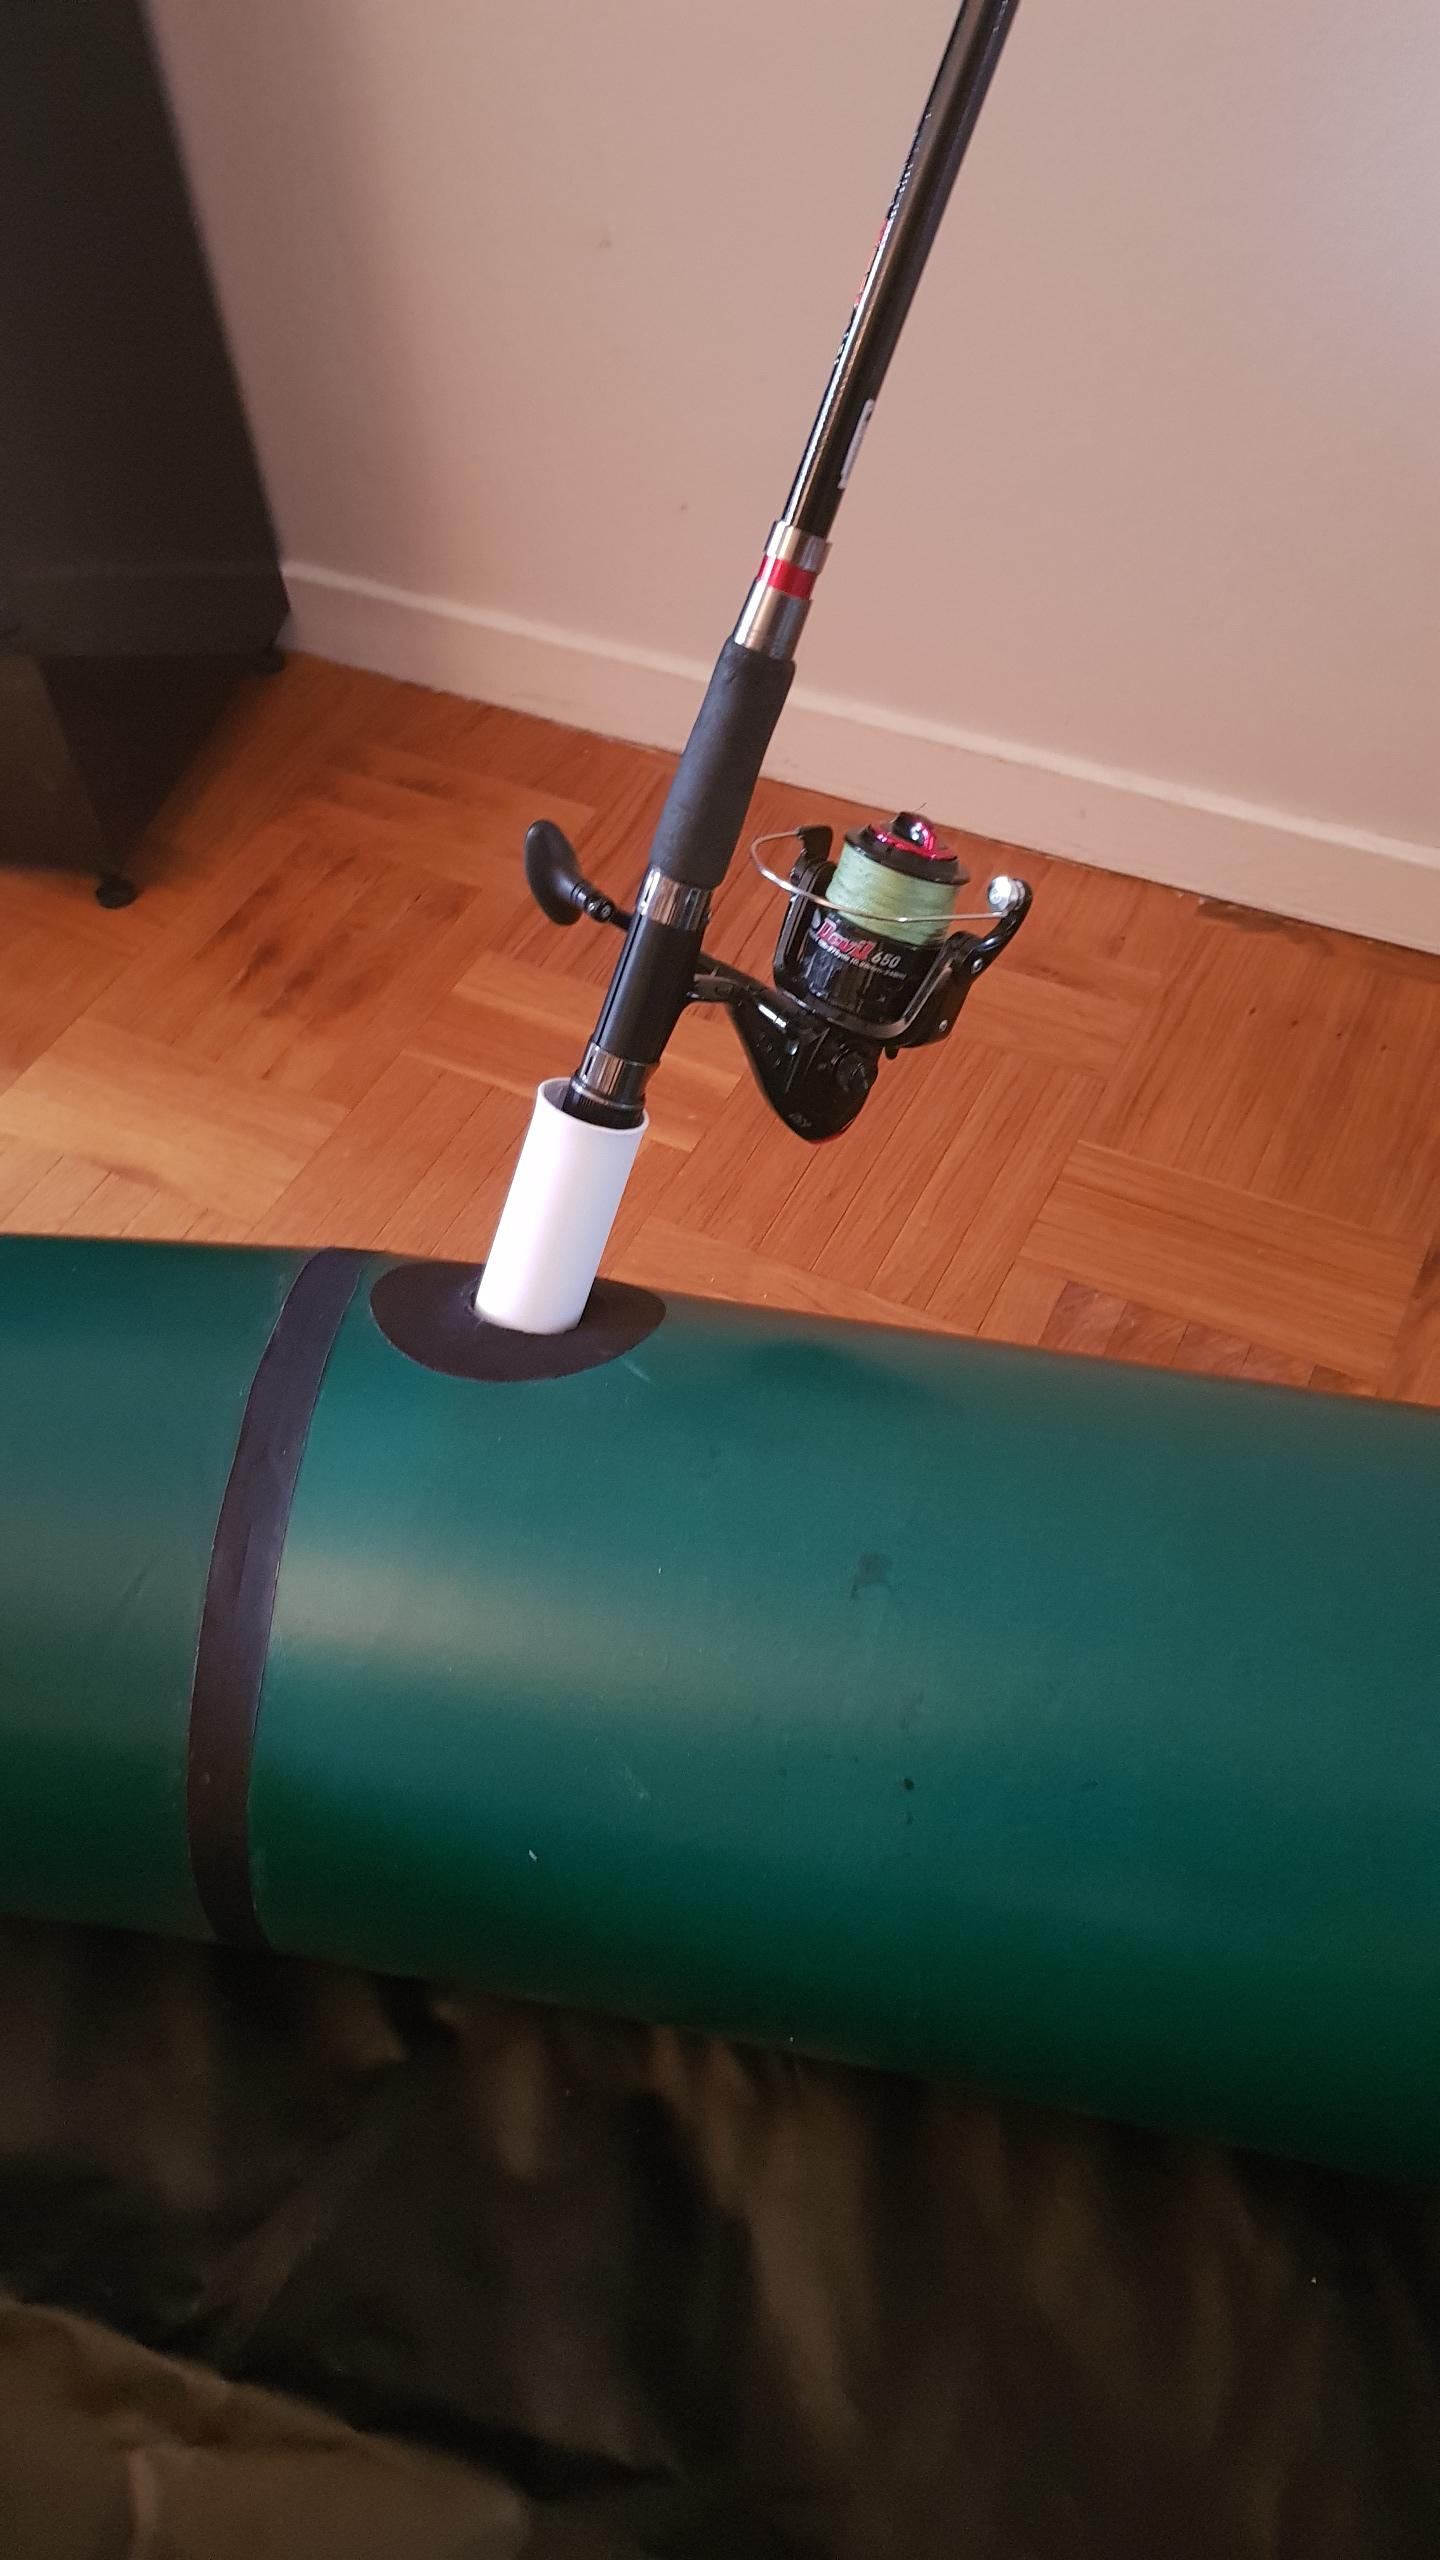
      Success!

      I might do take some more explaining pictures when I make the next one if others are thinking of something similar.

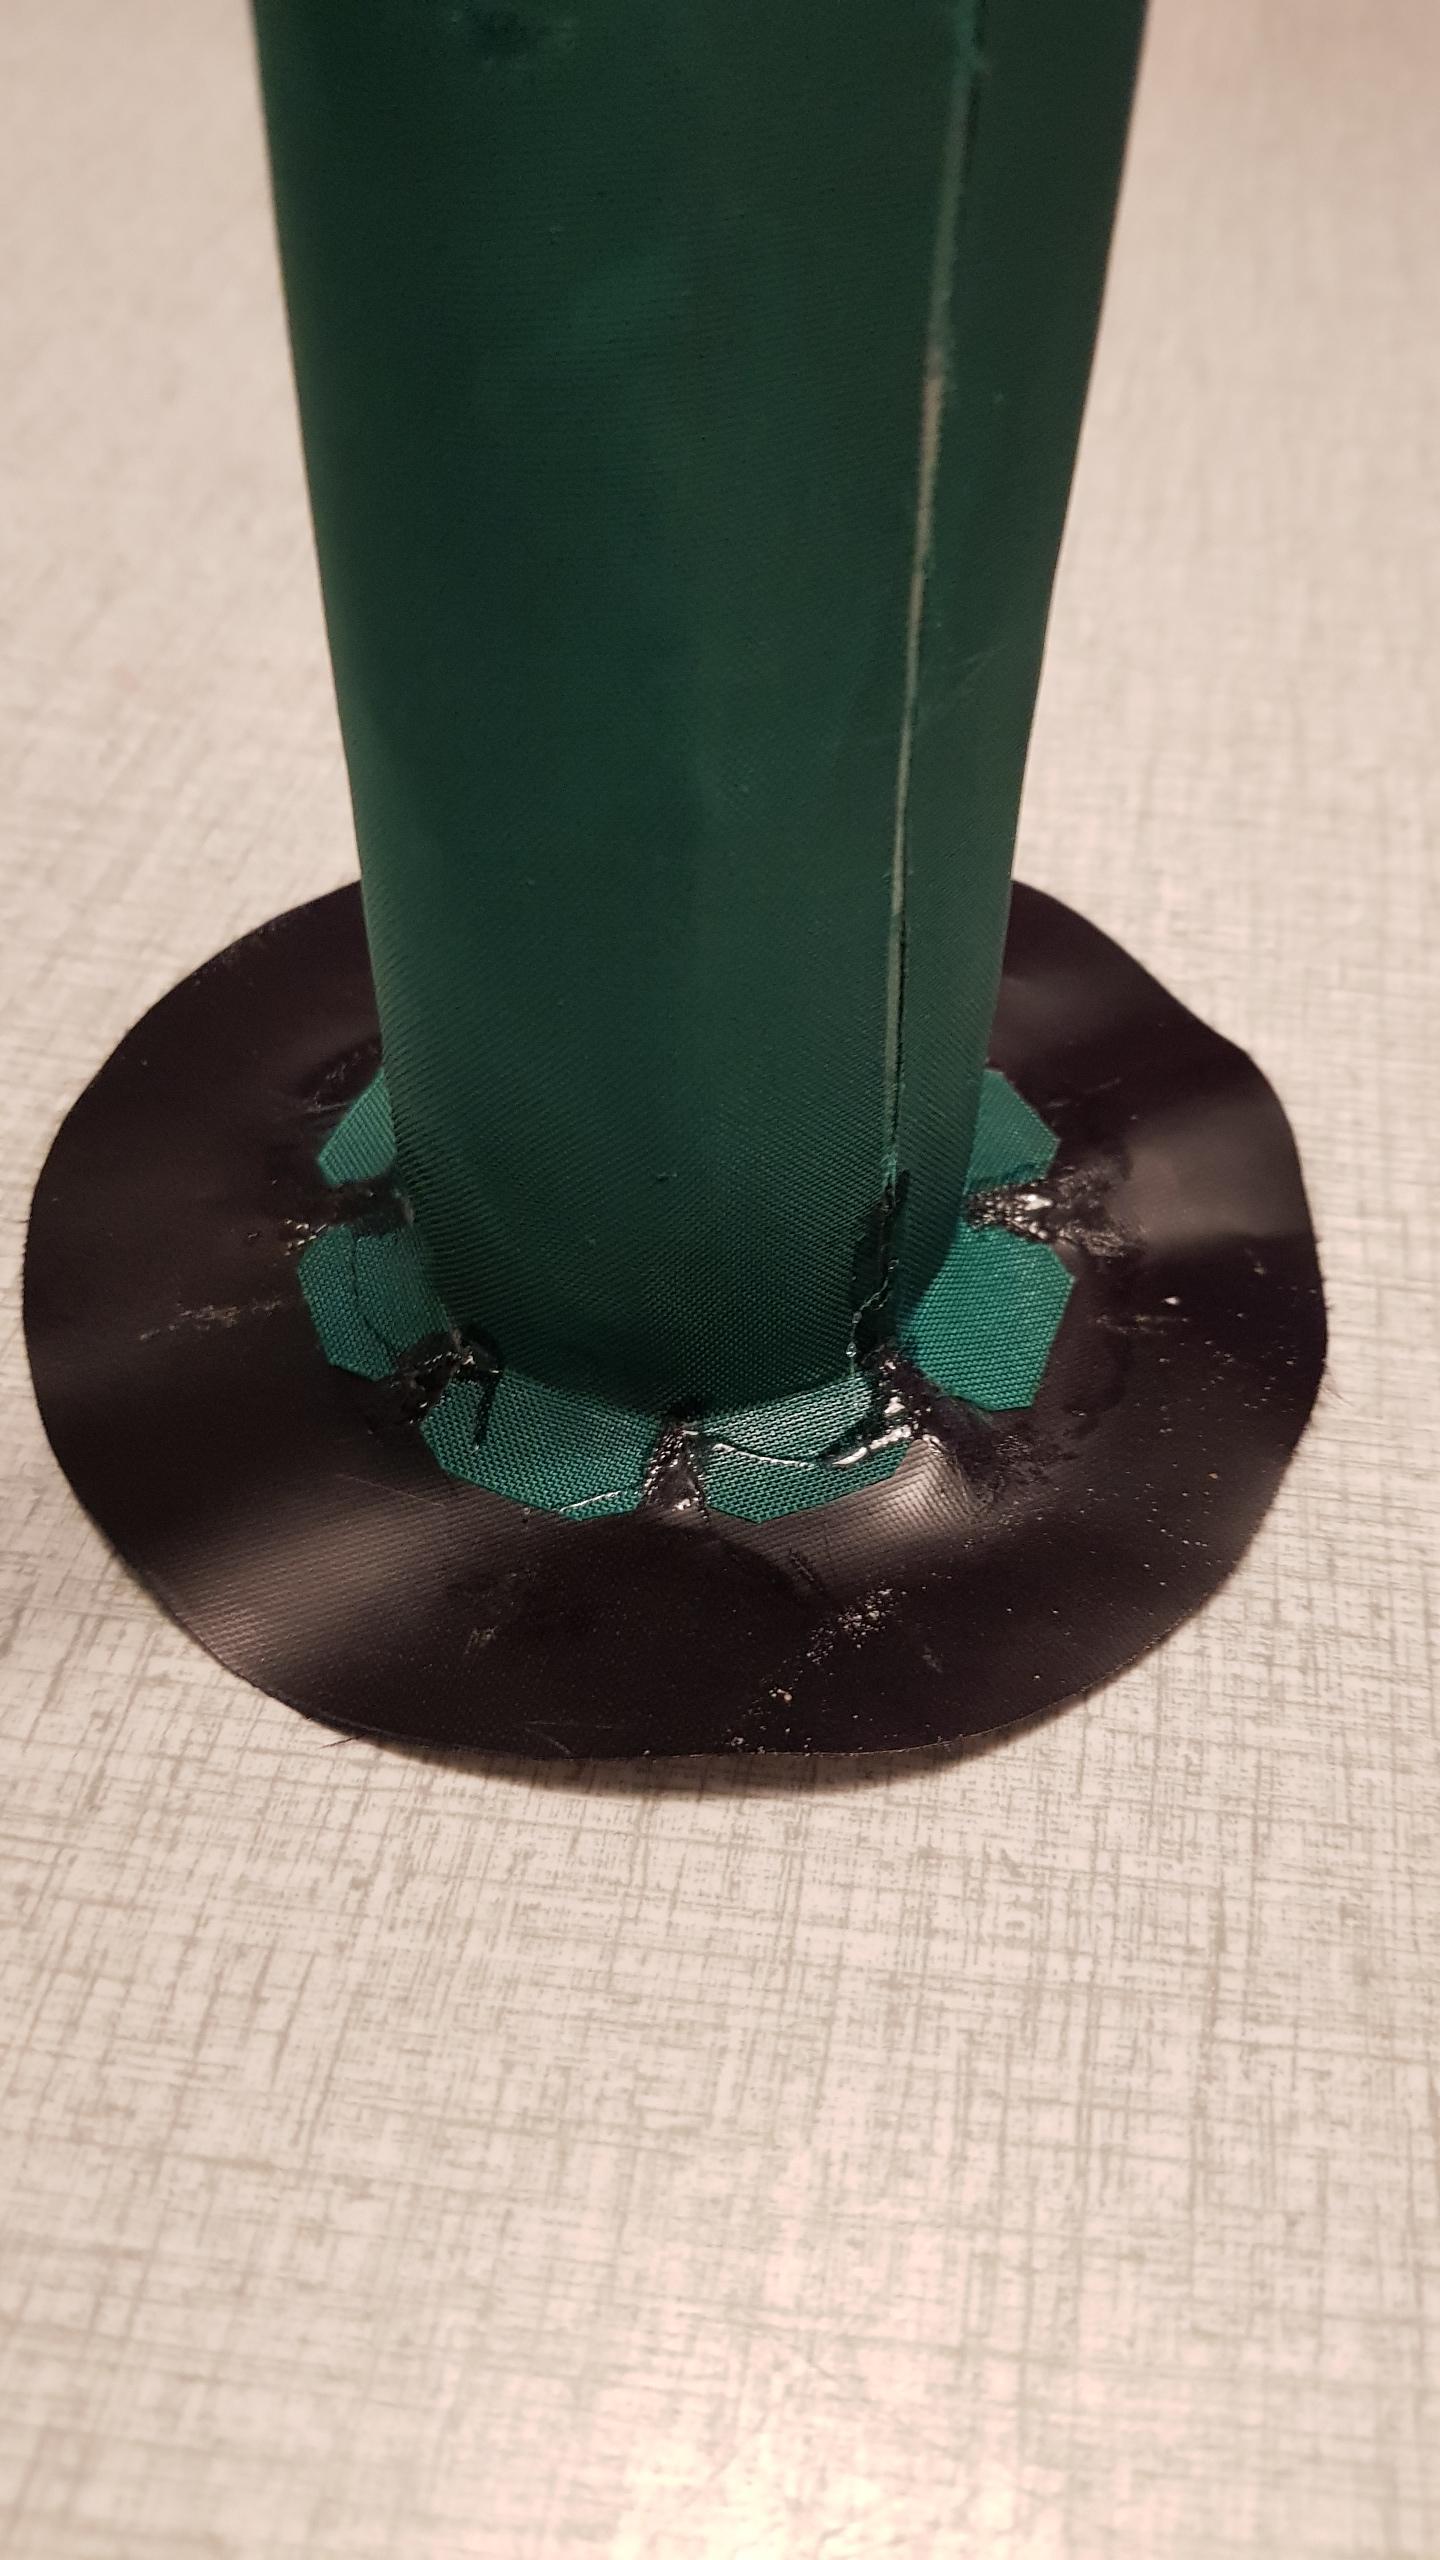
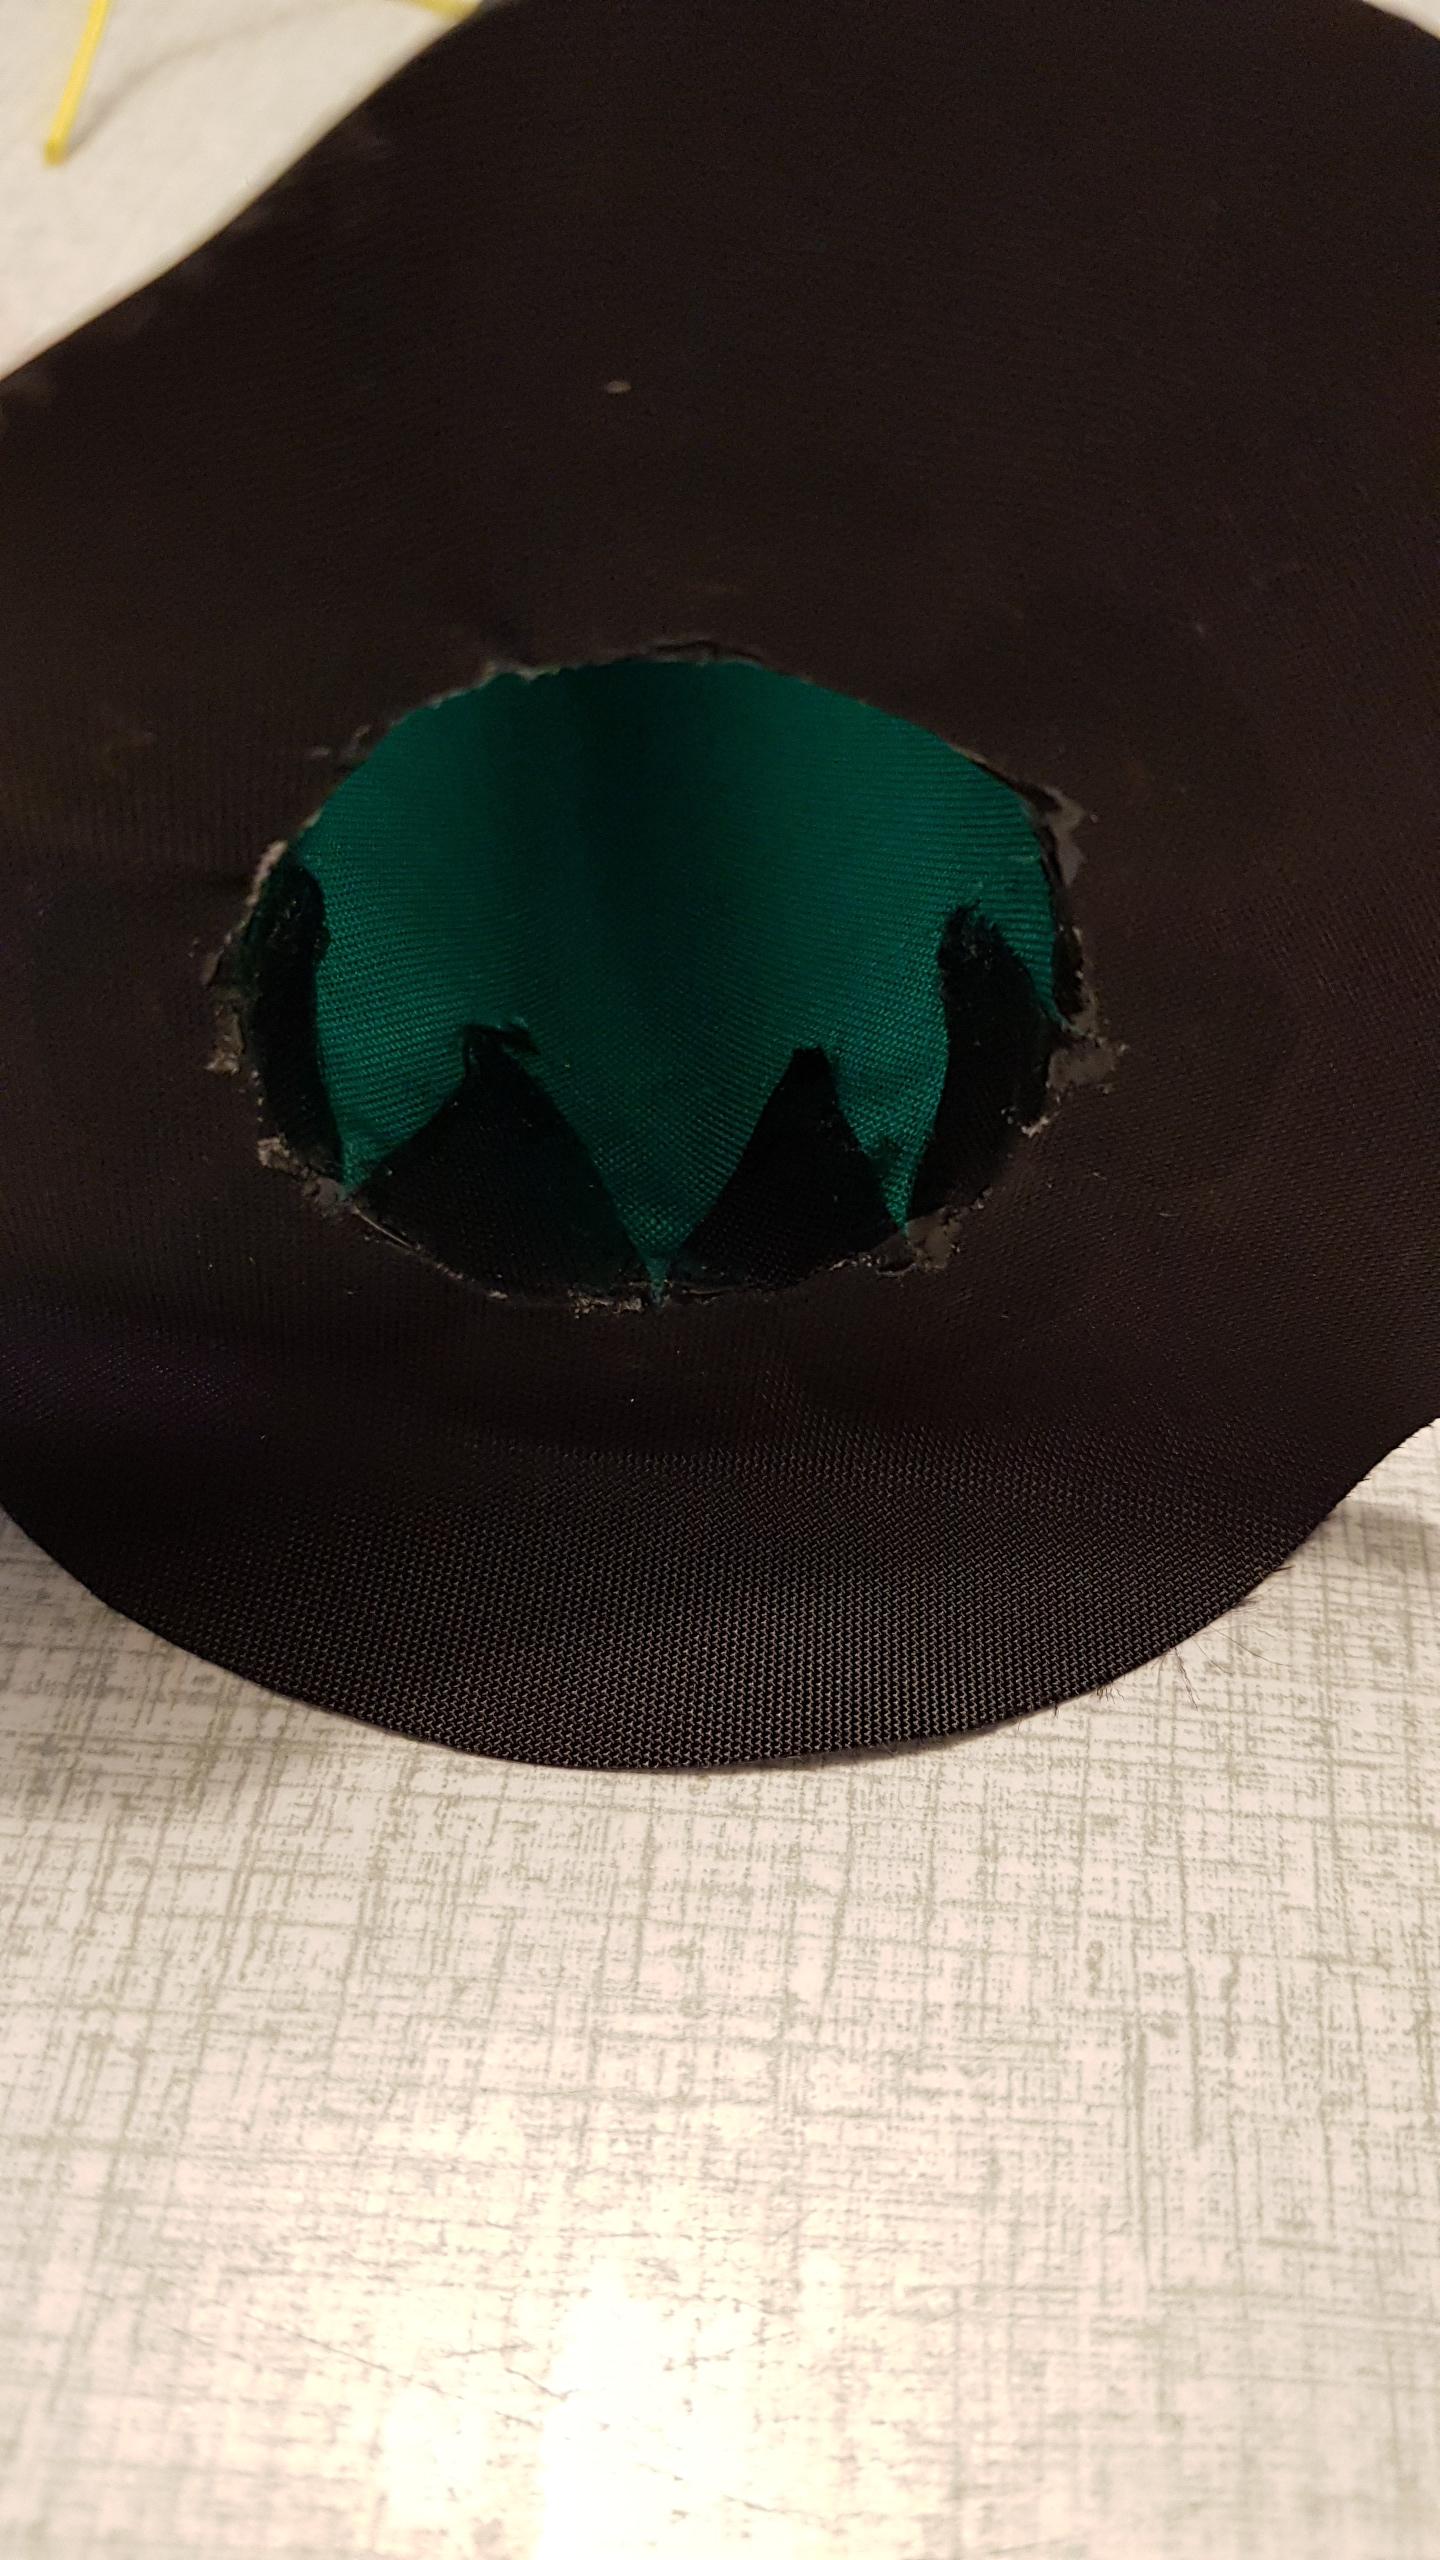
      The tube to circular patch was the tricky part to figure out but eventually I found a easy method. The 8 pizza/flaps pieces are overlapped so that there is no gaps but I reinforced with seamgrip just to be sure.

      The bottom is as simple as it gets, inside the tube there is a rectangular patch of double sided TPU. The cord is used to tie it to the bottom of the tube section where I have two loops attached to whats still accessible of the floor.  A change to original plan is to have two attach points that is apart from each other, this makes it more adjustable and stable.

      The tubing is 40 mm PUSH-fit pipe used for bathroom sinks etc. 5€ for a meter.

      Overall a very light weight solution. Not yet tried it as I’m waiting for the waters to clear from ice but it feels very secure.

      • #8947
        Matt (Admin)
        Keymaster

        Fantastic! Well done, Gustav, and thanks for sharing! I’ll post this on the blog (with credit to you, of course), as I’m sure other people will be interested and they might not see it here.

        • #8949
          gustav.kraft
          Participant

          Thanks!

          I think I will make the next one within a couple of weeks if I can find the time. I will take some better pictures of the process and add some measurements

          /G

    • #6995
      gustav.kraft
      Participant

      .


      • This reply was modified 6 years, 3 months ago by gustav.kraft. Reason: Reply to wrong post
    • #6957
      Matt (Admin)
      Keymaster

      Hi Gustav,

      I think that is a very interesting idea, and it could work quite well if made in the way you described. I would first build the packraft and then make the rod holder afterwards, both so you can decide exactly where you want it, and also because after making the packraft you will have a very good understanding of what is possible and what will be too difficult to make. I think the most challenging part will be designing the attachment between the rod holder and the outside of the tube, but perhaps it will be easier if it is made as a straight slot instead of a round hole. To ensure it will work properly and remain airtight, definitely experiment with scrap fabric before you attach your prototype to the packraft. Cheers!

      • #6959
        gustav.kraft
        Participant

        Thanks!

        I will defently add it after its finished. One downside of it will be that it kind off get in the way of stored gear but i guess it wont be that much of a downside if its located towards the front. I also have to be aware of not interfearing with the tube-floor joint with the bottom attachment (or do an attachment loop upon putting it together).

        Yes, I understand that a round pipe shape transforming to a flat in 90 degrees can be tricky and was thinking of making it octagon, square or flat shaped.

        I think i will make a classical shaped dry bag for practice, then I can just patch it up later and not let the material and work go to waste

        Can you glue an attachment loop to the non-TPU side, or do I have to make the bottom attachment through the tube floor and heat seal on the outside?

        Here is an ugly concept sketch for an easier understanding of what I want to do.

        • #6976
          Matt (Admin)
          Keymaster

          I haven’t found a readily-available glue that is as strong as a heat welded joint, so instead of gluing the attachment loop to the non-TPU side of the fabric, I would simply cut a hole in the tube and patch it with a piece of scrap so the TPU is on the inside there – then you can attach a loop to the TPU there.

          • #6996
            gustav.kraft
            Participant

            Tanks!


            I will go straight for that when I’m  testing, just a little worried that the perfect position will be over the floor/tube joint. But will take that on as it comes, otherwise I guess you could leave a flap from that joint and trim it as an attachment later. But for a first build it might be to tricky for my skill and risk of being the perfect tear point.

            • This reply was modified 6 years, 3 months ago by gustav.kraft.
Viewing 2 reply threads
  • You must be logged in to reply to this topic.