Home › Forums › DIY Packrafts › Seat Tie-in tabs
Tagged: attachment points, seat, tie-down, two sided fabric.
- This topic has 7 replies, 5 voices, and was last updated 5 years, 4 months ago by
 Matt (Admin).
-
CreatorTopic
-
March 31, 2018 at 6:30 pm #5932
 BruceParticipant
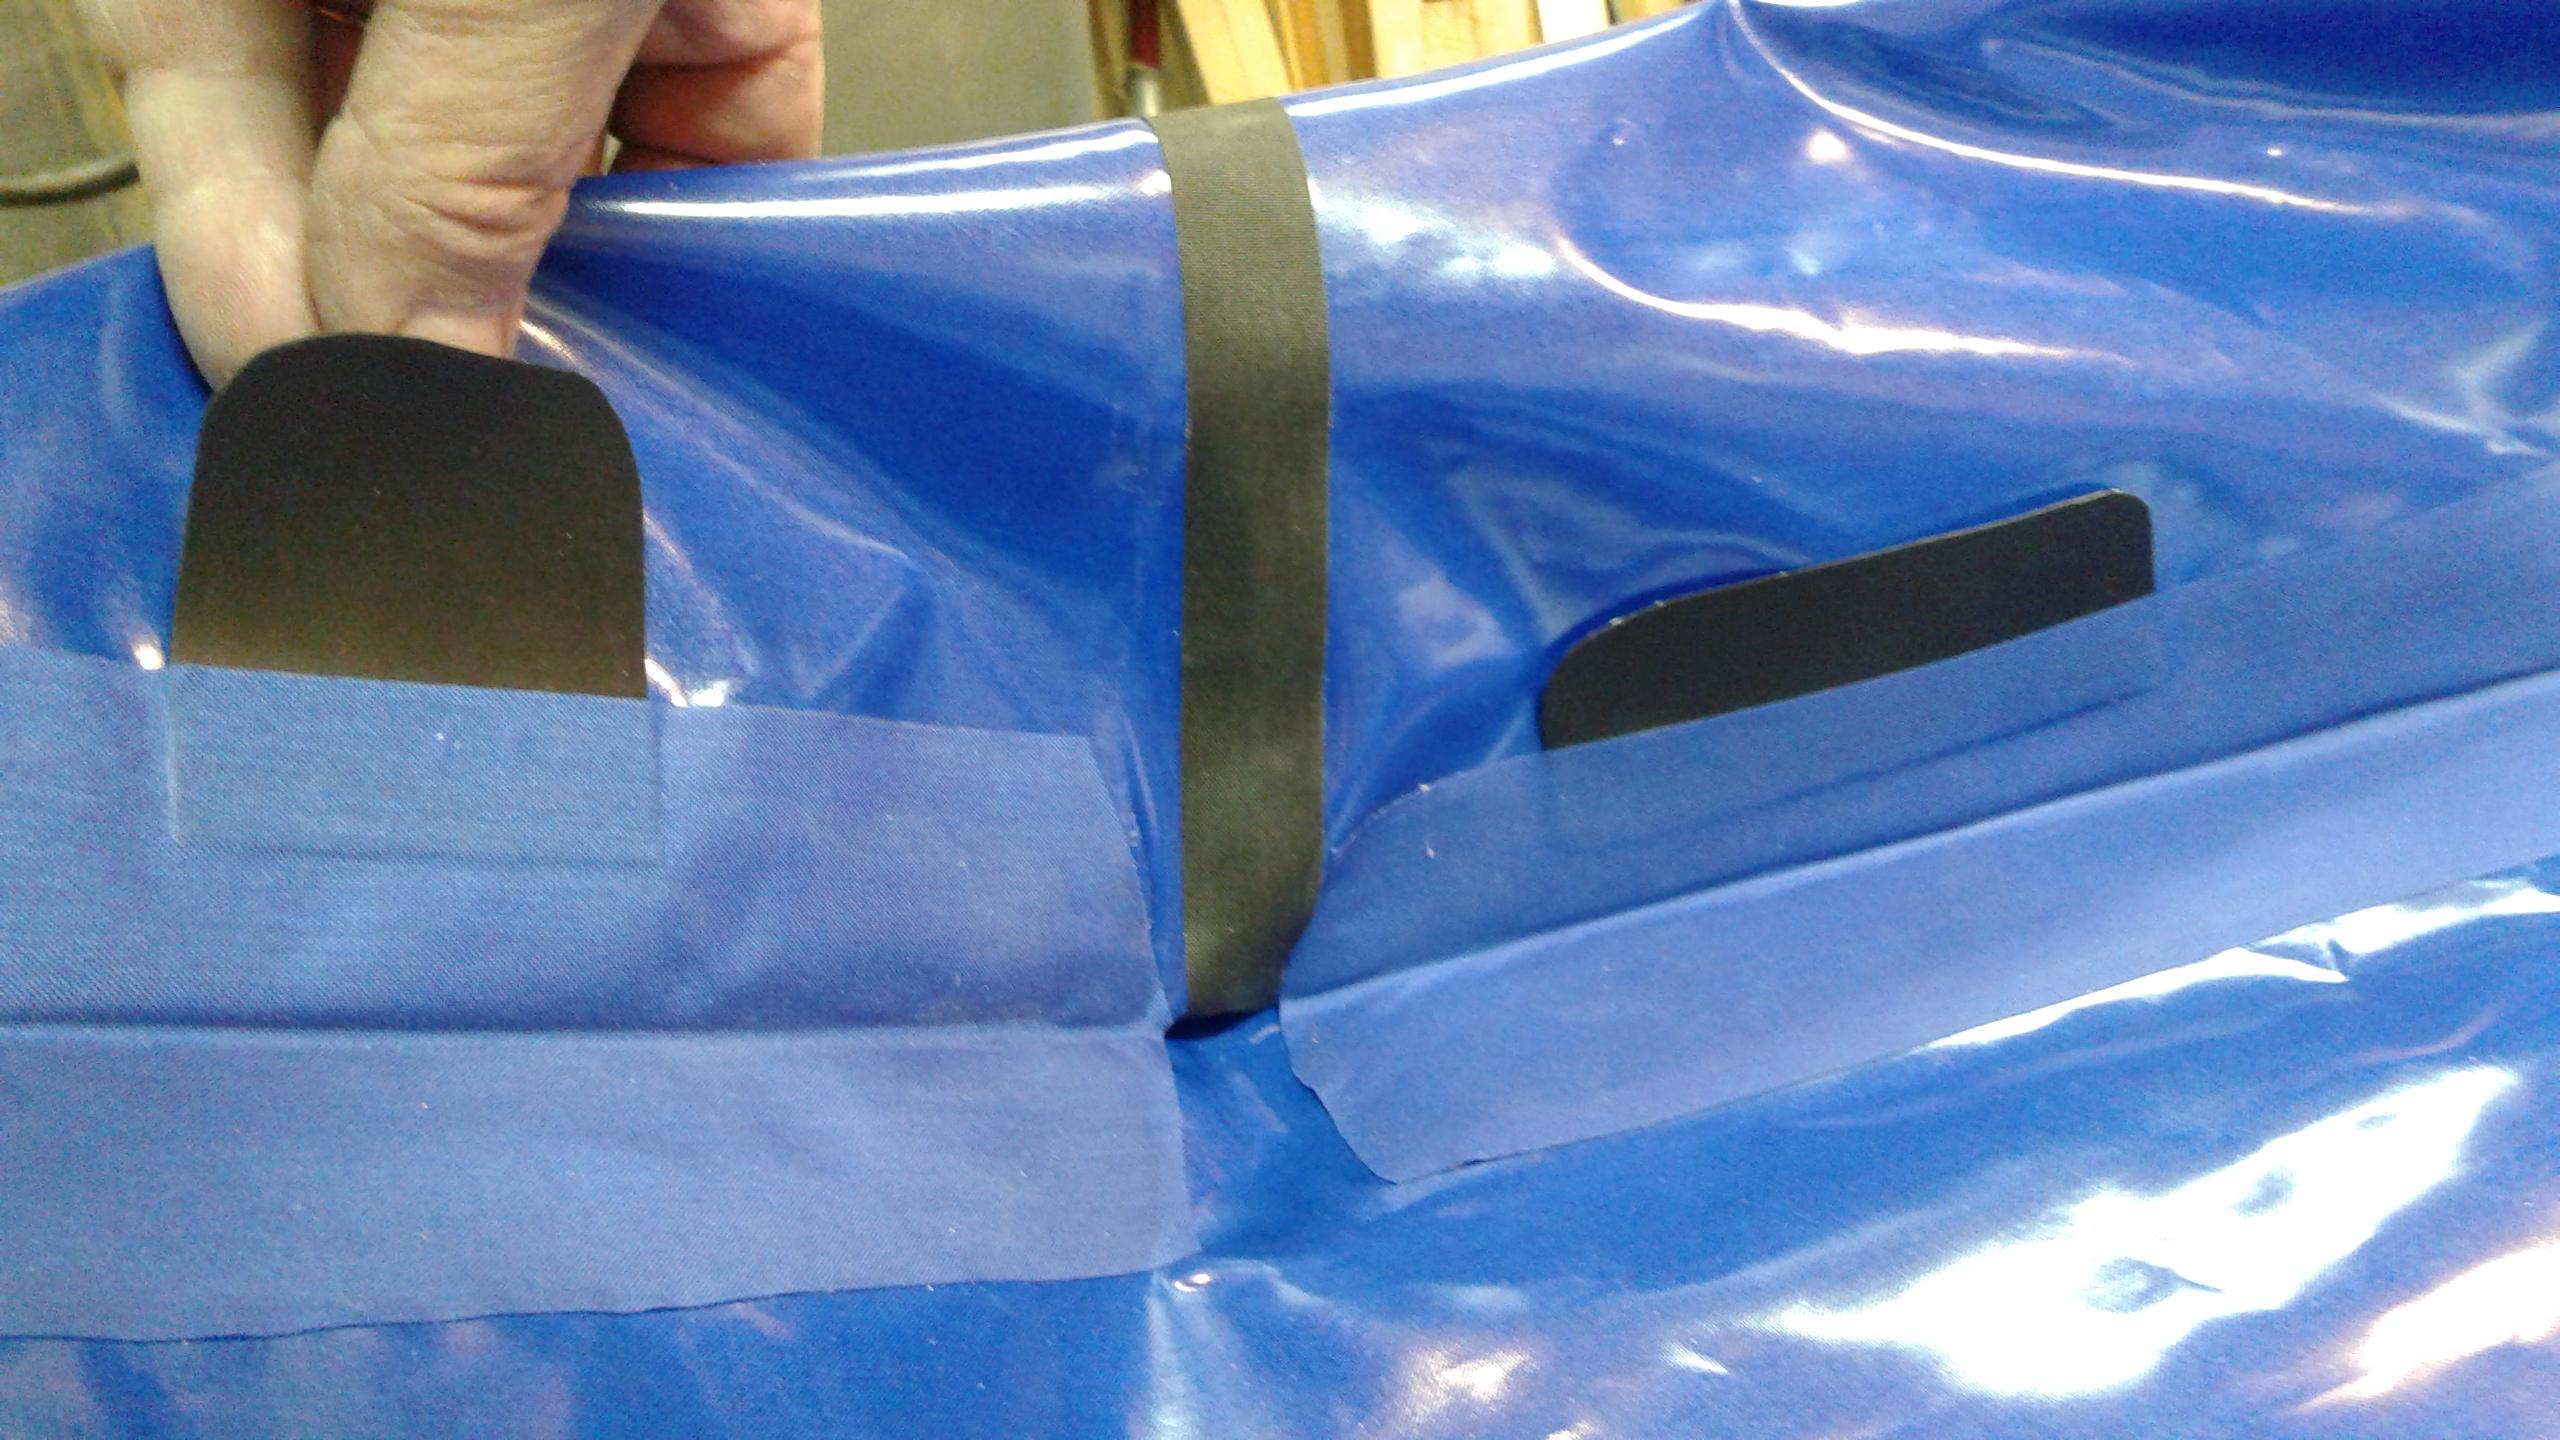
It is easy to add tabs to tie-in your seat when installing the V3 reinforcing strips. Small tabs made from 420D or 1000D two-sided fabric can be ironed in between the reinforcing strip and the tube section.

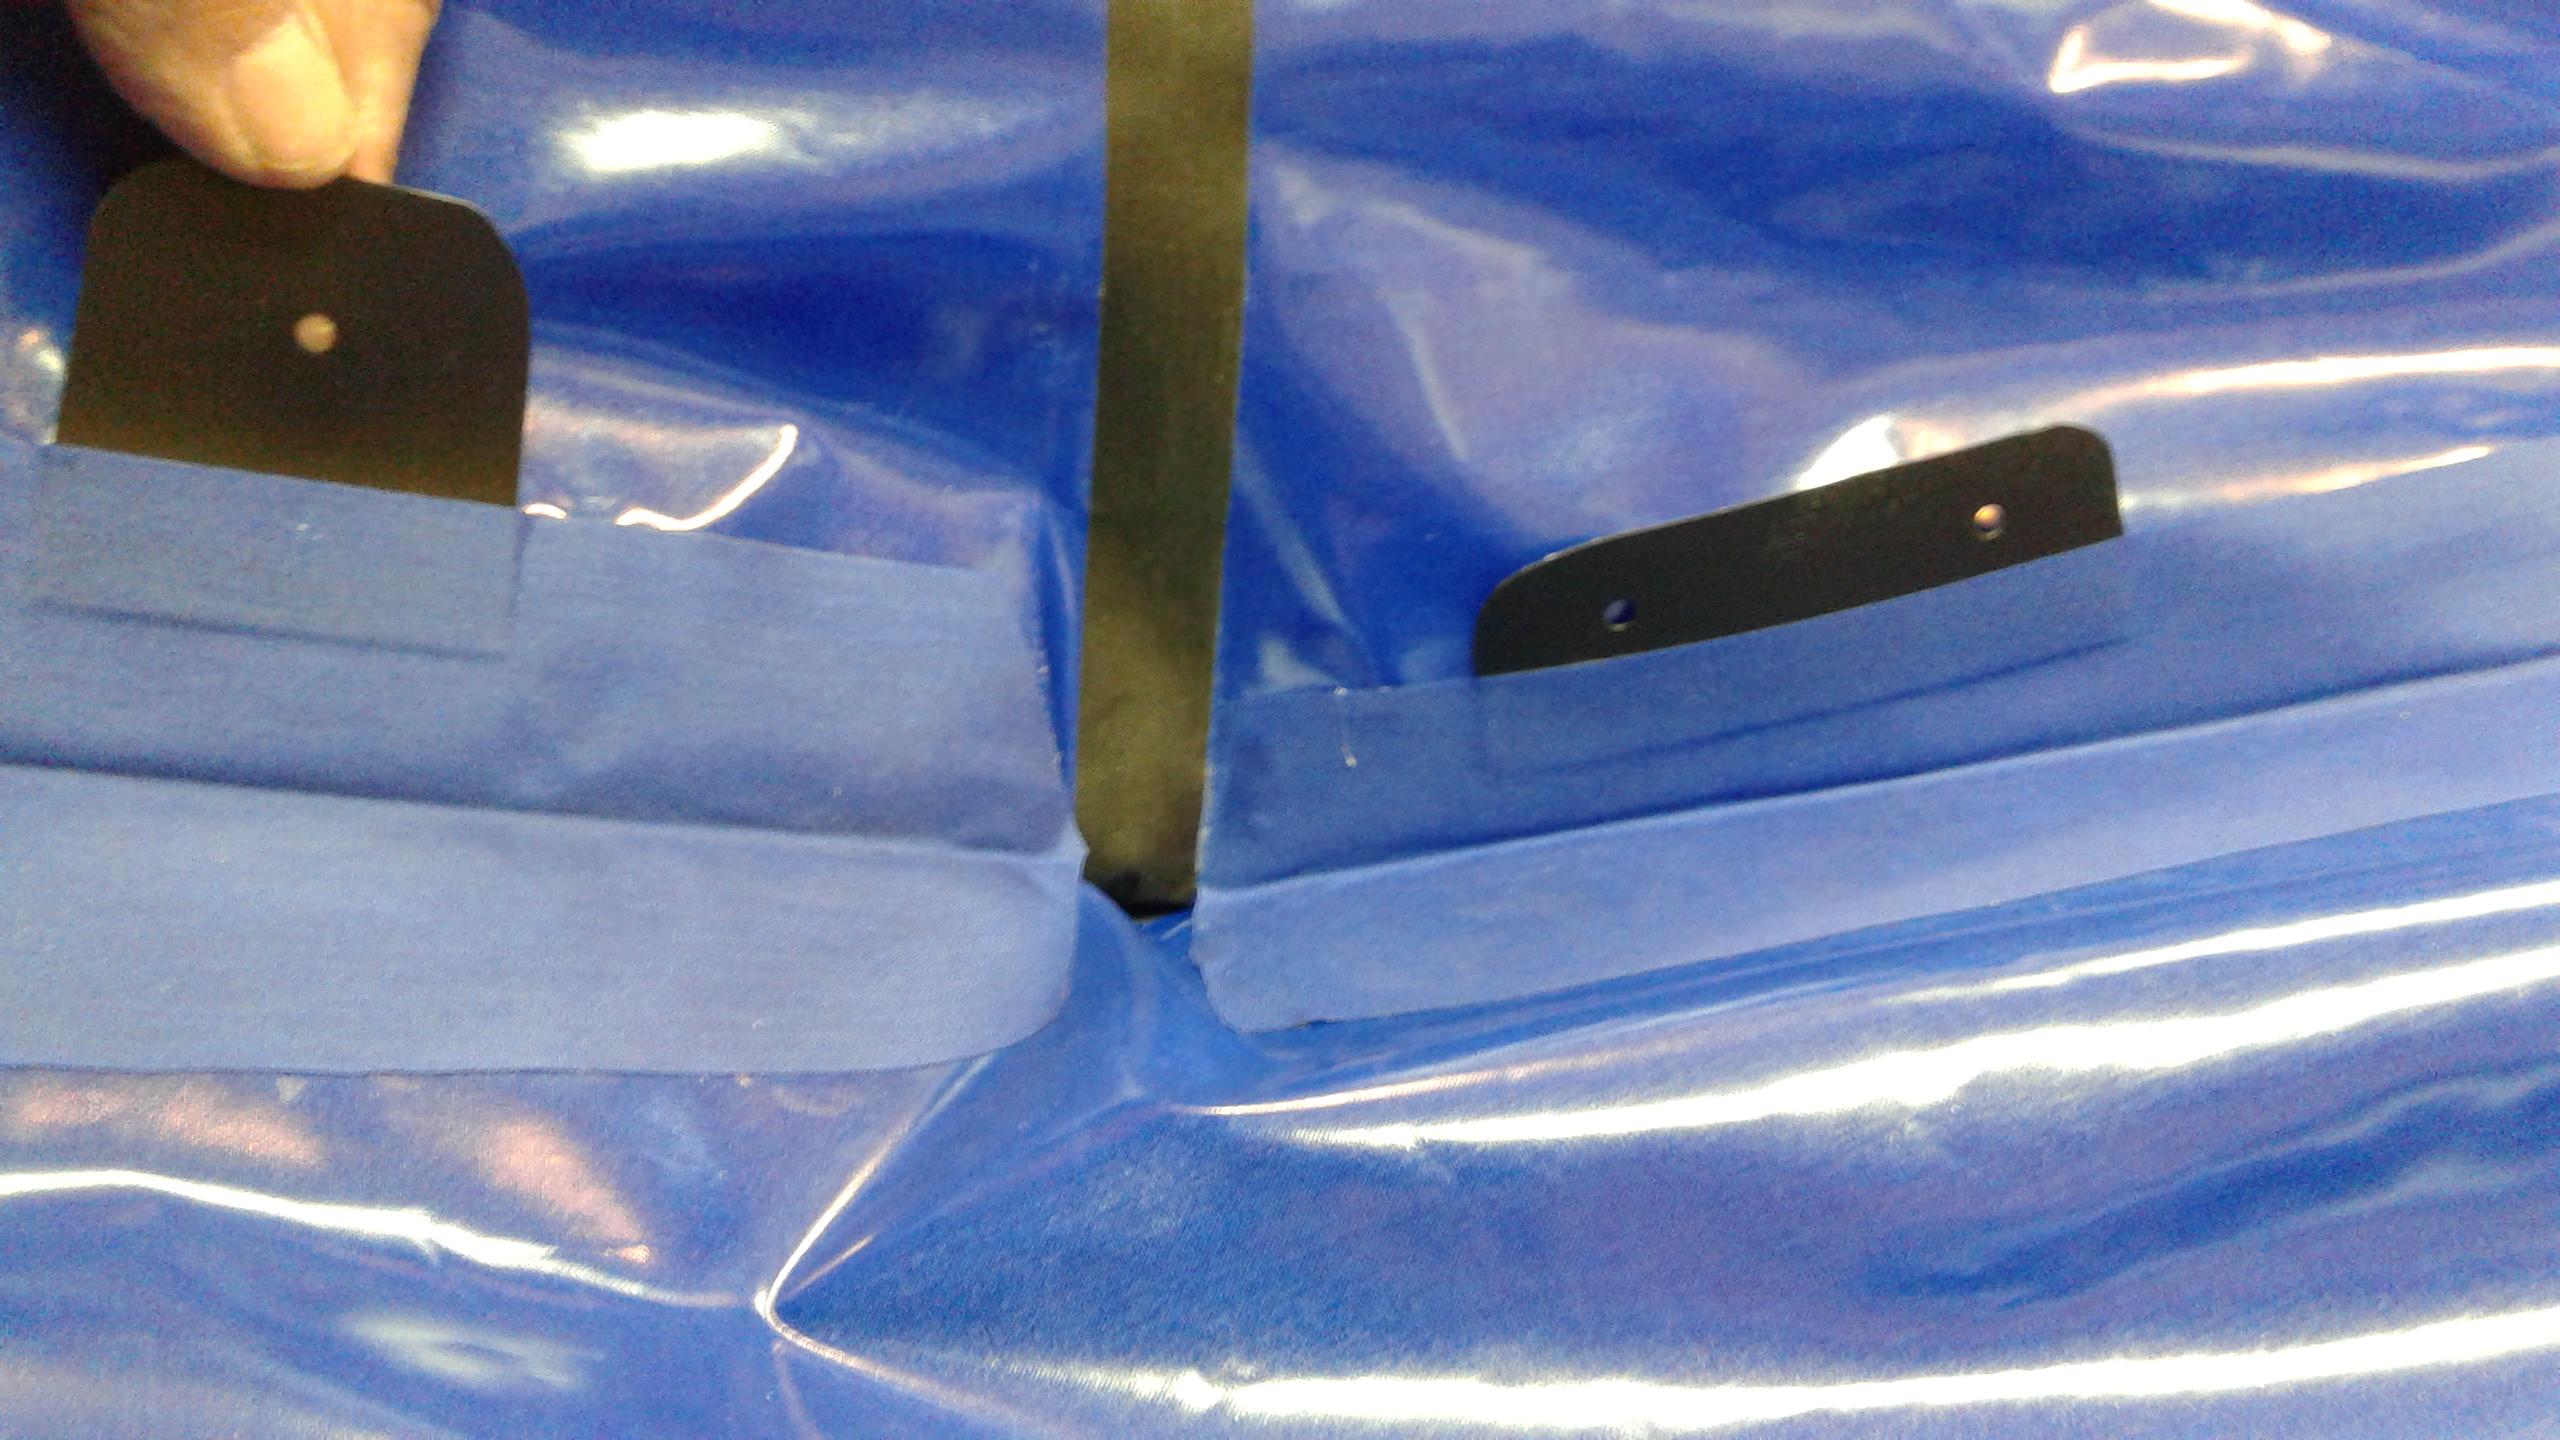
Punch holes in the tab, I used a leather punch, and short pieces of parachute cord to tie in your seat. (I punch matching holes in my seat, which I built with a 15 mm strip of 420D fabric in the edge seam.)
Bruce
Fairbanks
-
CreatorTopic
-
AuthorReplies
-
-
December 8, 2019 at 11:37 am #11324
 Matt (Admin)Keymaster
For the “V4” boats with the hourglass shaped seat/seat back, I find that a single “Type 2” attachment point (on the Tie-Downs & Attachment Points page) works well at the rear of the cockpit floor. I tie a length of cord through the attachment point and around the neck of the seat.
-
December 7, 2019 at 5:40 pm #11318
 unnamedpeaksParticipant
Has this become a standard part of the plan for the v4 boats? Or is there another method for keeping the seat in place?
-
May 22, 2019 at 12:31 pm #9983
 David TalbotParticipant
Solved the problem I’ve been thinking about thanks! Will put some these in to hold in both the seat and the thermarest floor I’m planning
-
April 10, 2018 at 7:06 pm #6017
 TaylorParticipant
I can’t quite grasp how this works, Bruce. Where does the parachute cord go?
-
April 10, 2018 at 7:40 pm #6018
 BruceParticipant
Taylor,
Punch holes in the tabs. Here’s another photo, pardon the poor image, but I hope you can see the holes. They are ready for short pieces of cord to tie to matching holes punched in similar tabs in the seat. The goal is to prevent the seat from floating away should you be si-washed in whitewater. Or carrying the raft from the car for that matter.

-
-
April 3, 2018 at 3:37 pm #5948
 Matt (Admin)Keymaster
Another excellent idea out of Fairbanks! Thanks, Bruce, and keep ’em coming!
I’ll add this to the how-to page so more people will see it.
-
-
AuthorReplies
- You must be logged in to reply to this topic.