-
Matt (Admin) replied to the topic Heat-sealing tools in the forum DIY Packrafts 5 years, 6 months ago
The iron I’ve been using lately is the leather iron from Alibaba.com. It requires some modification, but it’s better than the Black Baron because it’s narrower (more info here: https://www.diypackraft.com/construction/tools/ ). I see they’re also selling them on Amazon now too:…[Read more]
-
Matt (Admin) commented on the post, Surprise: Another New DIY Packraft Model 5 years, 6 months ago
Hi Nick, I’ll be testing out a seat for this packraft this weekend – I suspect it might need a bit more work, but yes, I hope to have it in the shop soon. Cheers!
-
Matt (Admin) replied to the topic TPU heat damage and repair? in the forum DIY Packrafts 5 years, 6 months ago
By the looks of it, it’s probably not still airtight, so I would heat seal some scrap yellow fabric over the damaged areas, and then add some Seam Grip or Aquaseal along the edge between the patch and the black fabric, if necessary.
-
Matt (Admin) commented on the post, First Look: Updated 2-Person DIY Packraft 5 years, 6 months ago
That might be a possibility in the future, but in general I’d recommend a smaller packraft for shallow creeks, as it’ll be much more maneuverable. Cheers!
-
Matt (Admin) wrote a new post 5 years, 6 months ago
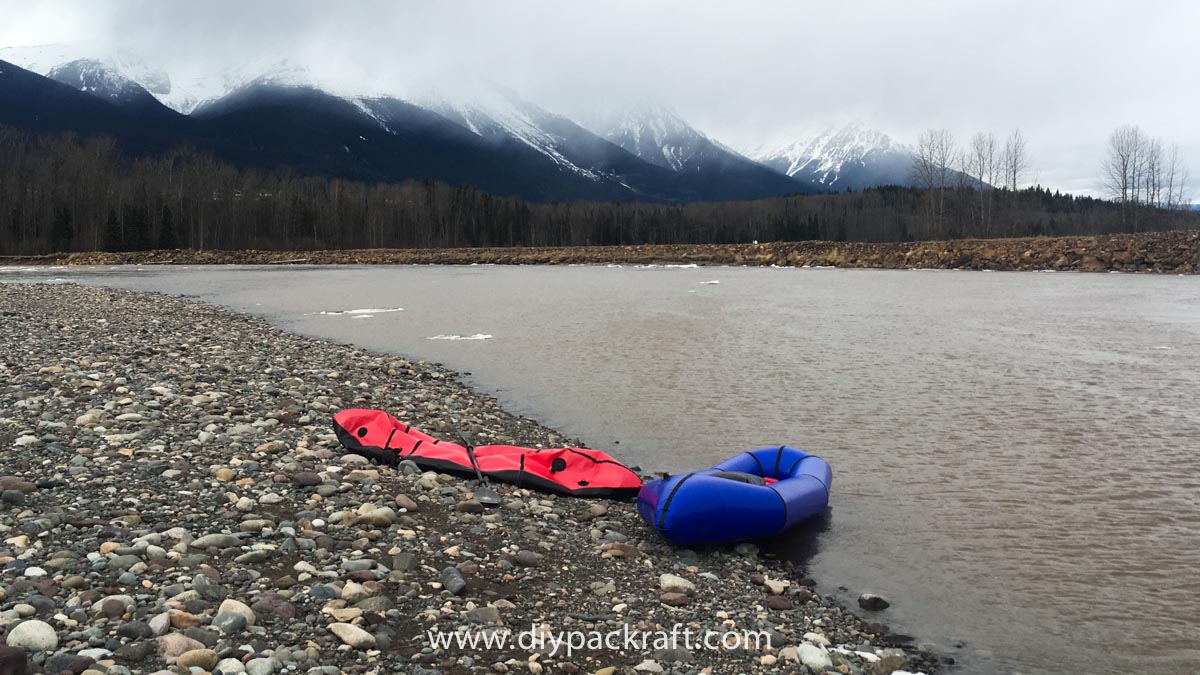
Last weekend the ice on my local river had opened up enough for me to go paddling, so I spent an hour navigating some Class 1 water while dodging ice rafts in the new 1-person packraft with the wrap-around floor. […]

-
I haven’t calculated it yet, but it should be comparable to the V3 plus a bit for some extra things that will be included that the V3 kit doesn’t have.
-
Hi Matt,
Any chance we can get the new design, but without the wrap around floor? I’d want beefier fabrics than the ultralight kit (210D tubes, 410D floors), but would like the ease of construction and improved paddling speed compared to the V3. I’m not sure the type of water I’m in warrants the wrap around floor.
Thanks,
Joe-
Hi Joe, yeah, I’ll likely do a regular version of a similar design – not sure when I’ll be able to get to it. It’s good to know people are interested though!
-
-
-
Matt (Admin) commented on the post, The Silicone Roller: my new favorite tool 5 years, 6 months ago
Thanks for making the video! I have been trying to direct the air between the fabric layers (the way an industrial hot air welder does), but I don’t have enough hands to hold everything. Your method is much simpler – I will try it!
-
Matt (Admin) commented on the post, Surprise: Another New DIY Packraft Model 5 years, 7 months ago
Hi Dan, I’m going to paddle it and the new 2-person packraft for the first time this weekend, and if all goes well I hope to have kits available later this month. No guarantees though!
-
Matt (Admin) wrote a new post 5 years, 7 months ago
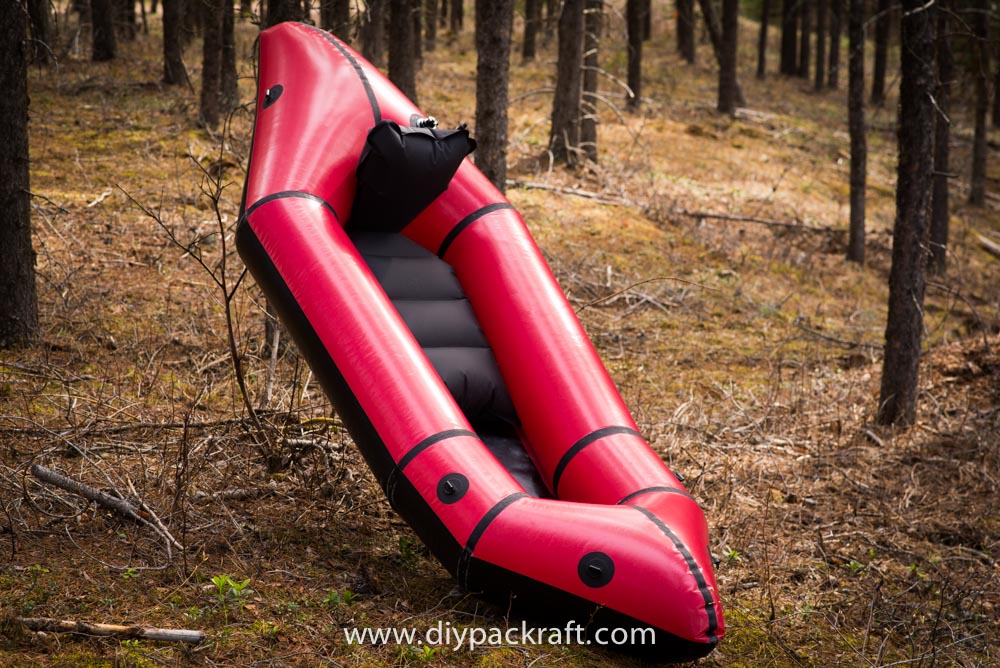
Notice anything unusual about this packraft?
2.278 kg, or 5.0 lbs
The tough floor fabric wraps halfway up the tubes to make this DIY Packraft extra tough where it counts, and it’s still […]

-
Hi Dan, I’m going to paddle it and the new 2-person packraft for the first time this weekend, and if all goes well I hope to have kits available later this month. No guarantees though!
-
Hi Nick, I’ll be testing out a seat for this packraft this weekend – I suspect it might need a bit more work, but yes, I hope to have it in the shop soon. Cheers!
-
Yep, you’re right – it’s got a higher volume bow and stern.
-
No, there’s nothing about the V3 design that precludes a wrap-around bottom, but I don’t intend to offer it as an option.
-
Hi Christian, thanks for your interest! It depends on the type of paddling you want to do, but if weight isn’t your main concern, personally I would choose the new model. Aside from the design updates, the instructions will be easier to follow. It’ll be in the shop quite soon. Cheers!
-
I don’t foresee any issues with the seat back interfering with a spray deck – just place the cockpit coaming back far enough so the seat back doesn’t push against it. Thigh straps shouldn’t be a problem either. If you don’t like the seat you can cut off the seat back and just make a flat seat instead and add a back band or something else (or just cut the seat back shorter). If you get an extra top-up valve (or repurpose the one intended for the packraft) you could turn the seat back into an inflatable foot rest or a pillow to go between your knees. There are lots of possibilities. Cheers!
-
I haven’t designed one yet, but it’s certainly possible!
-
Yeah, I’ll probably make a video of the new packrafts after I finish all the instructions.
-
I see you found it 😀
-
Yup waiting eagerly for it to arrive now!
-
I’m really interested in this design for a couple river (moderate whitewater) trips. Do you have the interior width (front and rear, since it clearly tapers)? I’m looking at the two smallest sizes. Shifting weight forward for better weight balance (fore/aft) is a pretty standard packraft design (the included seat design does that to some extent), and I’m wondering if I will get a good fit width wise if I go that route.
-
The interior width tapers from 37 cm (14.5″) to 21 cm (8.25″) in all three sizes. It’s designed to fit snugly around your hips, and being inflatable, it can stretch to accommodate wider bodies. Cheers!
-
-
I purchased a Telkwa kit from Matt in late June and finished it in early August. Building it was much like the V3 I built last January. However, there are a few key differences and so you should certainly review Matt’s updated Telkwa build videos to avoid some of the mistakes I made. Probably the biggest difference is that now Matt recommends using the “inside out” construction technique. I used that and found that it does aid in better access to the weld areas. On the down side, it also works the material pretty hard and there are touch up welds or seam grip “repairs” needed if you don’t take lots of care to get your welds right the first time. A person could still build the Telkwa using the V3 method as an alternative if so wished. I purchased my Telkwa kit with the zipper which definitely aided in the construction, especially in closing the aft seam.
I feel like the cockpit is just a bit narrower than the V3 as is the foot compartment. Still, there is room for me in the 130cm size.
The new seat design is fantastic with the pillow back. However, I definitely recommend sealing the seat separate from the seat back because while sitting on a partially inflated seat, my body weight pushed all the air into the back which left me with no air in the seat bottom. After I ironed the neck closed, I added a top off valve to the seat back. I put more air into the seat back and that gives great back support. Less air in the seat keeps my center of gravity lower in the boat but still keeps my butt off the floor.
I have taken my Telkwa on the middle Yellowstone River several times now, riffles only, maybe a possible low-end class 1 rapid. The Telkwa tracks much better in the water than the V3 does because of the more stream lined bow. I always add about 25# (12 kilos) to the front to keep it level in the water (a big, rounded rock has been used in the bow compartment a time or two, as well). I’m really pleased with how it handles. I have hit a few “butt dragger” shallows and had no fear of the bottom opening up. The extended floor up the side walls of the tubes gives me a bit more secure feeling should I scrape a log or rock although I have not done that and really try to keep from doing that.
My Telkwa weighs within an ounce or two of the V3 and pumps up with the same number of strokes from my small piston pump. My boating friends are amazed that I have built my own boats and are envious of the light weight when hauling gear back to the car shuttle or when hiking to a mountain lake (V3).
-
-
Matt (Admin) commented on the post, The Silicone Roller: my new favorite tool 5 years, 7 months ago
That’s the same one I bought! It does a good job of sealing the fabrics together quickly, but so far I haven’t figured out how to use it without melting too much TPU, so I haven’t incorporated it into my workflow. Do you have any advice on which settings to use?
-
Matt (Admin) commented on the post, First Look: Updated 2-Person DIY Packraft 5 years, 7 months ago
Hi Paddy, the best way to get a sense of the size would be to grab a tape measure and lay out the dimensions (given above) on your floor with tape or furniture and then sit within the lines. I’m sure the seat could be made into a pack – it would require some trial and error to make it comfortable for load carrying. I’ve never made a backpack,…[Read more]
-
Matt (Admin) commented on the post, First Look: Updated 2-Person DIY Packraft 5 years, 7 months ago
Hi Ryan, it’s actually already posted on page two of the shop as a sort of soft launch because I haven’t written and recorded the instructions yet or had a chance to paddle it to be sure it performs as expected (everything is still frozen here). I’m pretty confident in the design and I’m working on the instructions, but I don’t have a firm…[Read more]
-
Matt (Admin) wrote a new post 5 years, 7 months ago
For about $10 you can have a shiny new roller like this one.
When heat sealing TPU coated fabrics together, it’s important to apply pressure to the fabric as it cools, otherwise it tends to buckle and lift […]

-
YES, this works even better in combination with a hot air soldering station:
https://www.banggood.com/858D-220V-Hot-Air-Soldering-Rework-Station-Handle-Handle-Stand3-Nozzles-p-1129100.html?rmmds=buy&cur_warehouse=CN-
That’s the same one I bought! It does a good job of sealing the fabrics together quickly, but so far I haven’t figured out how to use it without melting too much TPU, so I haven’t incorporated it into my workflow. Do you have any advice on which settings to use?
-
I also have an 858D – squeeze a nozzle down to make a slot around 24mm wide. The air flow is quite low, so if it’s used at 220C or so the heat will spread out too much. Wind the temp up to 300 or more (even 400) and roll at a speed to suit and it will melt only the target you want. A bit like quickly searing a steak, rather than slowly cooking it right through.
-
we made a video about it:
-
Thanks for making the video! I have been trying to direct the air between the fabric layers (the way an industrial hot air welder does), but I don’t have enough hands to hold everything. Your method is much simpler – I will try it!
-
yes, you still need both hands to do it, so everything mustbe fixed in place by tape before you begin welding
-
-
Hey Naas,
What’s the strategy for the middle of the tubes? I imagine it’s tough getting the roller and the air gun to the center of the tube portions. Also, did you start sealing from the middle out, or did you start from one end with the pieces taped. How are you protecting the TPU in the middle on the floor and on the pieces adjacent to the seams or have you found it’s not much of a problem?
-
Also, I’ve been trying your method on some scraps, and found (at least according to the what sealing methods page) that my welds when pulled apart have the tpu all come off in one sheet on one side of the fabric. I also can’t seem to tell the difference between a strong weld and a weak weld until I pull them apart (they all look properly sealed until I rip them apart and the tpu all sheds off on one side). What do you guys think? Is the blower too hot? I’m wondering if the table beneath the blower is making the tpu on the bottom side not heat up enough and it’s therefor not welding properly. Thoughts? Matt have you dabbled with this method yet?
-
I’ve played with it a bit, but not to the point where I’m comfortable using it. I think the keys are to apply heat equally and evenly to both pieces of fabric and to not overheat them, and I find all of those things challenging.
-
Yeah, after a few hours of using it, that seemed to be my impression. In addition to welding irregularly (I think 1/8 worked properly), my iron shit the proverbial bed and wouldn’t get hot the second time I fired it up, so maybe an additional demerit. It’s being returned (which was fairly easy thanks to Amazon).
I ordered a coverite black baron (the last one I could find on ebay) and they shipped it to my address from 7 years ago (that was my fault) so I’m without a backup for the time being. I will now probably try the leather iron you recommended, but they still take a few weeks. I’d say the hardest part of this process thus far is finding a proper tool to use… Anyway, back to tool shopping…
-
-
-
-
-
-
YES, this works even better in combination with a hot air soldering station:
https://www.banggood.com/858D-220V-Hot-Air-Soldering-Rework-Station-Handle-Handle-Stand3-Nozzles-p-1129100.html?rmmds=buy&cur_warehouse=CN -
See the link in the first comment above.
-
-
Matt (Admin) replied to the topic Snow, sun, water packraft and some swimming in the forum DIY Packrafts 5 years, 7 months ago
Thanks for the great story of your maiden voyage!
How do you like the red press-fit valve and Schnozzle combination? Does it take too long to deflate with the single valve?
In the newer kits I’ve replaced the beach ball-style seat valve with a top-up valve, and that fixes the unexpected deflation issue. If you switch to a red valve, please tell…[Read more]
-
Matt (Admin) commented on the post, First Look: Updated 2-Person DIY Packraft 5 years, 7 months ago
Thanks, Bruce! The design changes are largely based on your feedback from the previous version, so thanks for that!
-
Matt (Admin) replied to the topic First test, whitewater in the forum DIY Packrafts 5 years, 7 months ago
Very nice! 🙂
-
Matt (Admin) wrote a new post 5 years, 8 months ago
Update: Gustav’s detailed fabrication instructions are posted here!
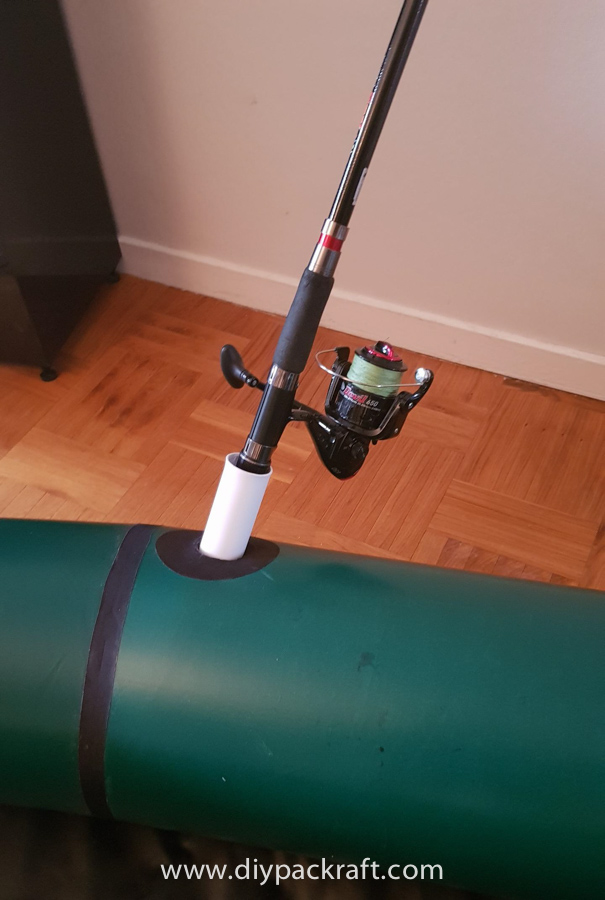
If you’ve ever tried fishing from a packraft, you know that it’s nearly impossible to hold a fishing rod and paddle at the same time. Gustav […]

-
Matt (Admin) replied to the topic Rod holder insert in the forum DIY Packrafts 5 years, 8 months ago
Fantastic! Well done, Gustav, and thanks for sharing! I’ll post this on the blog (with credit to you, of course), as I’m sure other people will be interested and they might not see it here.
-
Matt (Admin) wrote a new post 5 years, 8 months ago
Here in the north we’re deep in winter, so I haven’t had a chance to paddle the new 2-person DIY Packraft yet, but here are a few more pictures that show the new seat design (just one of them, because I’ve only […]

-
Matt (Admin) commented on the post, The Online Review Economy 5 years, 8 months ago
Thanks for the idea, Dan – I’ll give it some thought. And cool tents!
-
Matt (Admin) wrote a new post 5 years, 9 months ago
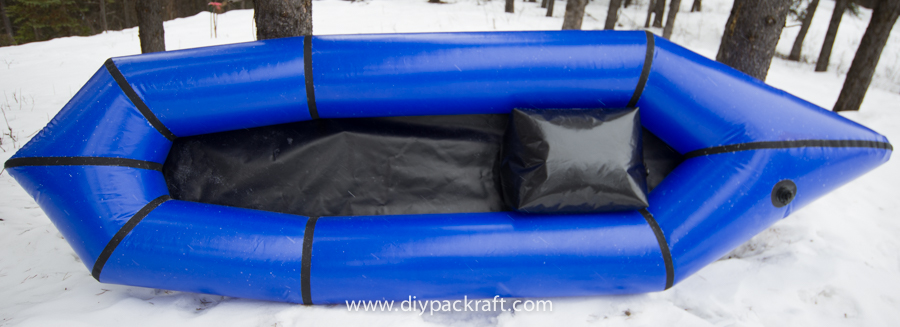
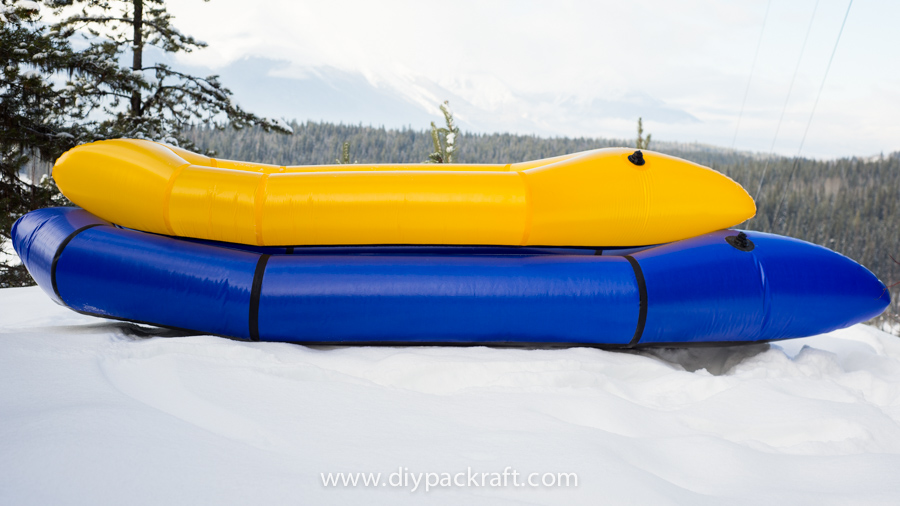
The new two-person DIY Packraft (blue) with the new Ultralight DIY Packraft (yellow) for comparison.
Packed size: 25 x 25 x 50 cm, or 10 x 10 x 20 inches
Weight: 3.0 kg / 6.6 lbs (with 560 GSM floor, no […]

-
Wow, Matt you’ve advanced the field immensely. This is the best tandem packraft design available. Congratulations. I clearly have to buy one for next winters project!
Bruce
Fairbanks-
Thanks, Bruce! The design changes are largely based on your feedback from the previous version, so thanks for that!
-
-
Hi Ryan, it’s actually already posted on page two of the shop as a sort of soft launch because I haven’t written and recorded the instructions yet or had a chance to paddle it to be sure it performs as expected (everything is still frozen here). I’m pretty confident in the design and I’m working on the instructions, but I don’t have a firm timeline for when they’ll be done. Regarding the price, it’s significantly higher than the previous 2-person kit because it includes way more stuff (not just the bare bones boat pieces).
-
Hi Paddy, the best way to get a sense of the size would be to grab a tape measure and lay out the dimensions (given above) on your floor with tape or furniture and then sit within the lines. I’m sure the seat could be made into a pack – it would require some trial and error to make it comfortable for load carrying. I’ve never made a backpack, myself, so I’m not sure how difficult that would be. Cheers!
-
Matt,
Great job, I’m waiting on my sample pack & your testing of the new 2 person model. Is there a possibility of the wrap around floor on the new 2 person model, lots of rough creeks & rivers in central Texas?-
That might be a possibility in the future, but in general I’d recommend a smaller packraft for shallow creeks, as it’ll be much more maneuverable. Cheers!
-
-
- Load More
