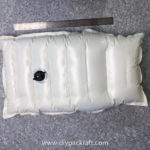
Note: That’s a 45 cm (18″) ruler in the picture, not a regular 30 cm (12″) ruler.
Today I whipped up a seat prototype – something I’ve been putting off until now – and it turned out remarkably well. It doesn’t have a back rest yet (I’ll try it out in the water to see if it needs one), but it’s quite comfortable, and with the internal baffles it doesn’t deform much when I sit on it.
The first time I sat on it, however, it popped! Fortunately the problem was just a poor sealing job on my part, so after a few more minutes with the iron, it now holds my full weight off the floor without losing air.
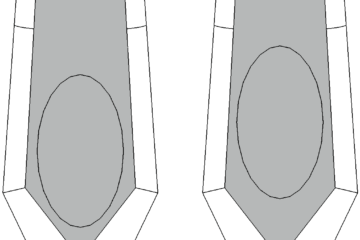
I think this would be a good starter project for anyone who is considering building their own packraft but isn’t sure they can do it, so I have posted a free set of plans you can download from the Shop. There’s a full-size PDF you can download and print, but I also designed the seat without any curved lines so that it would be simple enough to make from a set of plans scaled down to fit on one page, and that’s available there too.
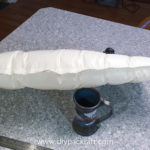
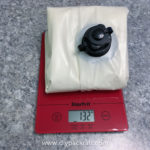
Anyway, here are some photos:
- DIY Packraft seat prototype
- DIY Packraft seat prototype
- DIY Packraft Seat
The seat has a tapered profile, with a thicker area under your butt for a more comfortable paddling position, and a thinner end under your thighs. It fits snugly into the back of the packraft and it’s held in place by the packraft’s tubes.
I need to make a second seat for my other packraft, so I’ll write instructions and make a video when I put that one together (instructions & video are now posted here).
With a back rest, this would be a very comfortable and lightweight camping chair, so even if you don’t end up making your own packraft it won’t go to waste. At 132 grams and such a small packed size, why not carry one in your pack?
I’ll try to find time to get out paddling this weekend to see how it feels on the water! (Update: It works really well!)


5 Comments
Steve S · June 23, 2016 at 12:51 am
How thick is the seat?
Matt (Admin) · June 23, 2016 at 7:58 am
As designed, the seat is approximately 12 cm (4.7″) thick, but it could easily be modified to be a different thickness.
Marco · June 21, 2016 at 3:42 pm
Hallo Matt nice idea, Ive copy the plan and wan a try the workshop, but description would be fine & a video helpful.
I ve not understand how you make it, like the raft stiched with an extra piece stripe of TPU frabric between.
Or schould the cut get an extra wide for the ironed transitions on the main piece?
How do you install the boston valve? also here would a video helpful.
Did you change the prices for packraft plans?
Matt (Admin) · June 21, 2016 at 6:39 pm
Hi Marco,
Thanks for asking – this motivates me to get to work. I will try to finish some written and video instructions for the seat in the next few days – and the boston valve installation too. Please check back in a day or two.
The price for the plans is the same, but the shipping cost is no longer included in the price, so the price looks lower. It was getting too difficult to account for the variety of combinations of plans and valves that people were ordering, so I updated the website with a new shop that can handle more complicated orders. I am trying to make the shipping cost the same as the actual price I pay at the post office, and the cost changes depending on the destination and the size and weight of the parcel. My goal has always been to keep the price of the plans to $20, plus shipping.
Cheers,
Matt
Matt (Admin) · June 23, 2016 at 11:39 am
Instructions are posted now