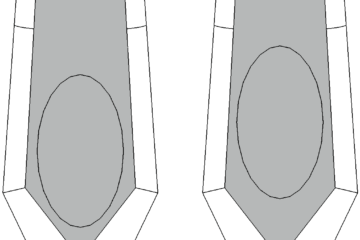
Some time ago I posted a page about making your own inflation bag*, and since then several people have asked me to supply parts so they won’t have to spend time and money sourcing them elsewhere.
In response, I’ve designed an inflation bag that costs the same as one meter of 40D fabric and can be made in less than an hour (excluding glue curing time). Best of all, it takes the fiddling and guesswork out of fitting the Boston valves that are included in the DIY Packraft kits.
The inflation bag is quite easy to make, so it would be a good first heat sealing project and, as with all my designs, there’s no sewing required and only minimal gluing.
I’ll post detailed instructions soon. For now, here’s the inflation bag kit in the shop.
*If you’re not familiar with inflation bags and how they work, you can see me using one in the video posted on this page.

5 Comments
Bruce Campbell · August 19, 2017 at 11:58 pm
I am especially interested in your connector that fits the fine Boston Valves. They are great valves, but an odd thread I have not been able to successfully fashion on my lathe. Worth the price of a kit, though I made my bag out of silnyl not TPU.
Matt (Admin) · August 20, 2017 at 7:28 am
Hi Bruce – the connector is unthreaded silicone hose, which is soft enough to screw into the Boston valve’s unusual threads without damaging them, and there’s no risk of cross-threading. The size fits the larger (drain) part of the valve, which makes inflation muchfaster than forcing air through the check valve part of the Boston valve. Once the packraft is full, I pop off the inflation bag, screw in the check valve, and top off the air pressure through the check valve by mouth. The whole process takes under three minutes.
I’m a fan of silnylon too, but keeping with my no-sewing promise I’m sticking with TPU (though Cuben fiber/Dyneema would also work well).
Bruce · August 25, 2017 at 6:41 pm
Great, I can find silicone tubing online. Did you use 20mm ID x 25mm OD size tubing? (The next size smaller is 16mm ID x 20mm OD, while other suppliers offer fractional inch measurements up to 7/8 inch but I think that’s too small.
Bruce
Matt (Admin) · August 29, 2017 at 9:00 am
I used 7/8″ and it seems to work well!
Allen · August 5, 2017 at 4:37 am
Yess Matt thank you so much! Deffinately excited about this and the next update, I have already begun imagining a way to add clips to the bag so it could double function as a drybag! Such amazing work your doing, I for one appreciate it!