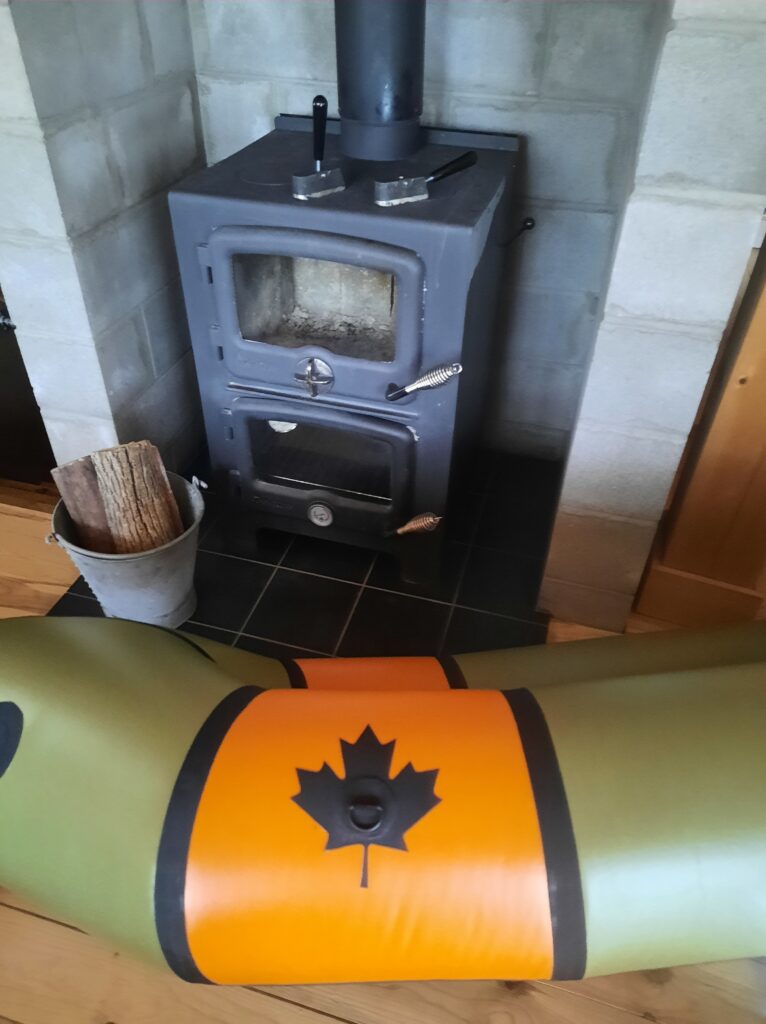
I’ll admit I was skeptical when forum member @oldcanuck first emailed to say he was planning to try powering his fabric welding iron the old-fashioned way, using his wood stove. He assured me that there’s an area on the stove that maintains a consistent 210-220° C though, and I had seen someone use metal blocks on an electric hot-plate in the same way before, so I agreed it would probably work.
Well, it looks like I underestimated @oldcanuck’s DIY skills – the irons look fantastic! I especially like that the handles can be attached in different orientations to make holding the iron more ergonomic while sealing different areas.
The following text and pictures are by @oldcanuck:
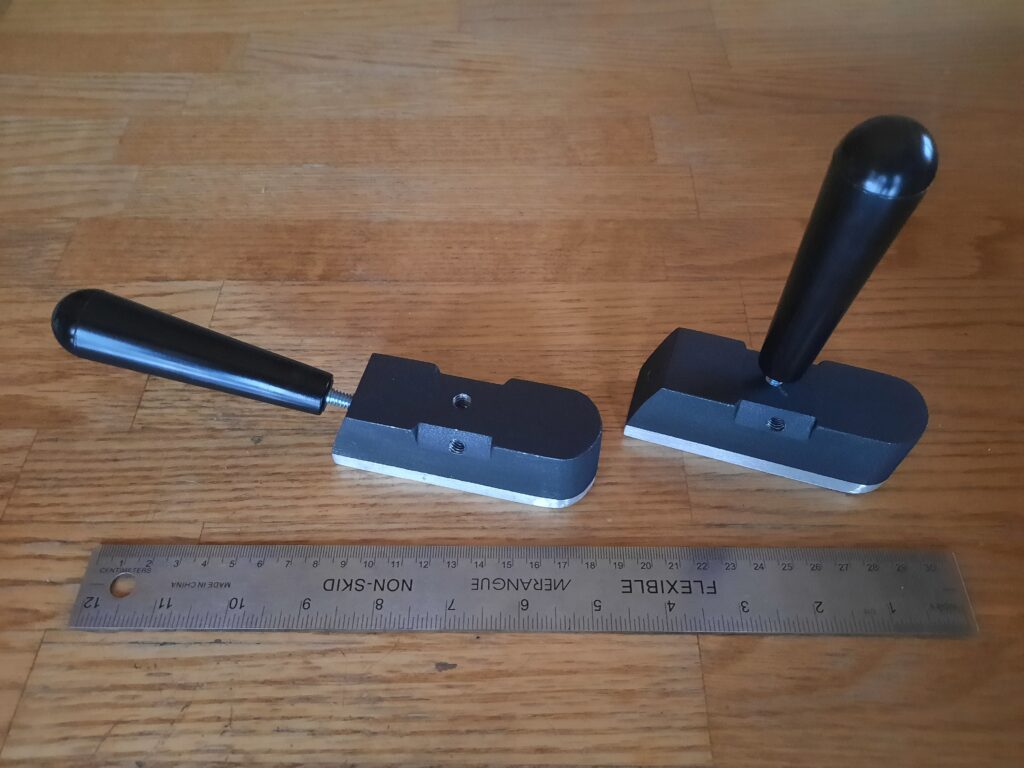
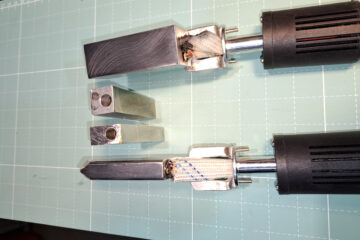
These were made with 100% sketchy redneck engineering. A miter saw, belt sander, hand file, cordless drill, hand tap and rattle can paint. The handles are from Lee Valley, also available online for a similar price. If the handles did not function well (i.e. melt, loosen with heat, burn the hand) I would have invested in re-purposing some camera equipment in my usual unconventional way.
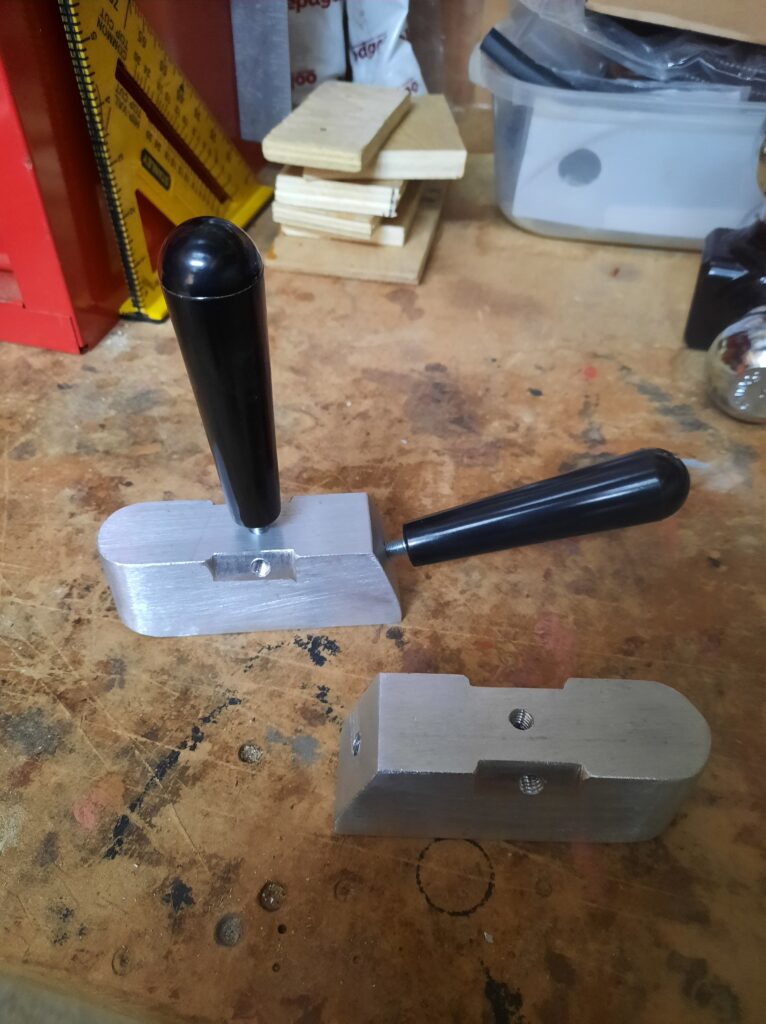
Cut from 38 x 38 x 100 mm aluminum blocks they are now 30 x 38 x 100 mm, each with four handle attachment points, a flat bottom with upturned rounded front tip for welding of smaller areas. Two were made for more efficient seam welding. When one is in use and cooling, the other will be heating to temp. Switching irons, handles and handle positions is quick and simple. Four available handle positions will hopefully make welding various seams more comfortable. Because of their bulk, heat retention is insane, but the handles get only slightly warm on bare hands, near the threaded fitting. Modifications to the irons will be easy if I find these need tweaking for different seam profiles.
I considered making two more irons with curved bottoms to match the wood form/bowl used for tube seams, but heard [Matt] say that liquefying the seam’s full width of TPU just helps the pieces move out of position, so it sounds better to only have partial contact for the more complicated tube seams.
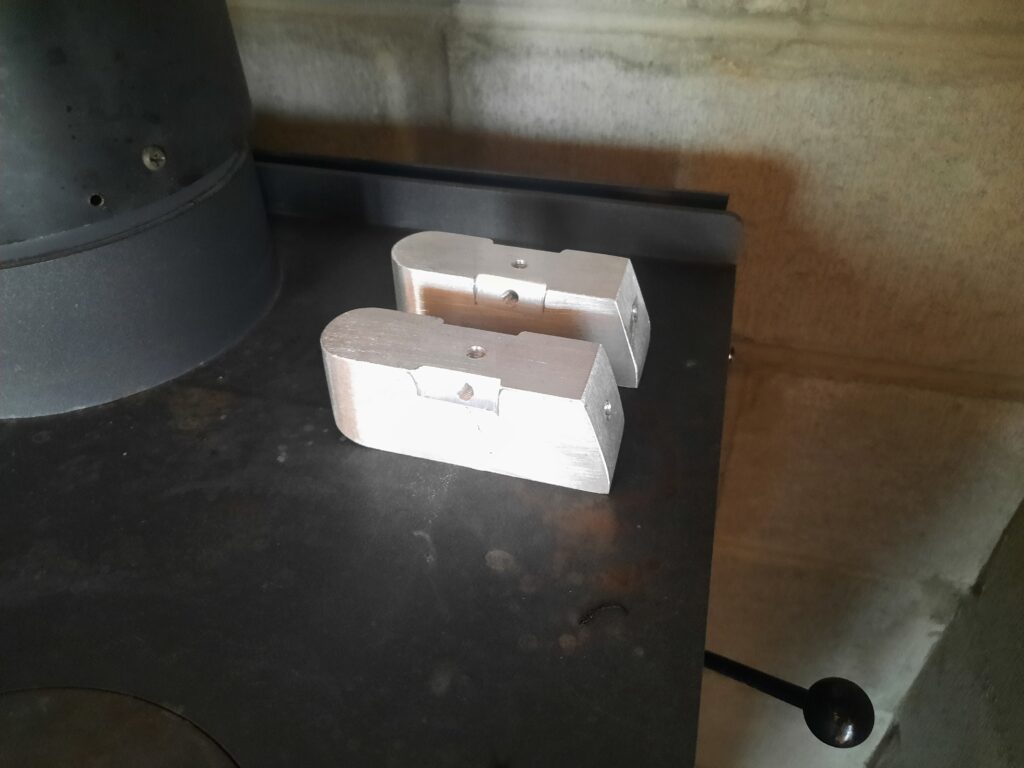
Pictures [above] show the aluminum blocks being heated on the area of my wood stove’s cook top where the temperature is consistently 210-220°C, and with two handles attached even though only one will be in place while welding seams.
The hand-made wood stove irons worked great. I played around with finding just the right spots to heat them on the stove top, depending on what fabric I was welding, the prep time needed between welds, and especially the firebox heat output, which I kept feeding firewood of consistent flavour and sizes at somewhat regular intervals. The optimum stove top temperature is 240°C to 250°C, otherwise the irons would take too long to get to their optimum 215°C to 225°C, read with an infrared digital thermometer, or heat way too high.
Seriously, this project was way too much fun!

1 Comment
oldcanuck · February 3, 2025 at 5:26 pm
Hello Matt … and welcome back.
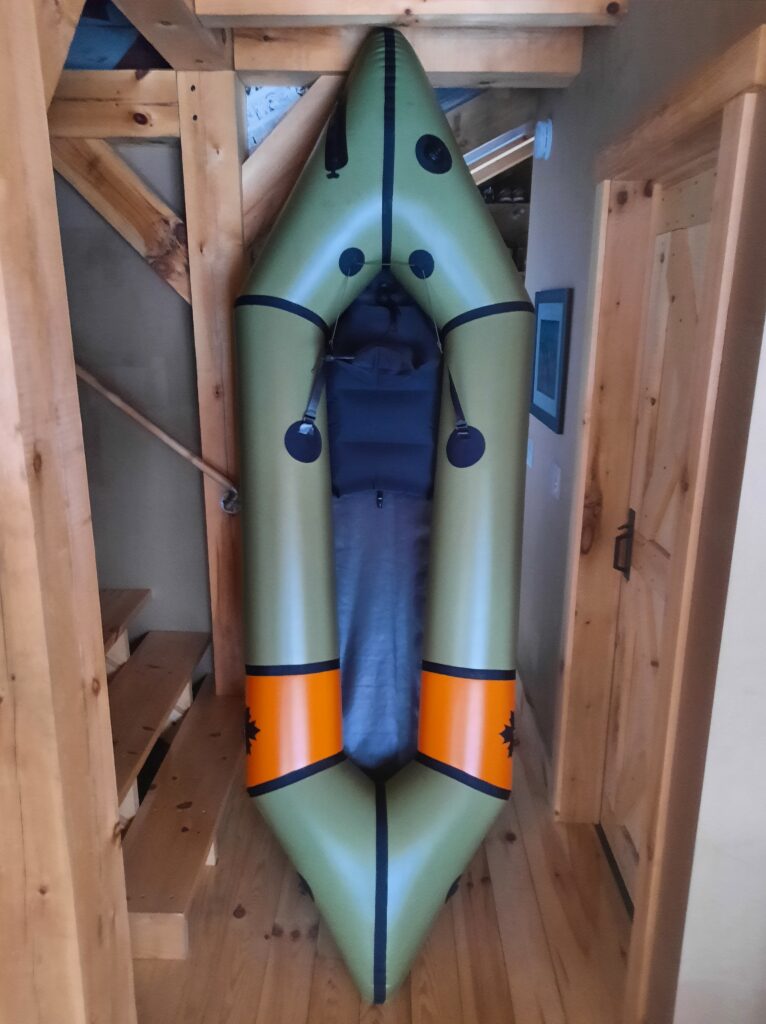
I hope my design can help others who also live off-grid know that they can build a diypackraft, with a hand-made seam sealing iron!
Living with solar power for an electrical source, the thought of running a power hungry electric iron for dozens of hours had me thinking there must be a way to use my wood stove to heat a tool, of some sort, for seam sealing. It’s the temperature control of the wood stove that is key. I heat my 900sqft cabin home, cook meals, bake wirh my Nectre 350 Bakers Oven and now for a new challenge, make a couple of Matt’s Skeena kits. I figure it’s worth a try!
oldcanuck