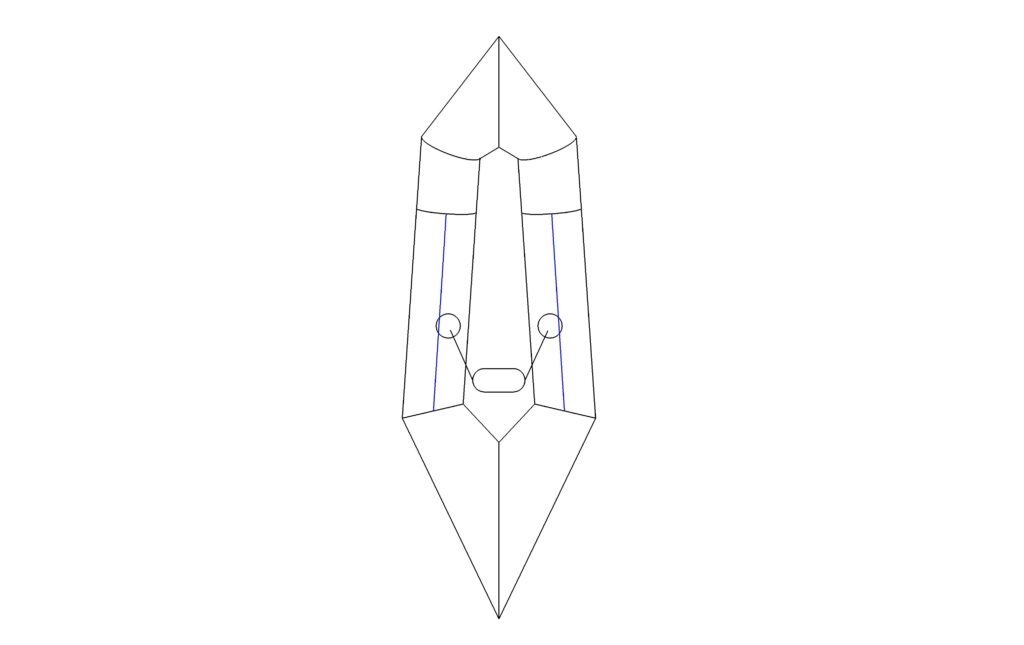
The black parts of the inflatable back band and the associated attachment points are scored into the fabric piece labeled “Seat +” and around the packraft’s floor fabric. Baffle D is scored into the sheet of colored tube fabric.
Note: if you ordered your kit before October, 2024, these parts are not pre-scored in your kit, but you can still make your backrest into a back band. You’ll just have to cut out the straps and attachment point shapes from the scrap tube and floor fabric. You can retrofit an existing backrest by cutting off the side seams and inserting straps before welding the sides together again.
Back Band Assembly
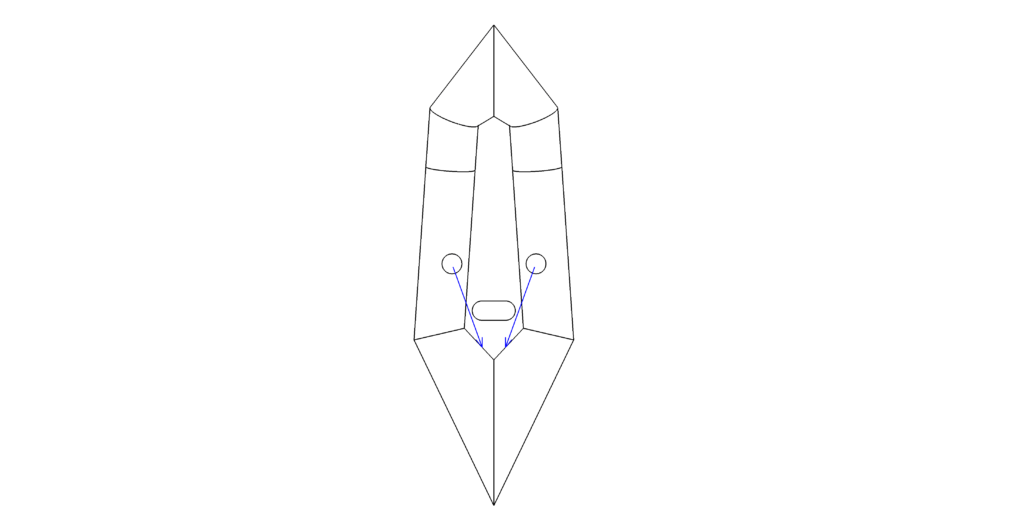
Attachment Points

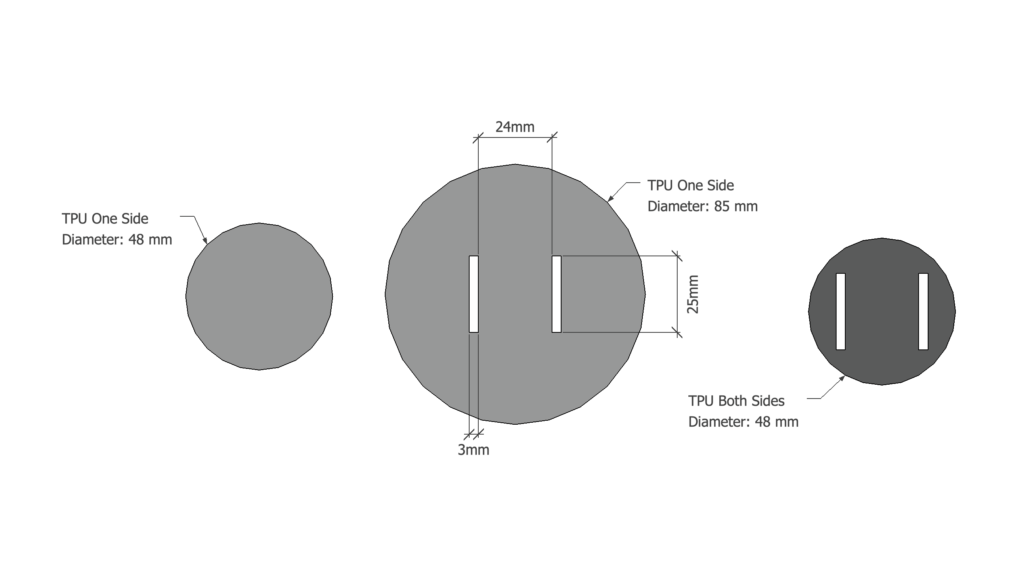
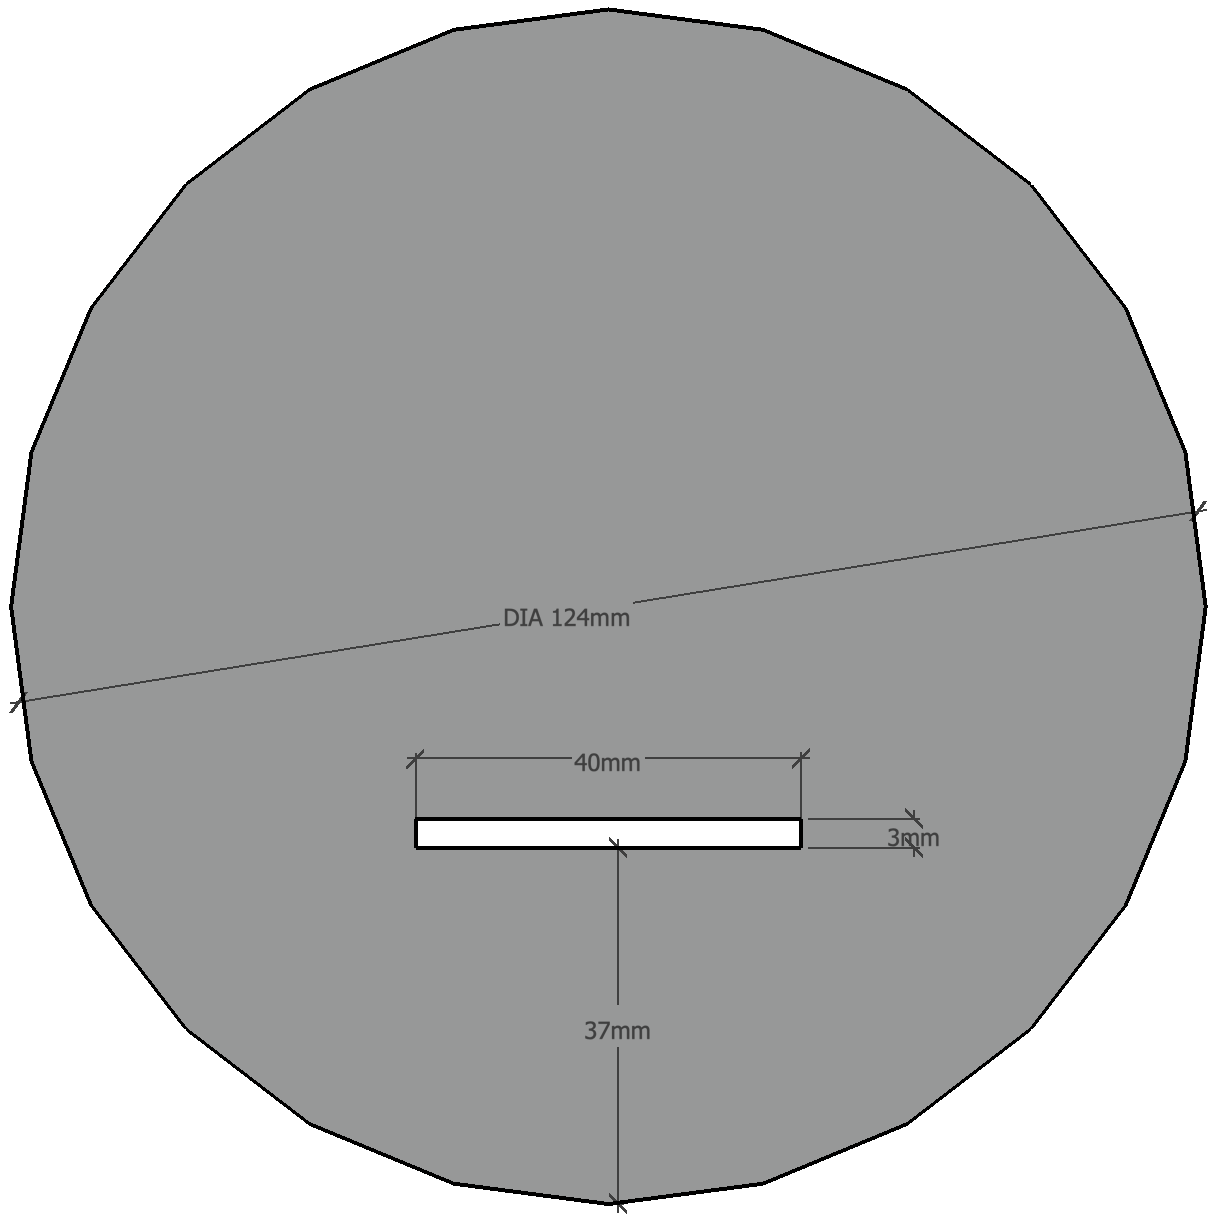
Note: The back band can also be attached to the floor at the rear of the cockpit, where the seat bottom is attached. Use a Type 2 attachment point, or the smaller ladder locks that are included in newer kits.
1 Comment
oldcanuck · February 10, 2025 at 4:42 am
Hi Matt..
Could you please add links, in the two appropriate lists, to these Back Band Assembly and Installation instructions, for all DIYPackraft model kits delivered with this new feature.
If I follow the How To list of instructions for my Skeena DIYPackraft, as a first-time builder I could easily carry on with the Backrest Assembly instructions and video, then realise the need to have followed the newer back band instructions and video. (don’t ask me how I know this. Haha)
oldcanuck