Approximate time: 20 minutes.
I recommend adding a seat attachment point to the rear of the packraft’s cockpit before you join the rear tubes together because it’s easier to access this area with your iron before the seam strip is in place. If you prefer, you can wait and do it after the packraft is otherwise finished.
Note: Be sure to leave room on the floor fabric to attach the end of the seam strip behind the seat attachment point (as I do in the video)!
Newer kits include ladder locks to make a seat & backrest attachment point:
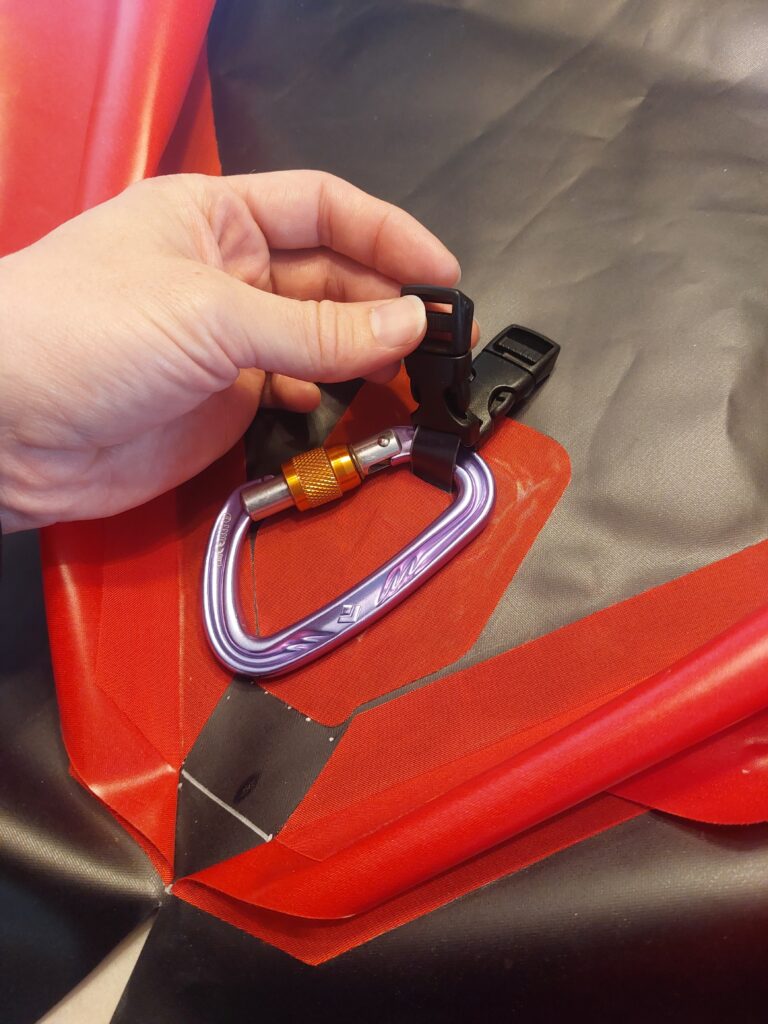
Optional: Use buckles instead of ladder locks for quick removal, and/or leave room to attach other items (in case you want to use a drybag as a backrest, for example).
Seat Attachment (old style):
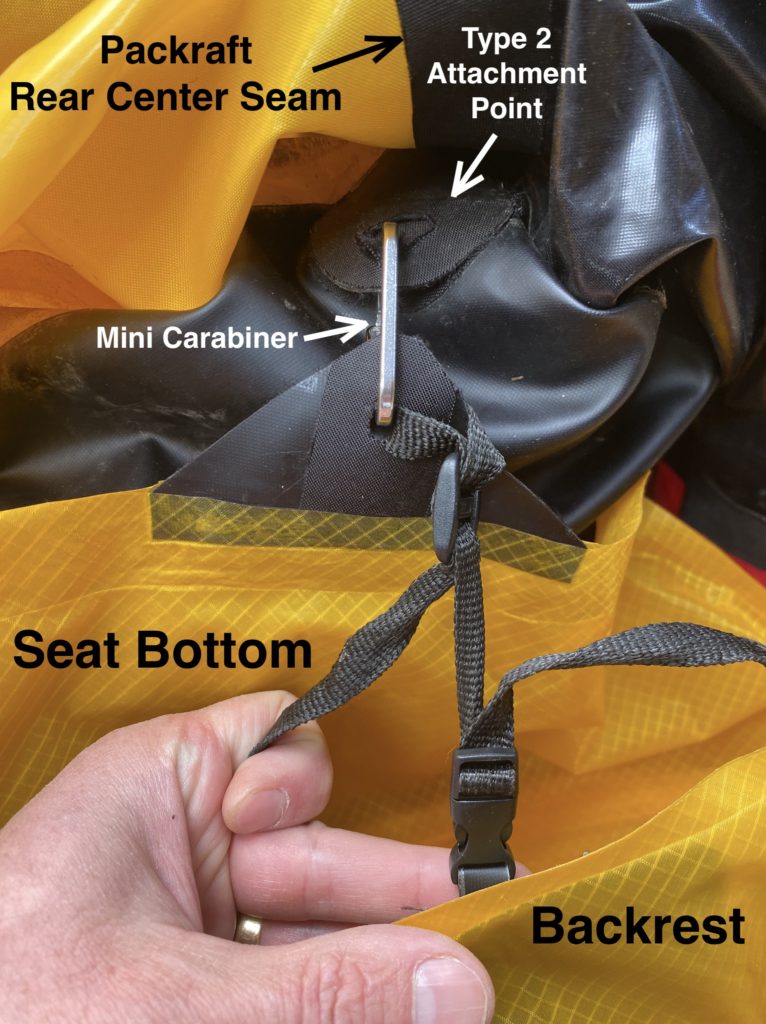
Seat and backrest location is a matter of personal preference. The image below shows how I attached my seat and backrest to one packraft – this is just one possible method. I used a mini carabiner to link the seat bottom to the packraft. I then attach the backrest to the seat bottom with a length of 1 cm (3/8″) webbing and a plastic buckle, to make it easily removable (because I also use the backrest as a camping pillow). You can see that the attachment point is frayed after a lot of use, so installing a plastic grommet in the hole might be a good idea.
Questions? Leave a comment below!
Note: this page is shared between multiple instructions sets. Use the back button to navigate back to your kit’s instructions.
6 Comments
Steven · February 1, 2025 at 8:29 pm
Hi Matt,
I’m working on made the back band version for the backrest and I was wondering if you had a picture or description of how the strap coming off the bottom of the back band is attached to the floor. Maybe it’s as simple as cutting a slot instead of a hole, but figured I would ask. There isn’t a comment section on the back band page so I figured the attachment point was the next best place to put it. Thanks!
Matt (Admin) · February 2, 2025 at 10:17 am
Hi Steven, great question – thanks for reminding me. I fixed the Back Band page so there’s a comment section now, and I’ll add some instructions there soon. I’ve started including two extra ladder locks in the kits (four in total) so that two can be used to attach the seat and backrest to the floor. The idea is instead of just making an attachment point with a hole in it like the one shown above, you’ll make an attachment point with two smaller ladder locks on it, so you can feed the straps from the back band and seat through the ladder locks (similar to the way the sides of the backband attach to the tubes). This is a work-in-progress and you’re one of the first people with the updated kits. For now, you could move on and come back to this, or if what I’ve written here makes sense then you can just go ahead and make an attachment point with the two smaller ladder locks. (You’ll need to trim the width of the lower attachment strap to fit through the smaller ladder lock.)
Matt (Admin) · February 7, 2025 at 1:11 pm
Hi Steven, I’ve now posted a new video showing how to make the attachment point. Cheers!
Steven · February 9, 2025 at 11:30 am
Thanks for the video! That is a lot more elegant than what I had in mind. I did swap the ladder locks for buckle clips so I could take the seat and back rest out easier. I also made the loop big enough I could fit a carabiner through. That way if I want to strap in a dry bag for a back rest I have more options.
Tanja Pietrass · August 27, 2024 at 6:22 am
Hi Matt,
my kit contains 10 pre-scored attachment points with D-rings for the tubes. Do you recommend using this type of attachment point with D-rings for the floor in the front and back? Your video shows the “home-made” versions that would lie flatter. The reason I’m asking is that I’m wondering if a D-ring would interfere with the welding of the seams, or have some other disadvantage that I’m not aware of. Thanks!
Matt (Admin) · August 27, 2024 at 9:32 am
Hi Tanja – good question. Instead of using one of the pre-scored attachment points and a D-ring, I would use the above style of attachment point, at least for the seat attachment point at the rear of the cockpit. There are a few reasons for this: first, it’s easier to make one of these attachment points; second, it’ll do the job just fine, and it won’t really be visible on the finished packraft, so although it doesn’t look as good as the D-ring type, that doesn’t matter; third, you can place this type of attachment point farther back towards the rear of the cockpit than you can the pre-scored Type 3 attachment point, which is round and will have to be moved forward to fit between the reinforcing strips (it’s easy to move the seat forward by lengthening the attachment cord, but you can only move it back as far as the attachment point, so it’s best to place the attachment point as far rearward as possible so you have more adjustability in your seat position).
If you want to add an attachment point at the front of the cockpit (not a requirement in most cases), you can use either type. Unless you add a spray deck to the packraft, you’ll be able to see that front attachment point as you paddle, so if you prefer the way the Type 3 attachment point looks (with the D-ring), then go ahead and use one of those. Think ahead about where you want the other attachment points to be on your packraft though – if it turns out you’ll want ten of those elsewhere for some reason, then you’ll be one short (not a big deal – you can cut out another one from scrap and buy a D-ring locally. Ten is more than enough for most things though.
I hope that helps!