If you’re paddling an lightweight inflatable boat in less than ideal conditions, it’s possible your packraft will develop a leak at some point. Fortunately, that’s not a big problem, because small leaks and even large tears are easy to repair.
Contrary to common sense, a leaky packraft is nothing to be afraid of. The volume of air inside the tubes is large, and holes in the fabric are typically small, so it takes a long time to lose so much air you can’t stay afloat. With your Boston valve or top-up valve positioned correctly, you can even top up the air pressure with a few breaths while you are out on the water, and even with a 1 cm (~1/2 inch) puncture in your packraft, air escapes slowly enough that you’ll probably be able to paddle to shore long before losing buoyancy. I have paddled around a lake for an hour with a passenger in a packraft while it was leaking air from a small hole because I was too lazy to fix it before going out… my passenger didn’t even notice we were losing air.
Punctures are only likely to occur in moving-water situations where momentum shoves you and your packraft against a sharp object with a great deal of force. Aside from avoiding sharp objects, the best way to prevent this sort of puncture is to use an inflatable seat, add padding under your heels, and store hard gear on the deck instead of on the floor or inside the packraft’s tubes (or if you store hard things inside the tubes, wrap them in soft things). This allows the fabric to bounce, stretch, fold, and flow around obstacles instead of being pinched between a rock and a hard place.
When you are a long distance from shore, such as island-hopping or crossing a fjord or a large lake, there are no sharp objects nearby and you are moving relatively slowly, so there is no need to worry about puncturing your packraft there unless you stop to practise juggling knives or do something equally foolish.
With all of that said, it is a good idea to keep your packraft airtight, if for no other reason than it will feel more rigid and responsive on the water when fully inflated. So how do you fix a leak?
Finding Leaks
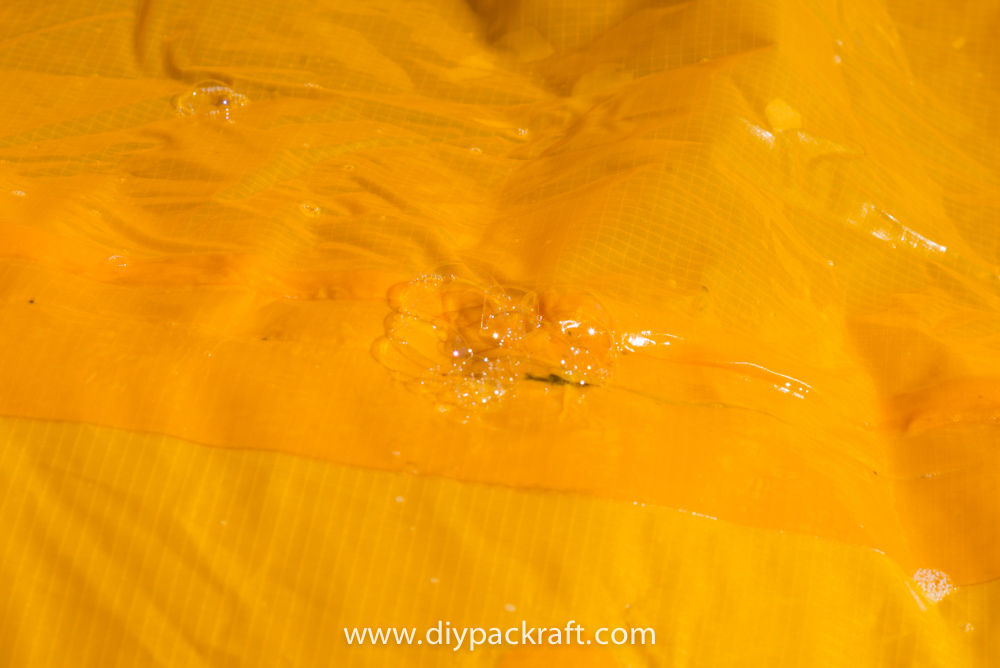
The first step is to figure out where the leak is. Large punctures will be easy to find, but most leaks are small and can take more effort to locate. Much like fixing a punctured bicycle tube, the easiest way to find the hole is to inflate the packraft and squeeze it with your hands while rotating it around your head as you listen for the hiss of escaping air. If the environment is too loud or the leak is so small that you can’t hear it, spread some soapy water over the fabric and soap bubbles will form wherever air is escaping. In the field, if you don’t have any camp soap, you can use plain water – soap just makes the bubbles more obvious.
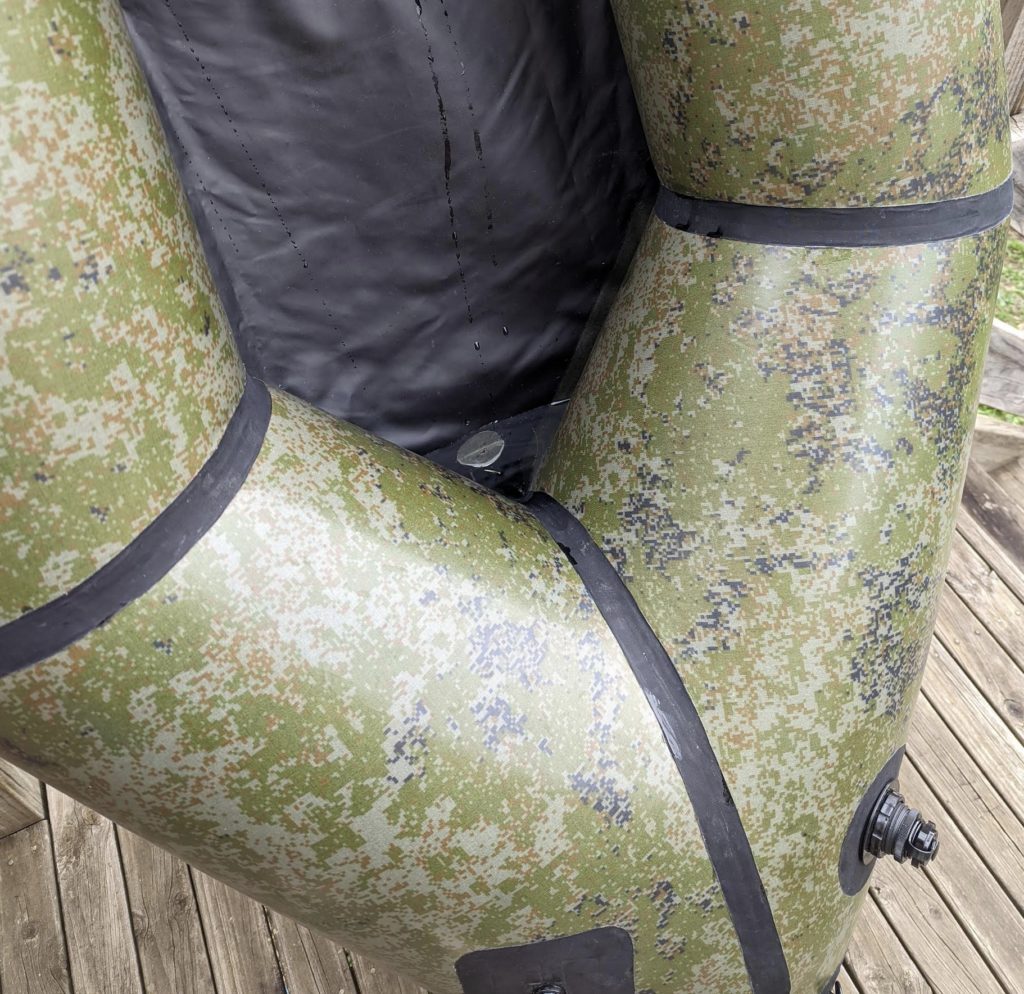
Once you have located the leak, rinse off the soap and wipe the fabric dry.
Tip: If you have a leak that is too slow to detect with a regular mix of soap and water, use a soap-to-water ratio of 1:1 and paint it on with a brush. This thicker solution will stay in place longer. (Tip submitted by Ken S.)
Fixing Leaks in the Field
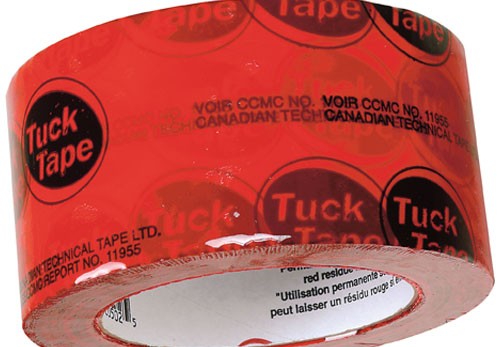
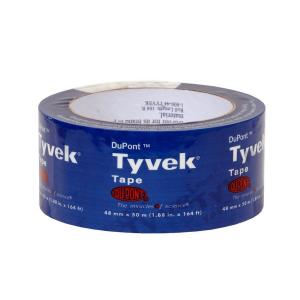
For field repairs, the best patch material I’ve found is adhesive tape designed for permanently sealing insulation vapour barrier plastic sheeting in building construction.
The outdoor outdoor repair tape available in the DIY Packraft shop is the same thing, except it’s clear and colorless.
These tapes are made of strong plastic film with a very sticky waterproof acrylic-based adhesive on one side. They bonds very well to TPU coated fabric, but can be peeled off without leaving much (or any) residue.
I keep a few meters of Outdoor Repair Tape wrapped around my bear spray bottle. It’s been there for four years, and I just recently peeled off a bit to fix something and aside from being a bit worn at the edges, it worked like new.
In the field, simply clean and dry the fabric and then slap a piece of tape over the hole in your packraft, rub it to ensure it’s well-adhered, reinflate the packraft, and carry on. These tapes works so well you can probably keep paddling for months without a more “permanent” fix.
These tapes are available in building supply stores, but are made by different brands in different countries:
- In Canada, Tuck Tape can be found at Canadian Tire and any hardware store
- In the USA, you will find Tyvek Tape at Lowes, Home Depot, etc.
- In Finland, Kerabit Air/Vapour Barrier Tape is available
- (If you know what repair tapes are available in other countries, please leave a comment below.)
Note: avoid using duct tape to repair packrafts – the adhesive is not waterproof.
When Tape Won’t Work
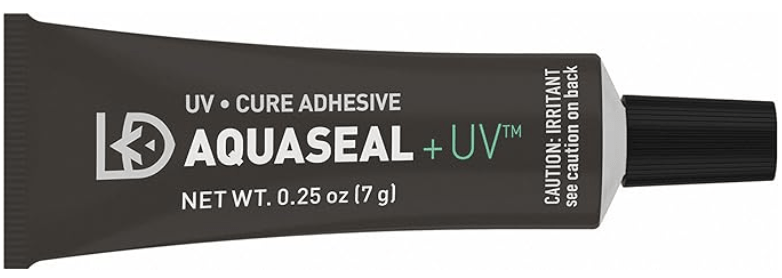
There are some spots on a packraft where it isn’t possible to place a piece of tape flat (such as in the corners where the tubes attach to the floor fabric inside the cockpit). If you find a leak in a place like that, then Aquaseal+UV can come to the rescue. Aquaseal+UV isn’t as good a sealant as regular Aquaseal, but the great thing about it is that it cures almost instantly when it’s exposed to sunlight!
Make sure the fabric is as clean and dry as possible before applying Aquaseal+UV.
If you’re camping somewhere overnight, regular Aquaseal or Aquasure or Seam Grip+WP can be used in the evening and it will be ready to go in the morning.
Permanently Fixing Leaks
Back at home, peel off the tape, make sure the fabric is clean and dry, and plug in your heat-sealing iron. Cut a piece of your heat sealable fabric large enough to cover the hole with at least 1 cm (~1/2 inch) overlap, and round off the corners with scissors. Simply place the patch over the hole, place a piece of parchment paper over the patch, and seal it in place with your iron.
If you have a leak where multiple pieces of fabric join together and there is no way to form a TPU-to-TPU bond around the hole, you may have to affix a patch with glue such as Aquaseal.
Note: do not use “Seam Grip+SIL” silicone tent sealant on your packraft. You must use a polyurethane based sealant. I recommend Seam Grip (now called Seam Grip+WP), Aquaseal, or Aquasure (all made by Gear Aid, formerly McNett).
Fixing Leaks in Seats and Backrests
Start by locating the leak by ear or by using soap and water (spread it around and watch for bubbles). It’s possible that there’s a leak where the baffle is attached, or in some other spot where the iron accidentally touched the TPU inside the seat or backrest, in which case ironing around the perimeter again won’t help.
Check the valve, too. I find that if the valves are overtightened then they will leak, but if you back off the screw-top a bit then they will almost always hold air.
If the air is coming through the fabric and/or out from the perimeter somewhere, the repair tapes mentioned above can provide a temporary fix (at least slowing the leak).
At home, spread some Seam Grip+WP or Aquaseal or Aquasure on the leaky spots and then let it cure. Test to see if it holds air. Repeat that soapy water and Seam Grip process, if necessary.
If there are leaks where a baffle is attached, I would be tempted to coat the whole baffle attachment area with sealant because if it’s leaking in one spot, there’s a good chance it’ll start leaking in another spot in the future as the baffle continues to pull against the TPU, and you may as well fix it before it becomes a problem.
After the leak is fixed, avoid over-inflating the seat and backrest by leaving them in the sun when they’re not in use.
37 Comments
Adam · March 19, 2025 at 4:40 am
Hey Matt – it terms of leaks fixing
– can a ‘patch’ of material be glued into place with seamgrip in a location such as where seam strip meets the floor?
– can a seam strip be rewelded if there is already seamgrip applied on the inside of the tube? Ie to repair a lifting edge
Matt (Admin) · March 19, 2025 at 8:18 am
Hi Adam, Seam Grip+WP doesn’t really work very well as an adhesive, so I wouldn’t try to glue on a patch with it, but the Seam Grip+WP alone should do the trick. And yes, ironing a seam strip that already has Seam Grip+WP under it won’t create any problems. Cheers
Frank · June 30, 2023 at 7:57 am
Hi Matt,
I finished making a Skeena which floats great but after about a month, have some pinhole leaks in the seat that deflate the seat over time from my weight (confirmed as visible tiny leaks when wet) Do you have a recommendation for a repair technique for the seat/backrest, as it is the fabric TPU on top or just repair with SeamGrip WP? Thanks
Matt (Admin) · June 30, 2023 at 8:48 am
If it’s leaking around the seat’s perimeter you should be able to just iron that area again, but if it’s somewhere else then the best fix will be a dab of Seam Grip+WP or Aquaseal. Cheers!
Phil · October 16, 2022 at 4:31 pm
Have you discoved a way to seal a tube a Seamgrip so it doesn’t dry out? I find that the screw on covers work short term but after a few months it hardens in the tube.
Matt (Admin) · October 17, 2022 at 8:39 am
I try to squeeze out all the air before screwing the cap on so there’s no air in the tube, but I still find I need to puncture a layer of cured Seam Grip if I leave it for a few months. I’ve read that storing it in the freezer can help because it slows down the chemical reaction, but I haven’t tried it myself.
Dave · November 11, 2022 at 8:28 pm
Store it in the freezer. Thaws to useable viscosity in minutes, but prevents it setting in the nozzle.
Philip Weissman · November 20, 2021 at 5:26 am
Hi Matt,
My zipper is leaking at the slider. I can hear the leak and pressing on the slider makes it worse. Can I fix it?
Thanks
Phil
Matt (Admin) · November 20, 2021 at 10:19 am
Please check this page: https://www.diypackraft.com/faq/why-is-my-airtight-zipper-leaking/
Karen · April 9, 2021 at 9:11 pm
Hey Matt, I messed up building my skeena packraft… I didn’t put baking paper between the plywood I was using as a table and the bottom of the raft – some of the ply has now attached itself to the shiny side of the floor. I know it’s probably hard to tell without seeing it in person, but is there a way I can send you a picture and get your opinion on what can be done to fix it/whether it has ruined the waterproof seal?
Matt (Admin) · April 10, 2021 at 9:11 am
Sure! Don’t worry – we’ll fix it 🙂 You can reply to your order confirmation or shipping confirmation emails, or if they went to your spam folder and got deleted then you can send me a message through the contact page and then attach a picture to my reply (I don’t post my email address on the site to prevent bots from flooding my inbox with spam).
Barbara · March 12, 2021 at 10:16 am
I don’t know if my expectations are too high (so far I’ve paddled a high pressure inflatable kayak), but I feel likeI still have leaks that I cannot find. I have even covered the full Skeena with 100% non-diluted dish soap, the laid on the raft for 10 minutes (to increase pressure) to findany remaining micro leaks. Even did some digging on general physics that indicate a 1% air loss is within range for a 3°C drop in temperature. However, inside temperature is constant, and I still need to add about 5-6 breaths after leaving it overnight. So, my question is: When the raft is fully inflated, should it stay at that same level of inflation for, say, 2-3 days, given that all other conditions are equal? I feel if there’s leaks left, they must be so tiny that I can’t even identify them by air bubbles from dish soap.
Matt (Admin) · March 12, 2021 at 2:24 pm
The short answer is yes – the fabric itself is airtight, so in theory the packraft should hold air indefinitely (and in my experience it’s possible in practice as well). That said, if a leak is too small to track down after spending significant time searching for it, it’s probably not going to be noticeable in real world situations. When paddling, you’ll have to monitor the air pressure anyway and add more air as the water cools the air inside the packraft, or release air when the sun comes out on a cloudy day or you go ashore and the air in the packraft heats up, so a leak that only lets out a few lungfuls over eight hours will be masked by those other factors that work on much faster time scales. Unless it’s bothering you, I wouldn’t spend a lot of time trying to track down the leak.
Ken S · January 16, 2020 at 12:16 pm
Per the video: When making the soapy water for leak testing there will be significantly less foam and suds if the soap is dripped into the water after the bucket is filled then slowly stirred. Typically, for soap leak testing only 5 – 10 drops of soap are needed for a quart (1L) of water.
An alternative for soap application that I typically use is to fill a 1 quart (1L) spray bottle with water then drop in 5 drops of dish washing liquid. After installing the sprayer gently turn the bottle upside down 3 or 4 times (don’t shake it). I use the stream setting on the sprayer because it creates less foam when hitting the raft. Any foam bubbles can be ignored as leaks, i.e. look for big bubbles that “grow” as shown in Matt’s video.
meeee · October 7, 2019 at 1:50 am
Is Aquasure the same as Aquaseal? Any differences known?
meeee · October 7, 2019 at 1:52 am
Also, there seem to be different products available names aquaseal – which is the one?
meeee · October 7, 2019 at 1:58 am
And another one – there’s also SilNet from the same manufacturer than seam grip – same thing as well? It’s also used to seal seams…
Matt (Admin) · October 7, 2019 at 8:22 am
SilNet will not work on the DIY Packraft fabrics, as it’s formulated for use on silnylon (silicone coated nylon fabrics).
Matt (Admin) · October 7, 2019 at 8:21 am
The regular Aquaseal made by McNett/Gear Aid is what I have used, and Aquaseal UV is nice to have in your repair kit, as it cures quickly (but doesn’t bond as strongly).
Matt (Admin) · October 7, 2019 at 8:19 am
I believe Aquasure is similar to Aquaseal, but it’s not available where I live so I’m not positive about that. I think it’s formulated for the EU, which requires different solvents than North American markets.
meeee · October 7, 2019 at 9:13 am
Thanks for the quick reply!
I reached out to McNett/GearAid, from their writing, I’d use Aquasure? Although the SeamGrip is explicitly meant for leaks and the bonding with PU fabrics is highlighted, so that might be an even better fit when sealing possible non-airtight bonds when building the raft?
I’m about to build the UL raft – is the coating on the side that can be reached with the sealant anyways?
here’s their reply in detail, hope that helps others as well:
With beginning of this year we had our brand transition from McNett to Gear Aid. Within this transition some products got a completely new name or an annex behind. All products themselves stayed 100% the same – only the name (in some cases) and the design of the packaging changed.
To streamline the products lines they were renamed by the strongest product, the concrete products get an annex to clear the function or difference: E.g. all seam selants are now named Seam Grip, all adhesives are named Aquasure. The ‚normal‘ Aquasure adhesive is now called Aquasure +FD (flexible durable). The ‚normal‘ Seam Grip is now Seam Grip +WP (waterproof). Seam Sure got a completely new name, you will find it as (Gear Aid) Seam Grip +FC Fast Cure Seam Sealant and SilNet is renamed Seam Grip +SIL.
This info might be interesting for you when searching for a particular product in a shop or on the internet as some (online)shops have still some of the old design on stock but others have already the new design (again – „old“ and „new“ products are 100% the same).
Regarding the seam sealants you might find several old and new products as follow:
Old design/name McNett new design/name Gear Aid function (difference)
Aquasure = Aquasure +FD -> multipurpose repair adhesive (high viscosity)
Seam Grip = Seam Grip +WP -> seam sealant e.g for PU-coated tents (lower viscosity)
Seam Sure = Seam Grip +FC Fast Cure Seam Sealant -> seam sealant (waterbased)
SilNet = Seam Grip +SIL -> seam sealant for SilNylon fabrics
Aquasure +WP is less a seam selant but a repair adhesive for flexible but strong and abrasion resistant repairs or modifications on garment and equipment. Due to ist high viscosity it would be bad to apply on (longer) seams.
Seam Grip +WP is our main seam sealant for any sealing apart from siliconized fabrics. You can create abrasion resistant and waterproof seams or just fix loose seam tapes (e.g. in hardshell jackets/trousers). As it is a reactive PU-agent that polymerizes in itself and the fabric. A very strong bond between sealant and fabric is created.
Seam Grip +FC is waterbased PU-emulsion and thereby a more nature friendly solution (contains no solvent). It creates a thin PU-layer on the fabric, but is a non-reactive product. Thereby the bond is not as strong and durable as it is with Seam Grip +WP, but still strong enough for tent seams.
If you want to seal seams of a jacket or pants I would recommend Seam Grip +WP as its made for ‚hard use‘.
On tents it is up to you to use Seam Grip +WP or +FC – both products would do the job.
Matt (Admin) · October 7, 2019 at 9:24 am
Interesting – thanks for posting that! It must be in reference to the European names, because Aquasure is not available in North America, but Aquaseal is very common.
I recommend Seam Grip+WP for sealing the inside of the packraft seams for the same reasons as the Gear Aid representative suggested (because it is less viscous so you can apply a thin layer more easily and one tube will go farther).
Jonathan Hallemeier · September 16, 2019 at 11:08 am
Hello! I’ve just completed my first heat sealing project – the seat for the Telkwa. While most of it looks good, I do have a leak I’m not sure how to deal with. I found air bubbling not through a seam, but through the material on the interior edge of a seam where there is a gap in my reinforcing strips. My best guess is that while sealing to the reinforcing strips, I created a bond between the two pieces of seat material in that millimeter area that then came apart and compromised the material and TPU coating in that spot. Regardless, how should I fix this sort of leak when all I have is non-TPU material showing? I imagine using my sealing glue with a patch, but any thoughts on best practices? Would it matter if the patch is fabric or TPU side down?
Matt (Admin) · September 16, 2019 at 1:06 pm
Hi! I have a similar leak in a seat that I lent out and I think it got overinflated. I’m going to try simply covering the area with a layer of Seam Grip and I’ll see if that fixes it. If not, I may cut a small slit in the area so I can slide a patch of fabric inside and heat seal it from the outside. Cheers!
Olle · July 7, 2019 at 11:18 am
I haven’t been able to find any of the tapes mentioned above for a reasonable price where I live. I did however find these two tapes:
https://hpx.eu/en/product/isoseal/
https://hpx.eu/en/product/power-sealing-tape/
Does anyone know of either of these will do the job?
Matt (Admin) · September 16, 2019 at 1:08 pm
Hi Olle, I don’t have experience with those tapes, but looking at the links, I think either one will probably work – they both use acrylic adhesives, and I’ve found that tapes with acrylic adhesives seem to work best. Cheers!
Fan Z · May 13, 2019 at 6:52 am
Matt,
What are your top two fabrics, in terms of seam strength (less propensity to leak air / better chance of complete heat sealing)? The 250 GSM?
With your fabrics, I am trying to make air bladders (sponsons) for my folding kayak, which looks like this:
http://www.portablekayaks.com/wp-content/uploads/Azon-Pakboats-Quest150TopSide-withoutDeck.jpg
OEM’s sponsons are so poorly made (weak seam strength and air leaking from seams), that I managed to cause air leak with my mouth/lung without blowing hard.
Matt (Admin) · May 13, 2019 at 8:53 am
I would probably choose the 250 GSM fabric for that application, but seam strength will depend as much on how well they’re sealed and whether or not they’re reinforced.
Fan Z · May 13, 2019 at 10:35 am
Thank you very much, Matt. How do I reinforced seams?
Matt (Admin) · May 13, 2019 at 11:07 am
Add a strip of fabric across the inside of all welds so they cannot peel apart if overstressed or poorly sealed. An example would be around the edges of the V3 seat, which you can find under the How-To menu above.
Matteo · September 1, 2018 at 6:09 pm
Hi I finish to make the packraft but there are some leaks I can’t find a way to fix. They are on the internal start of the seam strip, where the two tube pieces, the seam strip and the floor meet. Most joint have leaks, better or worse.
I have tried to use ridiculous amounts of silicon/aquaseal both inside and outside (3 tubes of heavy duty silicon), I try to seal an additional patch on top but there is no much grip because there are the non-tpu side of the reinforcement. I tried to use some 3M All Weather Tape but it does absolutely nothing, I went to the biggest construction supplier here in New Zealand and I couldn’t find a Tyvek Tape. Do you have any advice? Most of the leaks are visible only with water and totally inflated
Matt (Admin) · September 2, 2018 at 10:07 am
I have not tried it myself, but I have heard that sealant fluid for tubeless bicycle tires works well for patching difficult leaks, so maybe that is a good solution at this point.
gustav.kraft · December 15, 2018 at 2:08 am
Hope you have managed by now but for others in the same situation:
The far best method I have found is to seal with Aqua seal from the inside if you need to inflate the boat to some degree to avoid glue sticking to the wrong place when it hardens. If you use seam sealer or try from the outside the pressure will make its way during when the glue hardens. When totally sealed you can reinforce with glue from the outside (when inflated) preferably with seam sealer.
To reach in far I have some glue on a small plastic bag over my hand, sort of hiding the glue in my hand when reaching in, apply it over the tricky part and then hide the glue in my hand again when backing out to avoid getting glue in the wrong place.
To glue the floor/tube joints from the outside when deflated is risky and its easy to glue it to tight and then rip it when you inflate the raft. Inside works if you can avoid getting it stuck to the wrong place.
When done I inflate to low pressure, flips the rafts upside down and place a cardboard box inside the the raft so its rest upside down but on the floor and not on the tubes. This makes the floor joints stretch out even if the raft deflates from other leakage.
Good luck!
Quincy · February 2, 2017 at 1:53 pm
If a leak is from a seam that wasn’t completely sealed in the construction process can you just heat it up and seal it again with your heat sealing iron, or is there a reason to go automatically to using AquaSeal?
Matt (Admin) · February 2, 2017 at 2:07 pm
Hi Quincy,
Yep, heat sealing should always be the first choice. If you accidentally sealed a fold into the seam, or if there’s some other reason why you can’t iron it airtight (like if it’s in a spot where you can’t get a complete TPU-to-TPU bond around the leak), then would I use Aquaseal.
Tom · October 22, 2016 at 2:01 am
Hi Matt,
Thanks for great pages! I might try to build a packraft. I have not worked with TPU before so here is one theoretial question about repairs…
(“If you have a leak where multiple pieces of fabric join together and there is no way to form a TPU to TPU bond around the hole, you may have to affix your patch with glue such as Aqua Seal.”)
Let’s think I have situation as described above. Would it be possible to bond TPU film (for example link below) on non-TPU outer side and put patch over it? Or would TPU film be useful for something else?
http://www.extremtextil.de/catalog/TPU-film-clear-transparent-0-3mm-thick-340g-sqm::2804.html?language=en
Matt (Admin) · October 22, 2016 at 8:32 am
Hi Tom,
I have not found a good use for TPU film without a fabric backing… I have tried bonding TPU film to fabric and it does not form a strong bond, so in that situation you would still have to use some glue.
Cheers,
Matt