TIZIP SuperSeal and MasterSeal zippers are airtight and waterproof zippers, which, when installed in your packraft, allow you to store gear inside the tubes and access the inside of the tubes for easy repairs. It’s possible to install a zipper in your packraft’s tube fabric before you build the packraft (shown in the first video below), and you can also install a zipper in an existing packraft (shown in the second video).
Before You Begin (Important Information):
Note: Every TIZIP SuperSeal airtight zipper is tested at the factory to ensure it does not leak. I handle and pack the zippers carefully to ensure they are never folded or kinked before they reach you. You should treat yours with the same care.
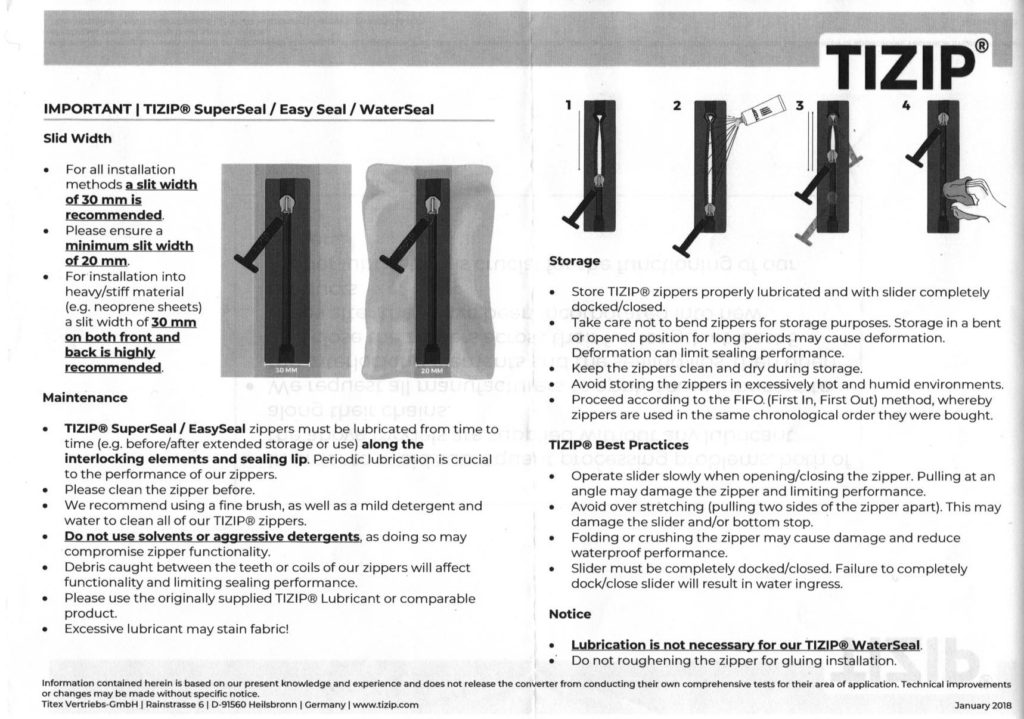
Note: New SuperSeal zippers are very tight and difficult to open the first time. Don’t worry – this is normal and your zipper will loosen with use. They’re especially difficult to open before they are mounted, because you have very little fabric to grab on to. If you want to try it out before it’s installed in the packraft, you can clamp one end of the fabric in a padded vice or vice grips and pull on the T-zipper handle. Thread something through the webbing loop to make a larger handle, if necessary. That first opening may require a lot of force, but the zippers are very strong, so it shouldn’t break if you pull steadily (don’t jerk it). After it’s open, adding the silicone lubrication to the zipper will help it slide, and after it’s been opened and closed several times it will start to loosen up. My recommendation is to open and close the zipper a few times before installing it, but to wait and lubricate it after it’s installed so you don’t risk getting silicone grease on the fabric, which could interfere with the heat sealing.
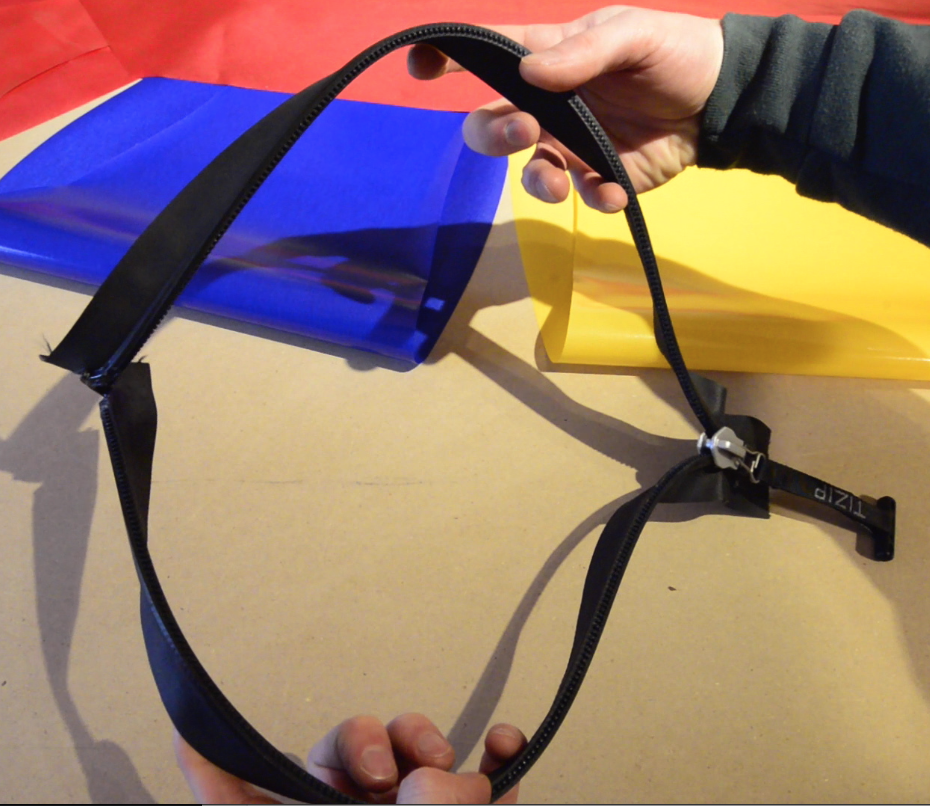
Folding an airtight zipper sharply can permanently damage the seal!
- During packraft construction, avoid fouling the zipper with glue or debris
- Don’t over-stress the zipper by stretching it open forcefully or by bending it sharply.
- When you pack your packraft, never fold the zipper – roll the zipper area with a diameter no less than about 5-10 cm (3-4″).
- Wipe/rinse away any sand or debris before opening your zipper – grit in the seal will cause it to leak.
- Make sure your gear is clean before sliding it through the open zipper – a single grain of sand stuck in the zipper will prevent the airtight seal from closing and will cause a slow leak.
Airtight zippers are precision-made mechanical devices and, as such, can wear out over time. To keep your zipper working well, keep it clean, pack it with care, and occasionally reapply the included silicone lubricant.
Differences between MasterSeal and SuperSeal zippers
DIY Packraft now offers two different styles of airtight/waterproof zippers. Both are made by TIZIP in Germany, and both work great. Here I’m only discussing differences in installing the two different zippers – check the zipper product pages in the Shop to see other differences between the MasterSeal and SuperSeal zippers.
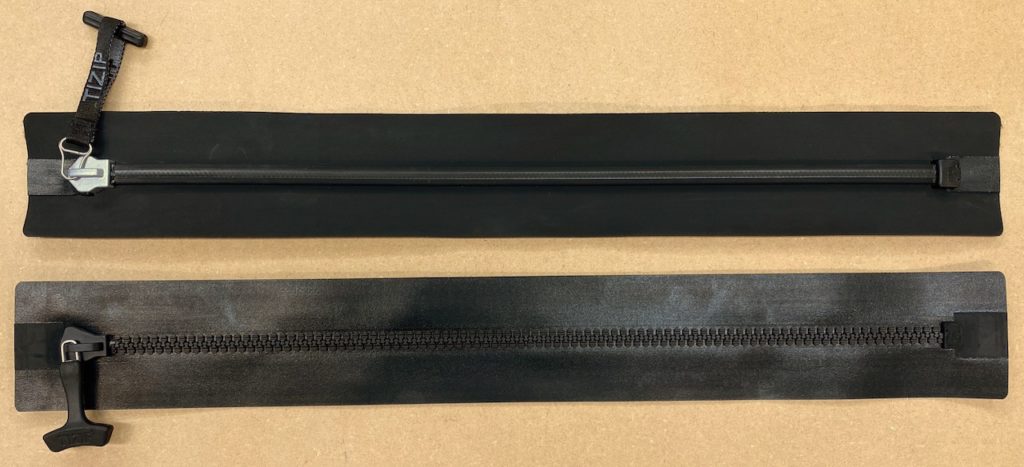
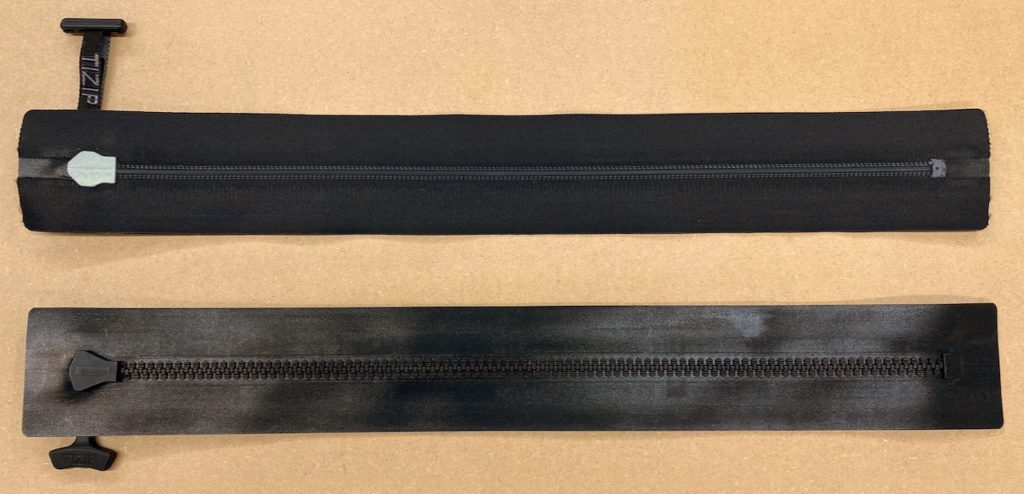
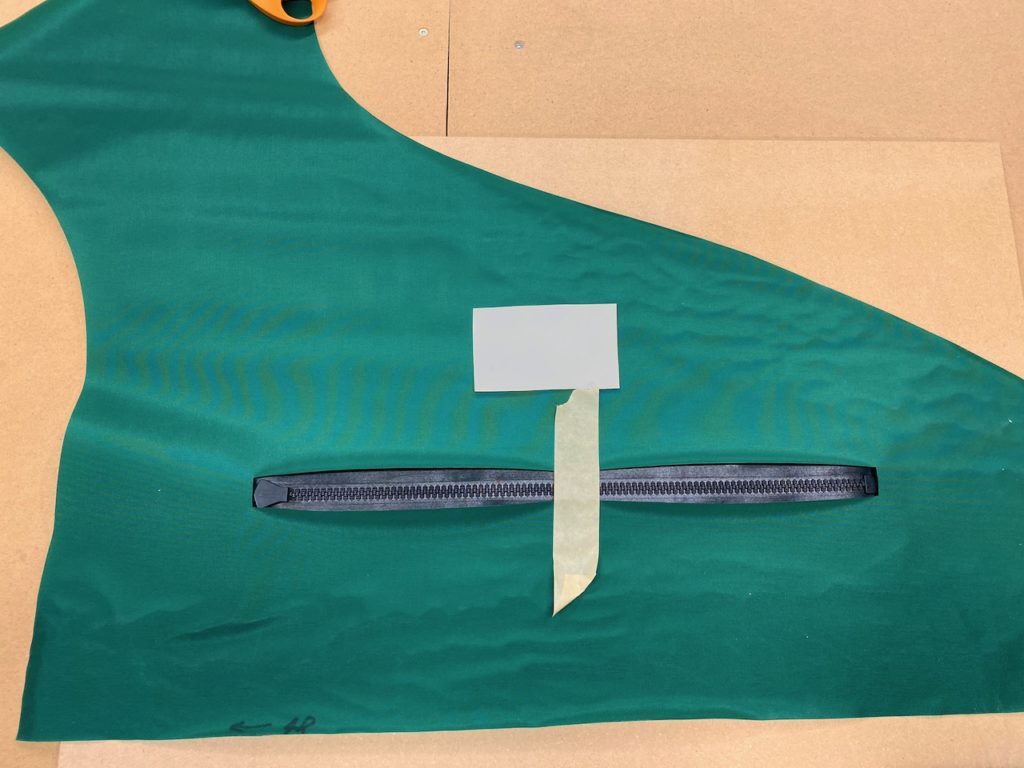
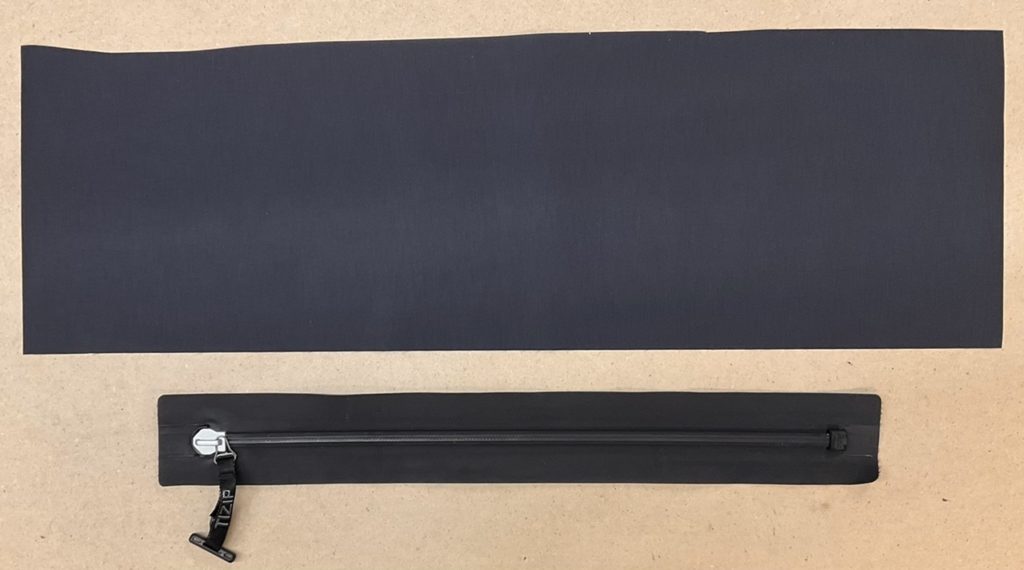
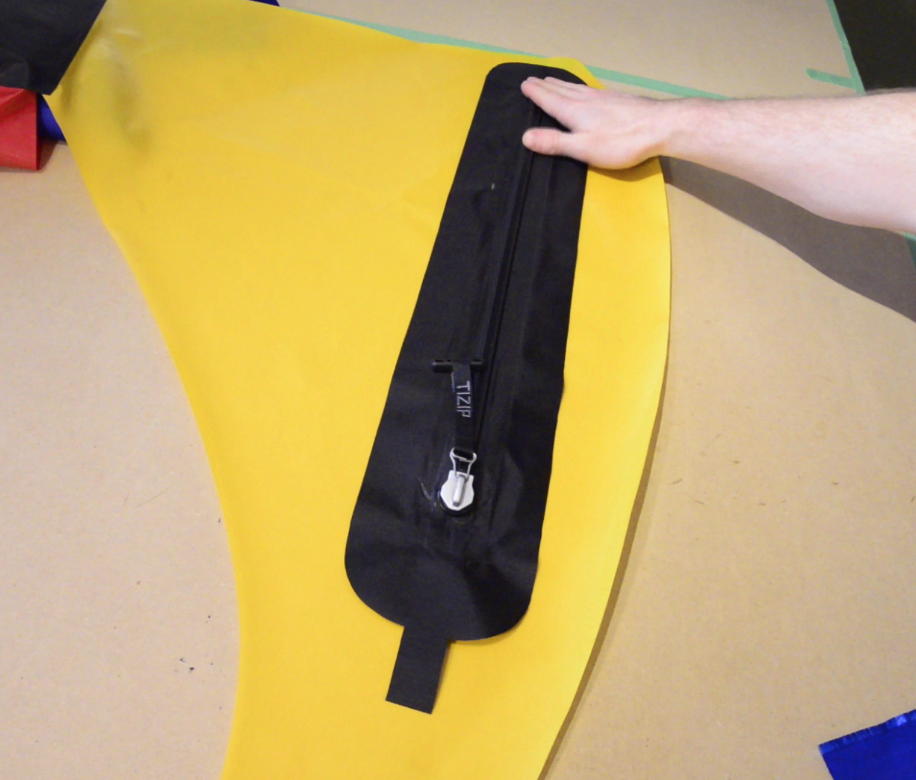
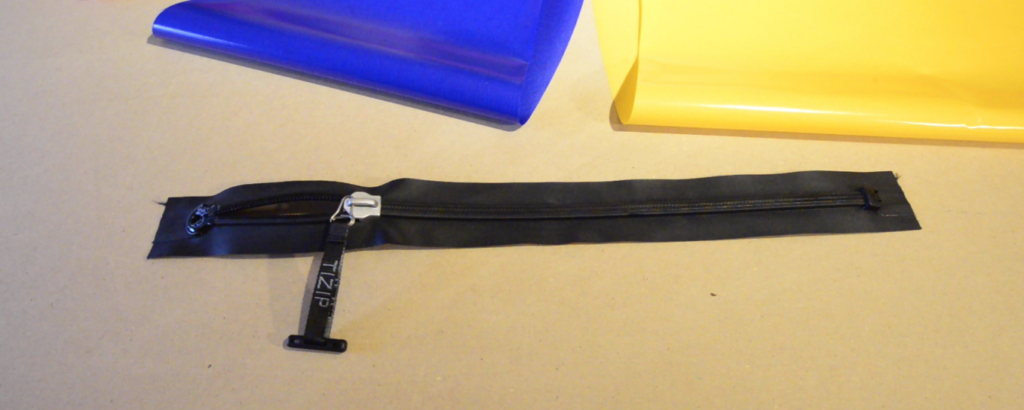
As you can see in the images above, both types of zipper come pre-mounted in a rectangle of fabric from the factory. For installation purposes, the important difference between the two types of zippers is that the SuperSeal has a heat sealable TPU coating on only one side (the outside) of the factory mount, while the MasterSeal is coated with TPU on both sides. That means that you can only seal the SuperSeal from one side (the outside), but you can seal the MasterSeal from either the inside or outside (or both).
Scroll down to the relevant section if you are:
- Installing a MasterSeal zipper while constructing a DIY Packraft
- Installing a SuperSeal zipper while constructing a DIY Packraft
- Installing either type of zipper in an existing packraft
- Tips, details, and options
Installing a MasterSeal zipper while constructing a DIY Packraft
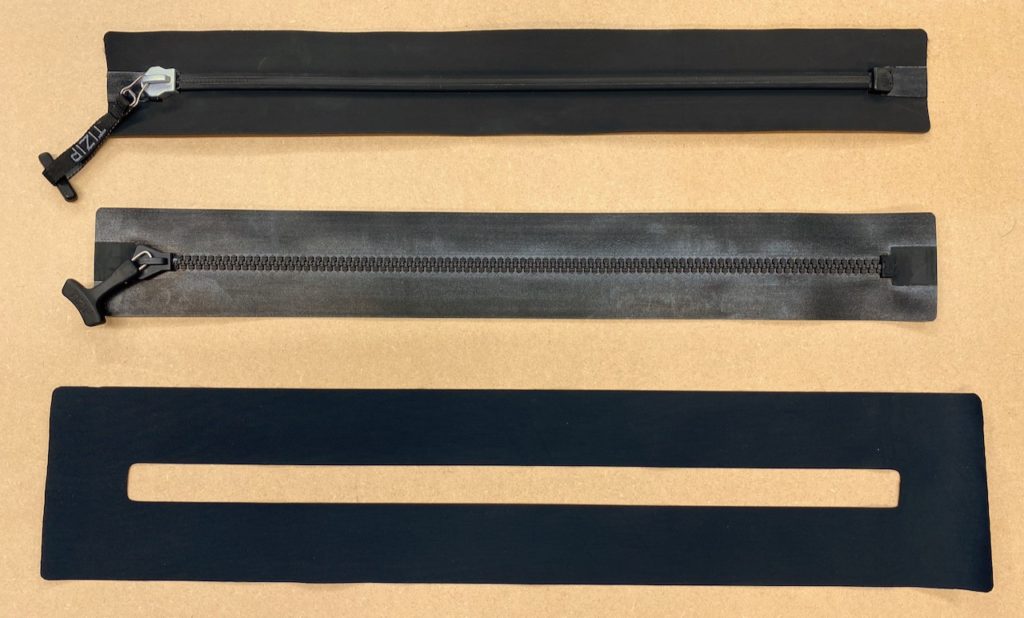
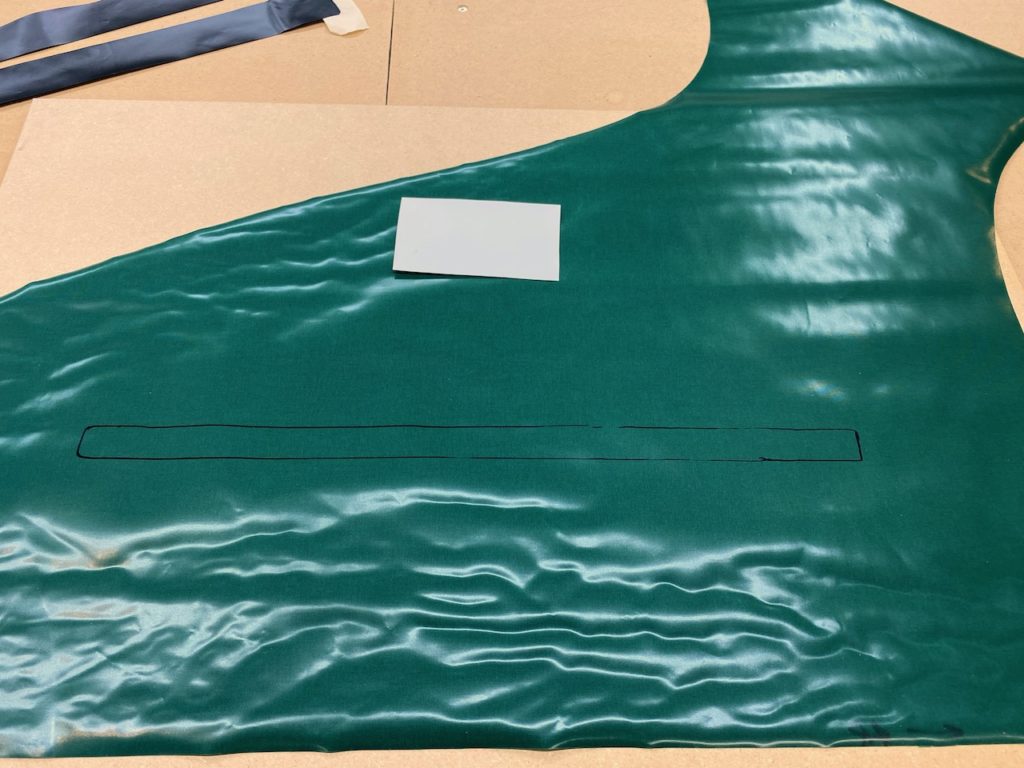
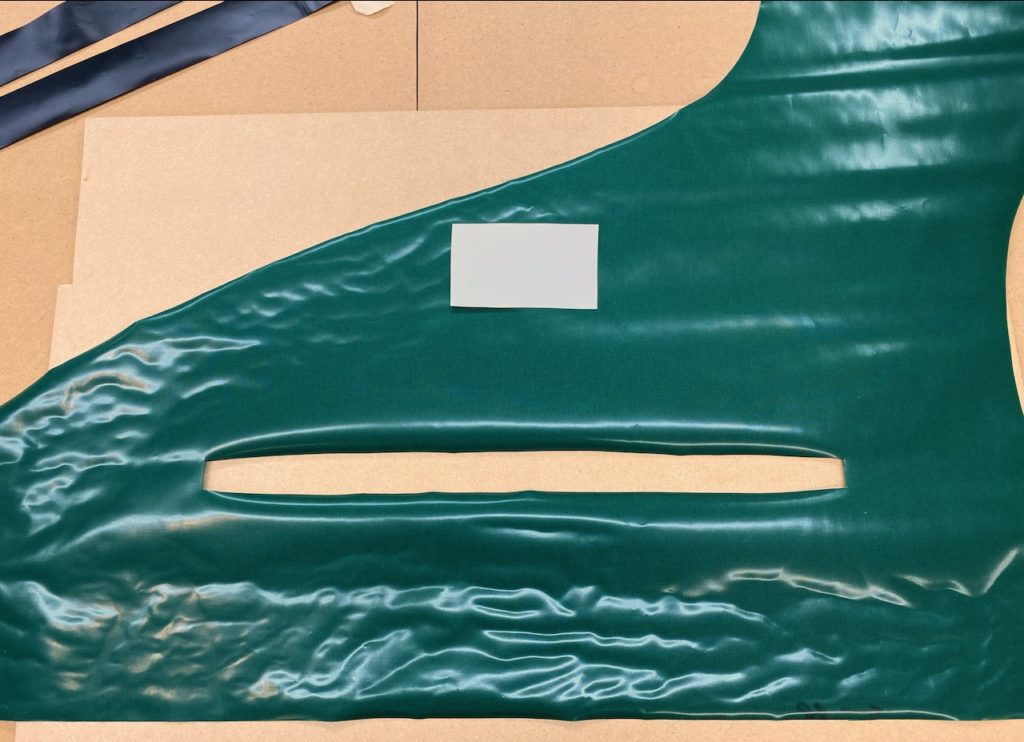
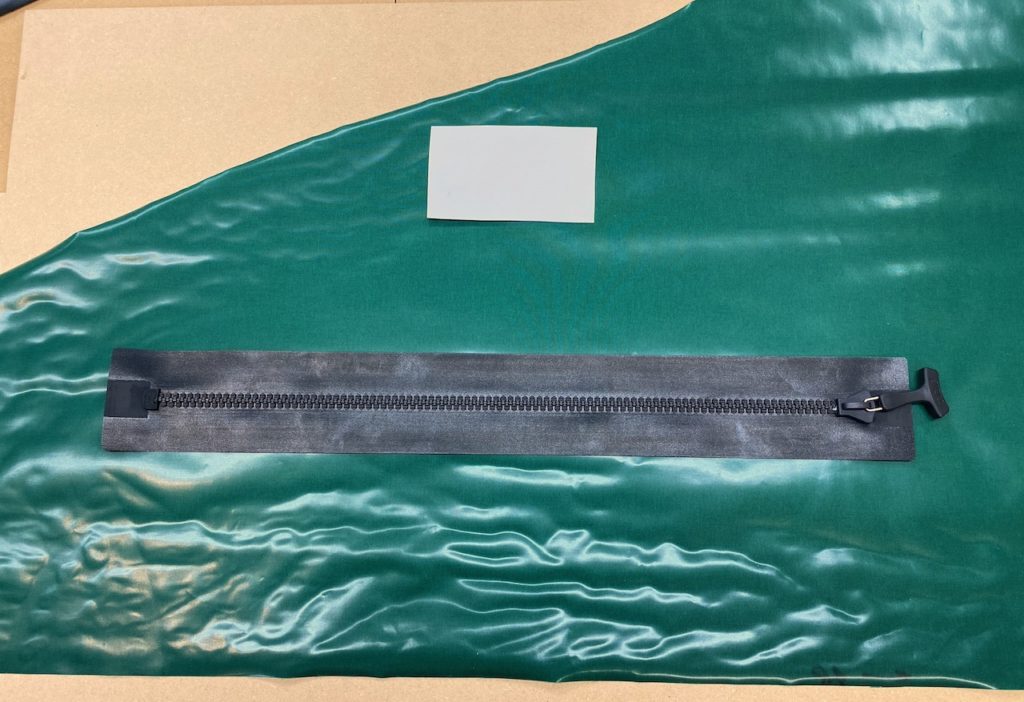
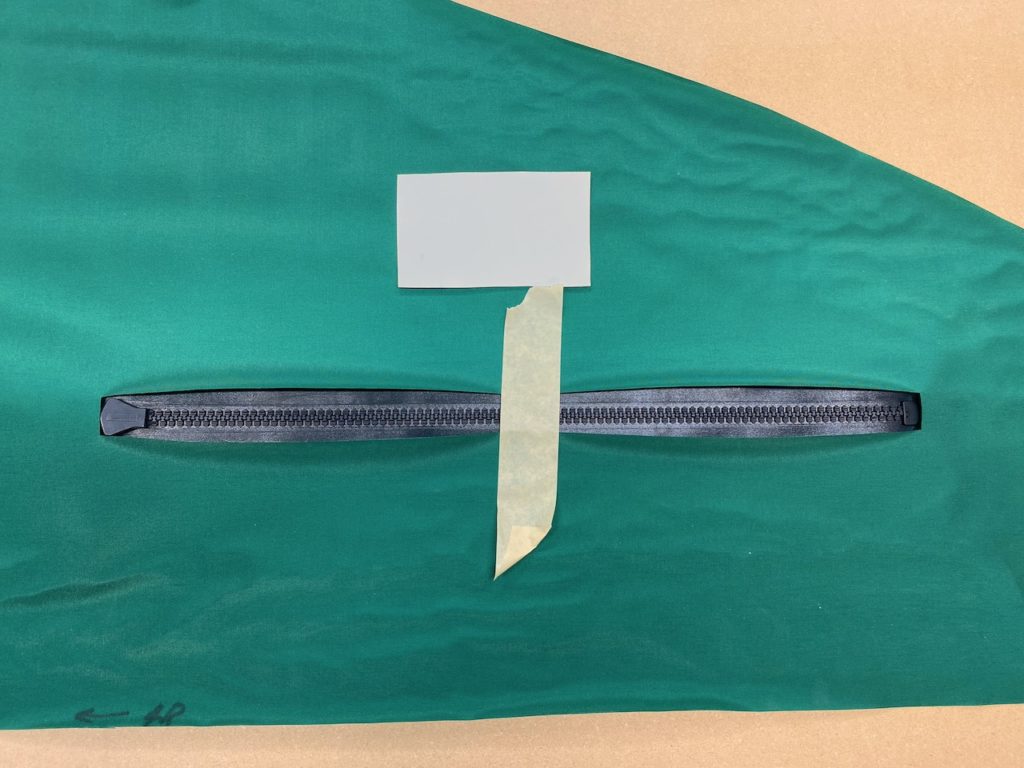
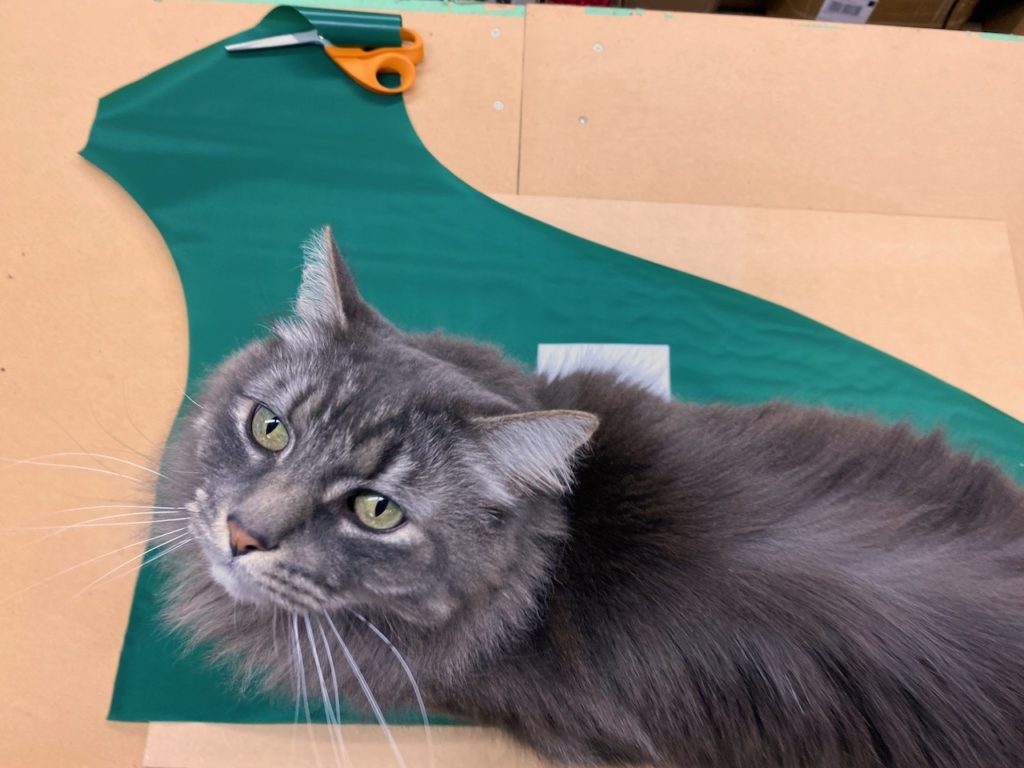
If you’re installing a MasterSeal while constructing a DIY Packraft, you can weld it directly to the tube fabric, like this:
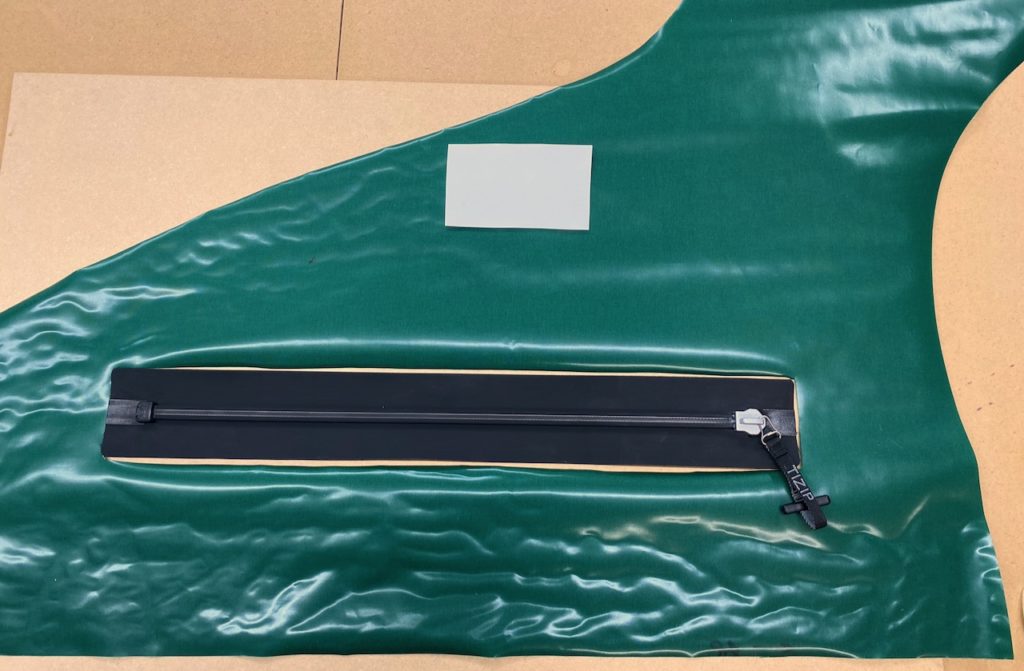
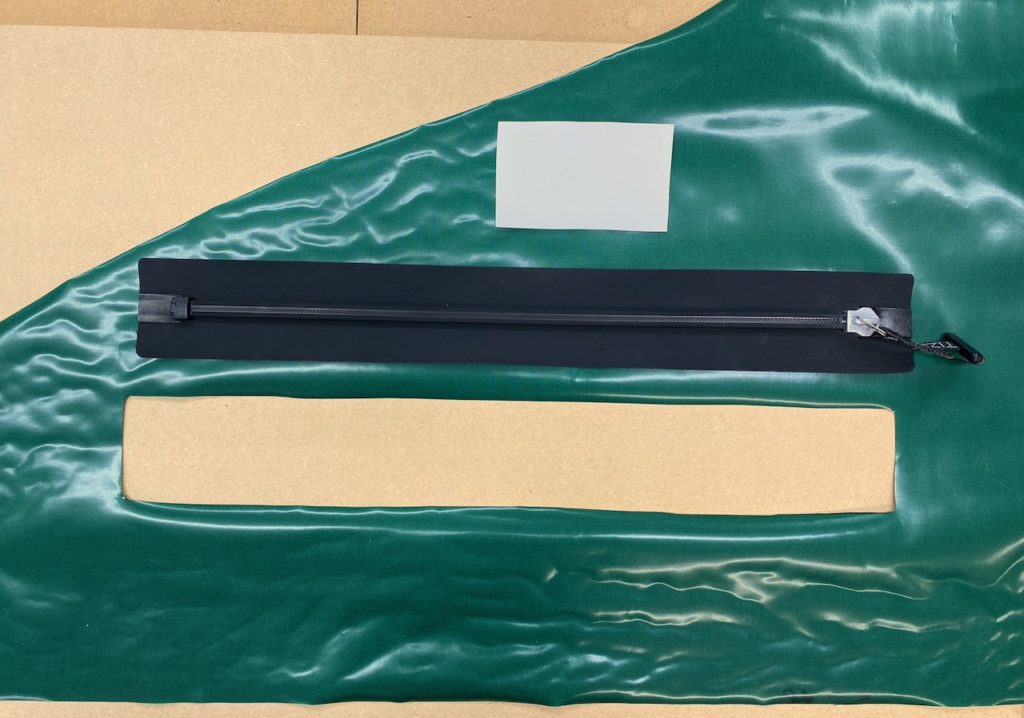
Installing a SuperSeal zipper in the tube fabric before constructing the packraft:

Installing either type of zipper in an existing packraft:
If you are installing an airtight zipper in an existing packraft, you will need to use a mounting rectangle regardless of whether you are using a SuperSeal or a MasterSeal zipper (because you can’t iron it from inside the packraft).

- Mount the zipper in a slotted rectangle of fabric, as in the Installation Details below. (If this is your first heat sealing project, practice heat sealing with scraps of fabric first following these instructions. A fabric sample pack can be used for practice.)
- Inflate the packraft, hold the zipper on the packraft to figure out where you want to mount it, tape it in place, and mark the location of the zipper’s ends with a permanent pen.
- Deflate the packraft, cut a slot in the packraft’s tube between the points you marked (measure twice, cut once!).
- Slide a wooden board (or something else that’s flat and heat resistant) through the slot you cut in the tube and then flatten the packraft’s tube fabric over the board with the slot centered over the board.
- Ensure your iron is set to the correct temperature by heat sealing some scrap fabric to the piece of fabric you removed from the packraft’s tube (see the Proper Heat Sealing Technique page).
- Place the mounted zipper over the slot and heat seal the edges of the fabric rectangle to the packraft’s tube fabric.
- Open the zipper and apply the supplied lubricant following the instructions on the included TIZIP zipper care card for your zipper model.
Installation Details:

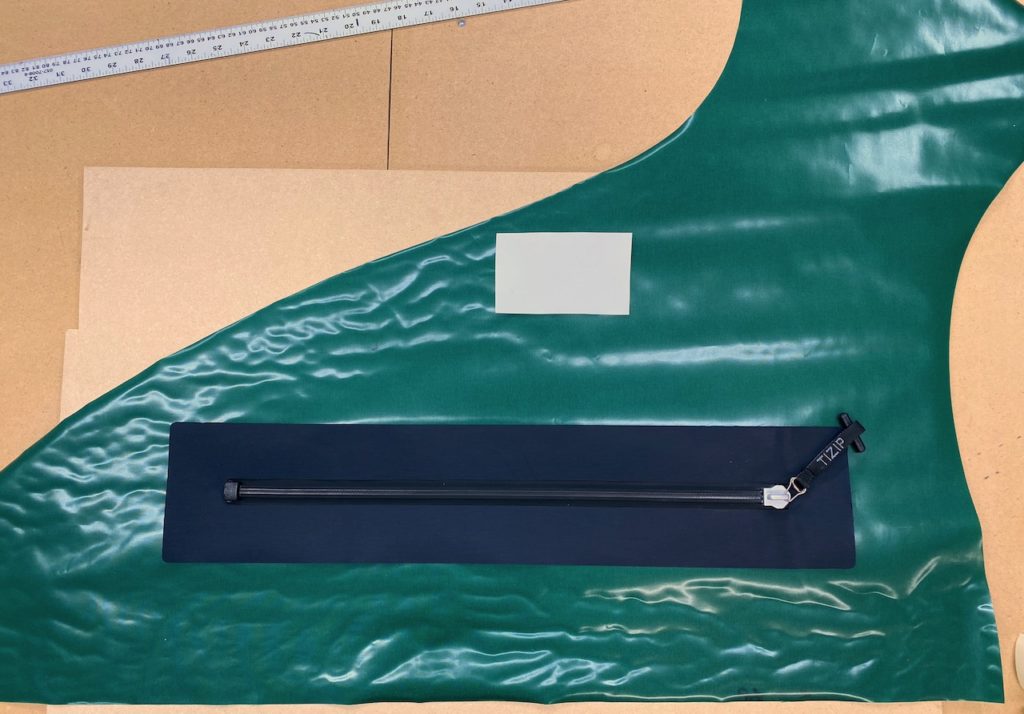
Because the heat sealable side of the zipper fabric faces in the same direction as the heat sealable surface of the packraft’s tube fabric, we must use a separate piece of heat sealable fabric to join them together:


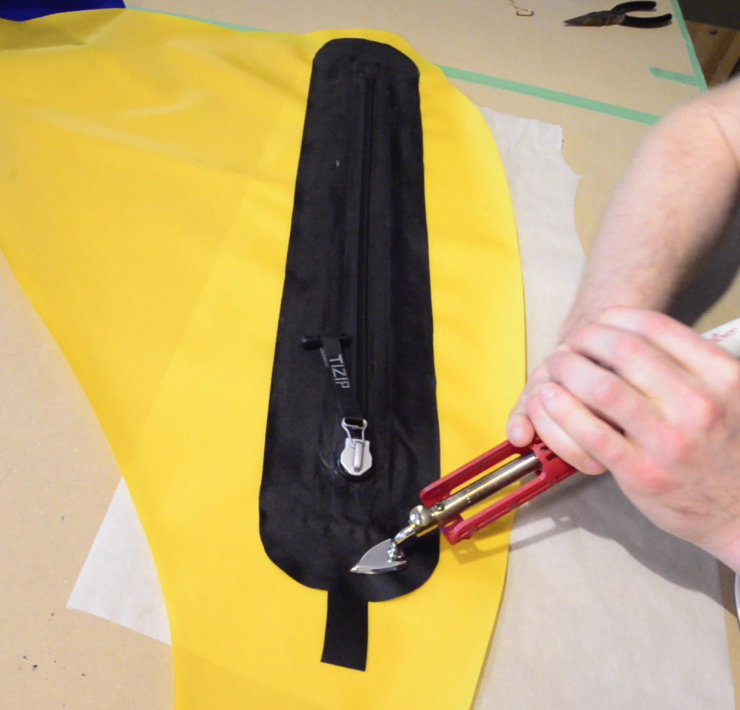
Use your heat-sealing iron to bond the slotted rectangle to the zipper fabric, making sure to center the zipper in the slot so the fabric won’t interfere with the zipper’s slider.
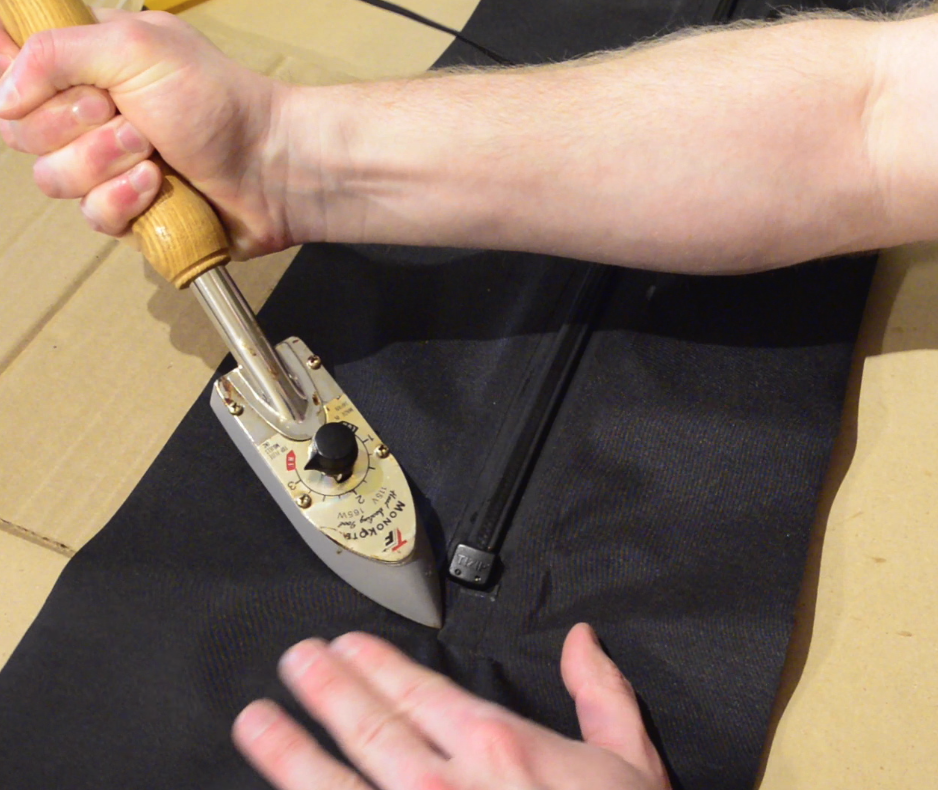
Note: Avoid touching the zipper with your iron.
Note: The heat sealable TPU on the zipper fabric is activated at a slightly higher temperature than the TPU on the packraft fabric, so you may need to boost the temperature of your iron a bit higher than normal to get a strong bond. Alternatively, you could use a clothes iron or a larger hobby iron for this step, like the one pictured above. Also note that the zipper fabric does not conduct heat as well as the packraft fabric, so you will have better luck making this weld by ironing from the slotted rectangle side instead of ironing the back of the zipper fabric.
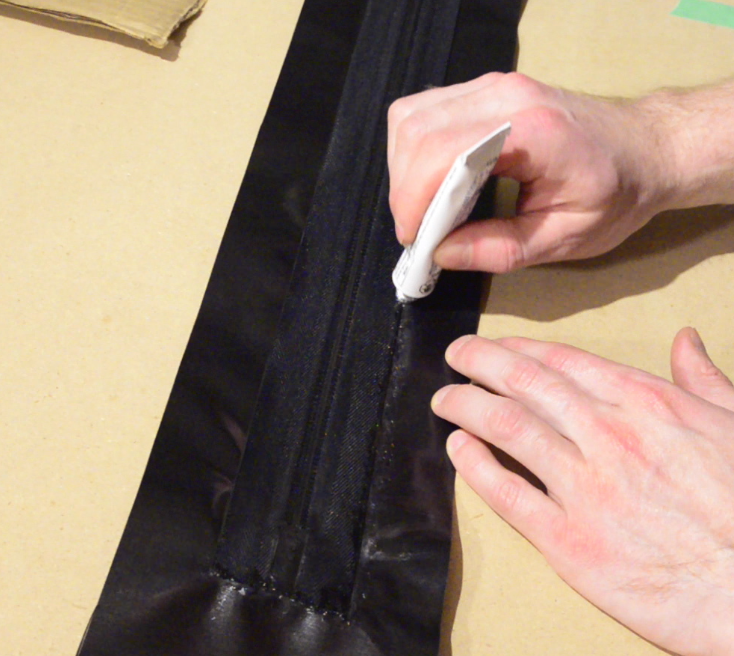
After mounting the zipper into the fabric rectangle, cut a slot in the packraft’s tube fabric. If you haven’t already assembled your packraft, this will be easy, but if you are retrofitting a completed DIY Packraft or a manufactured boat, you’ll find it easiest to inflate the packraft first and then hold the zipper in place to figure out where to locate it, and then mark where you want to cut a slot for the zipper (as demonstrated in the second video at the top of this page).
If you’re adding a zipper to a packraft other than a DIY Packraft be sure to consider the following questions when choosing where to locate your zipper:
- Will installing the zipper here allow me to store gear in both sides of the boat?
- Will the zipper be exposed to abrasion from any obstacles I paddle over/past?
- Will the zipper interfere with a spray deck installation or anything else I want to attach to my packraft?
- Will my arm rub on the zipper while I’m paddling?
- Will I be able to roll the packraft into a tight bundle without folding the zipper? (The TIZIP SuperSeal can be rolled lengthwise, but not folded sharply.)
After considering the above points, you’ll probably decide to locate the zipper as close to the tip of the stern as possible.
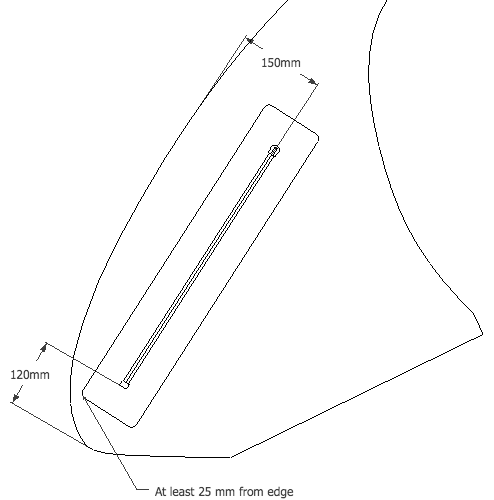
Zipper Location Measurements
Note: For the newer DIY Packraft models (Atlin, Skeena, Telkwa, 2-Person, Ultralight, etc.), zipper location measurements are given on their respective instructions pages.
You can choose a slightly different location if you want; just make sure there’s enough space around the fabric rectangle to add the seam strips along the tube edges, and avoid placing the zipper so far from the tip of the stern that it will wrap up and around the packraft’s tube into the cockpit – especially if you plan to add a spray deck to your packraft.
Note: The video and pictures on this page show the zipper being installed in a discontinued V2 model DIY Packraft. Your tube pieces may look different.
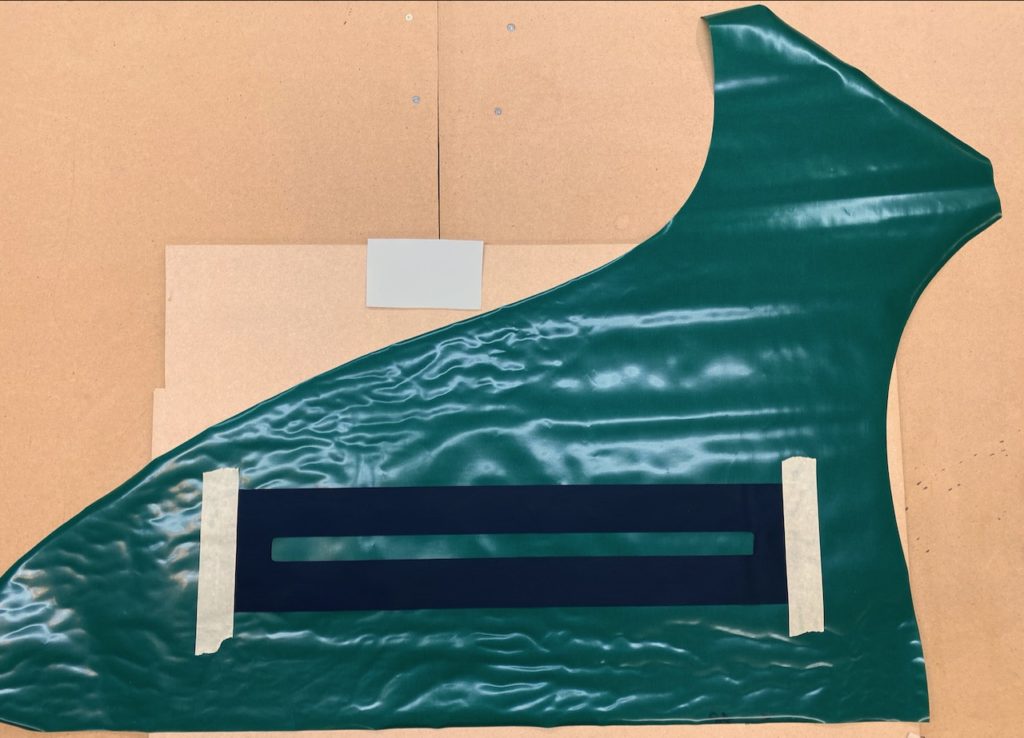
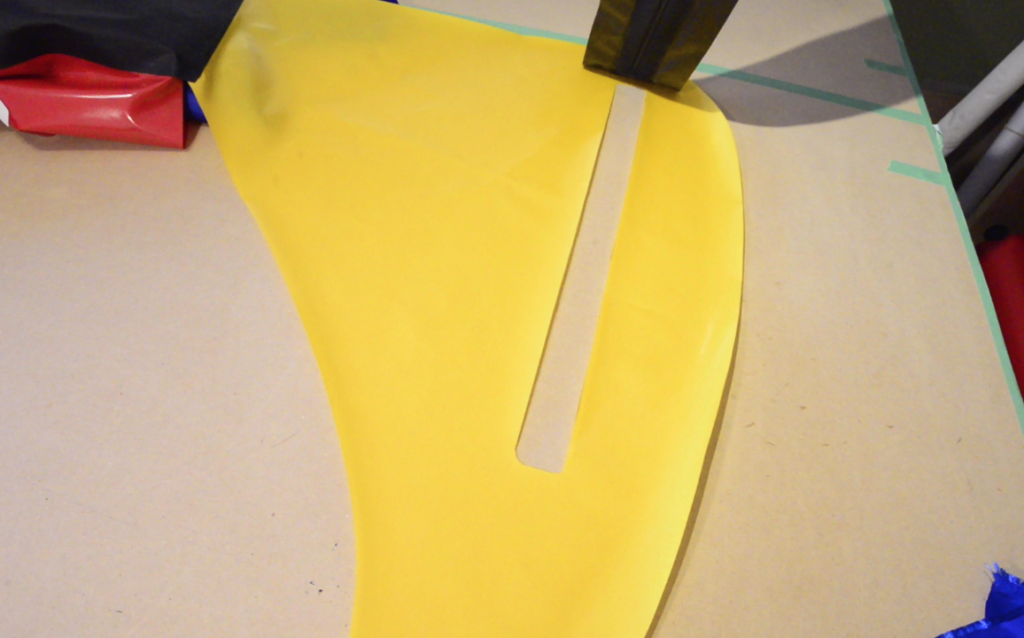
Mark the location of the zipper and then cut a slot in the tube fabric a few cm wide and slightly longer than the zipper (the exact dimensions aren’t critical).
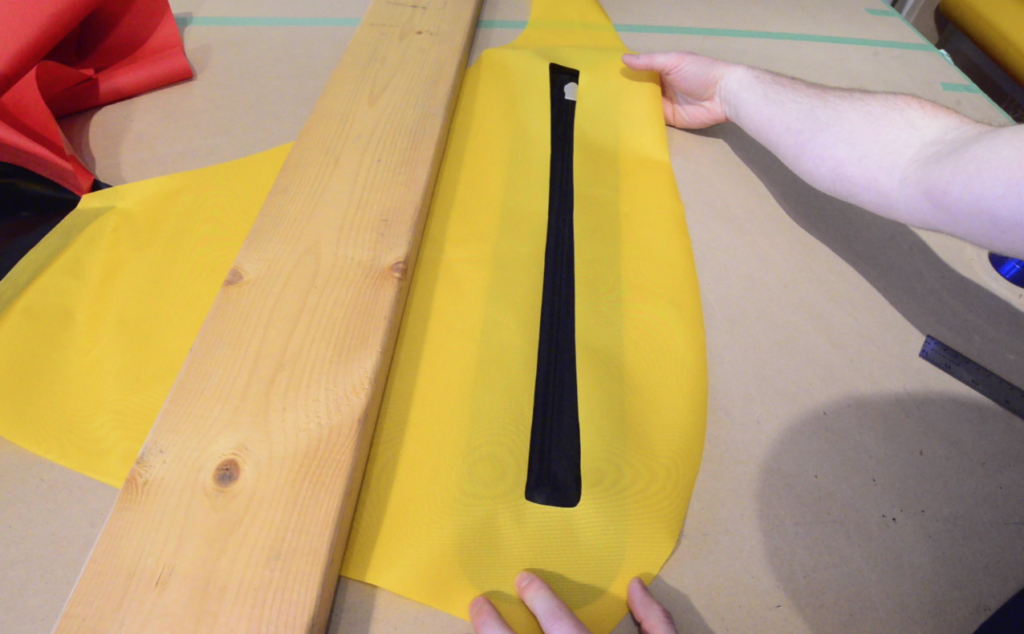
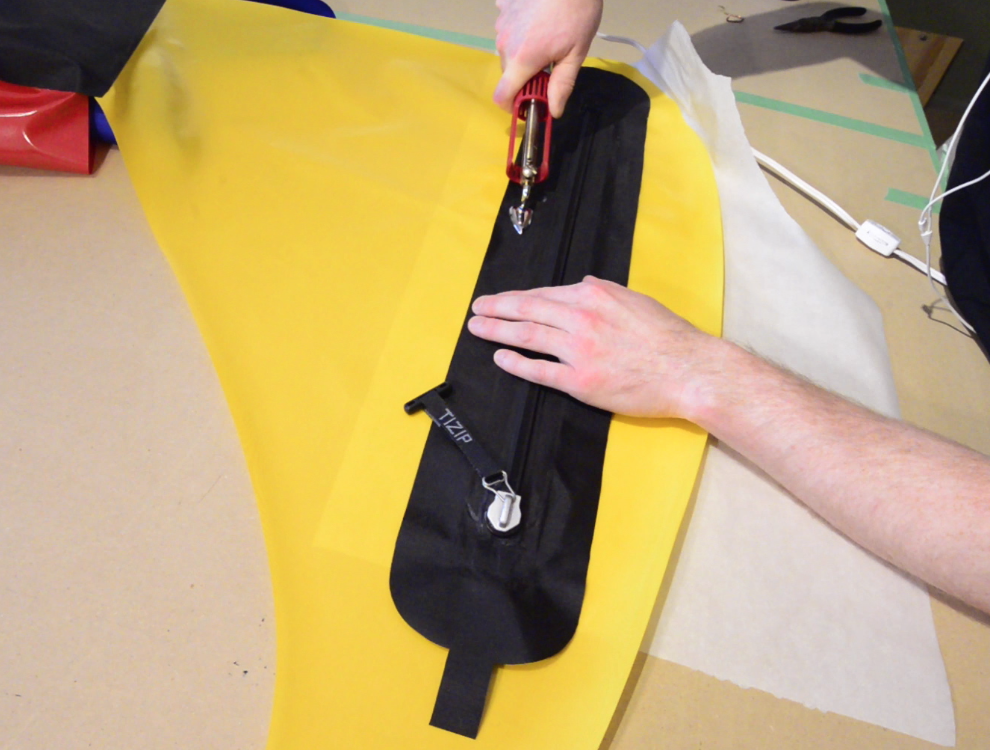
Position the zipper over the slot with the TPU side of the rectangle facing down against the TPU side of the tube fabric, and then heat-seal the rectangle to the tube.
Tip: Use masking tape to hold the zipper in place and then tack weld several points with your iron to prevent the fabric from moving as you weld the slotted rectangle to the tube fabric.
Now the zipper is installed in the packraft’s tube piece.
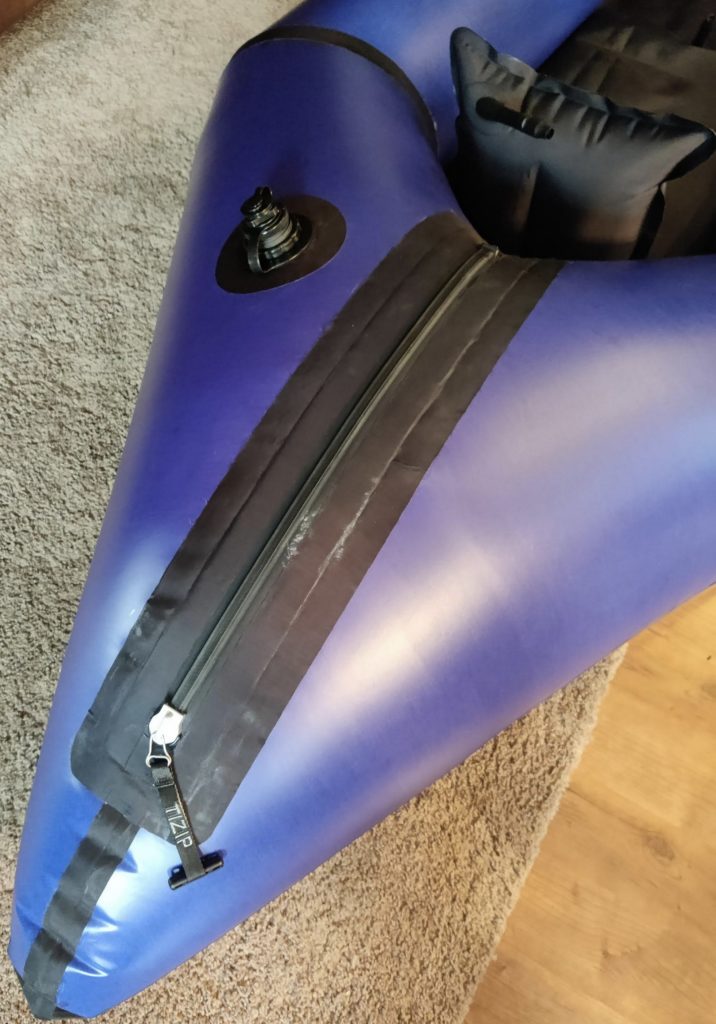
Option: Install Zipper in Rear Center Seam
Instead of locating the zipper in one of the rear tubes, you may choose to install your zipper in your packraft’s rear center seam, as Laith Barnhill did, shown in the photos below. (Note that this location may interfere with a spray deck.)
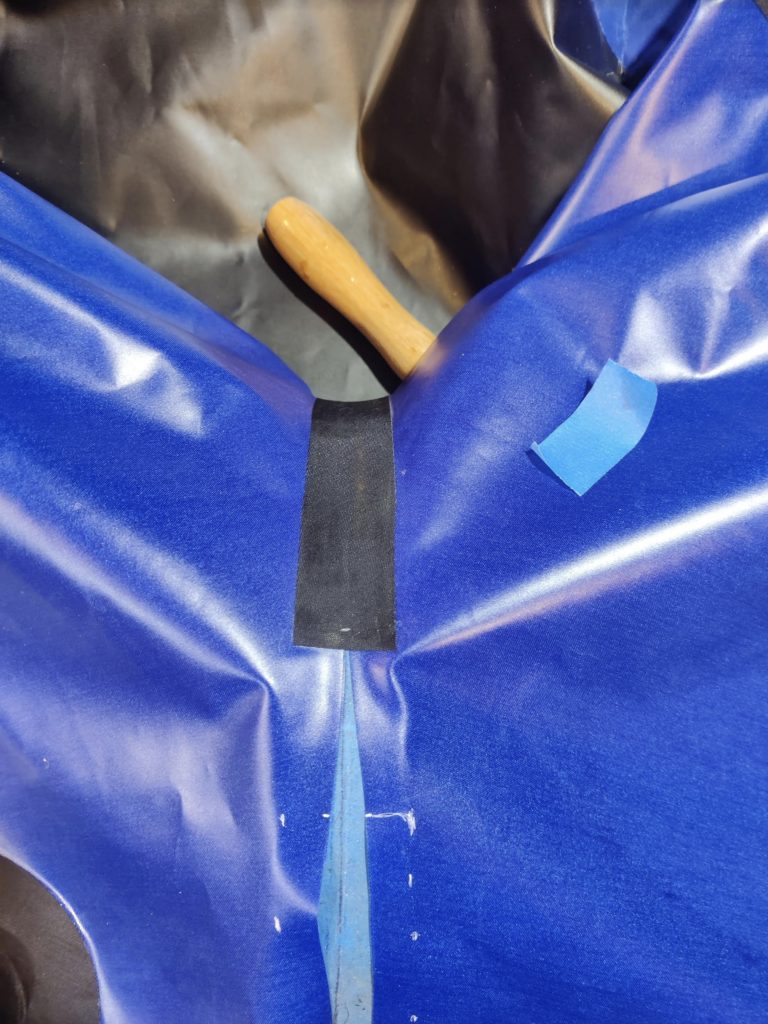
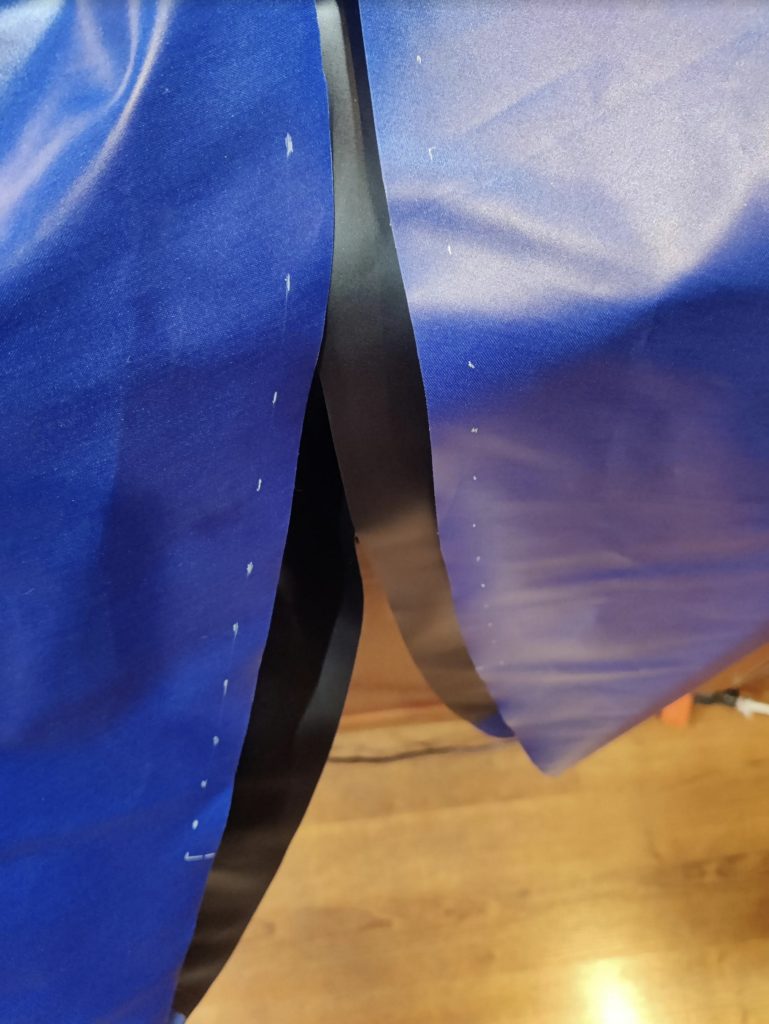
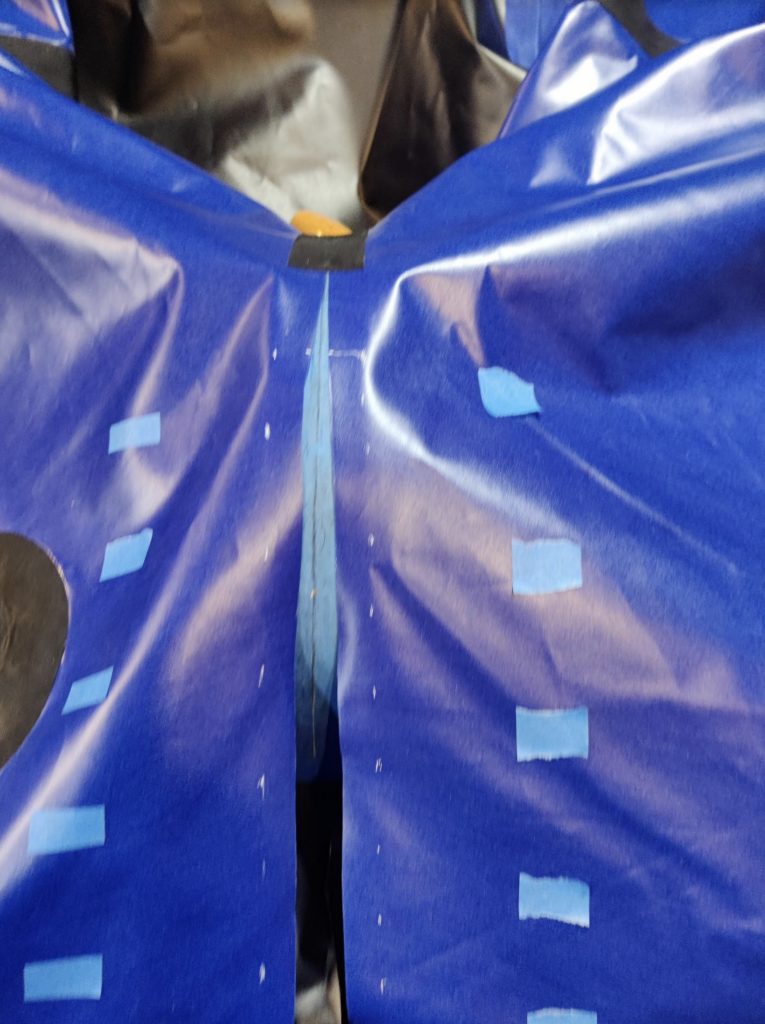
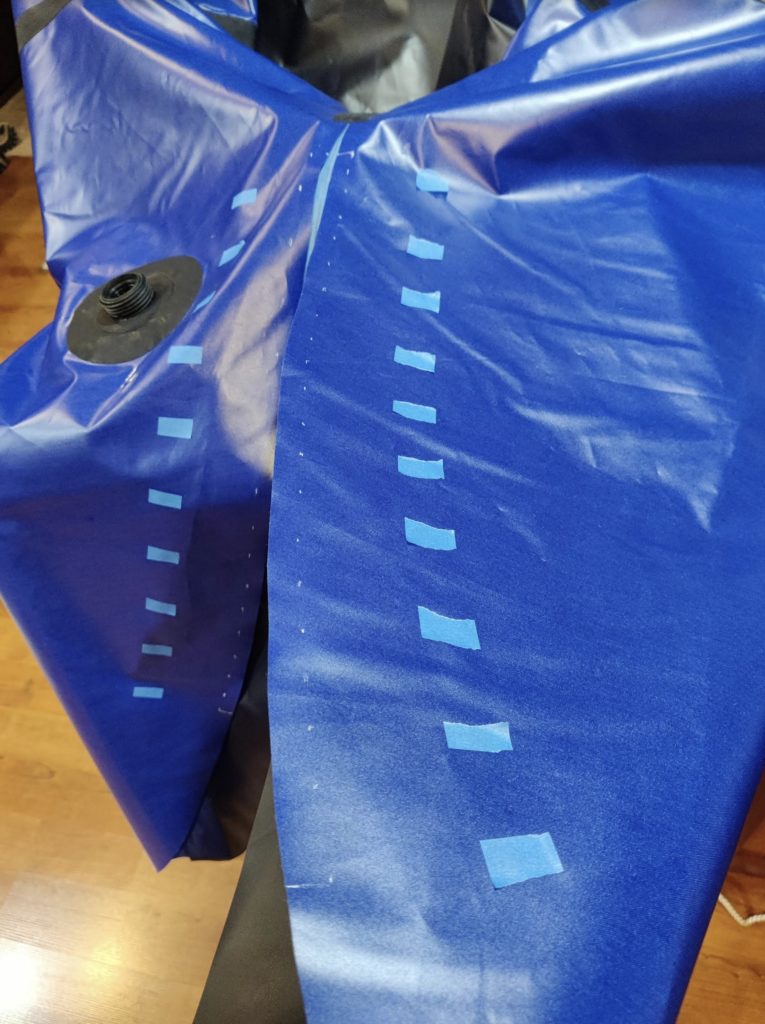
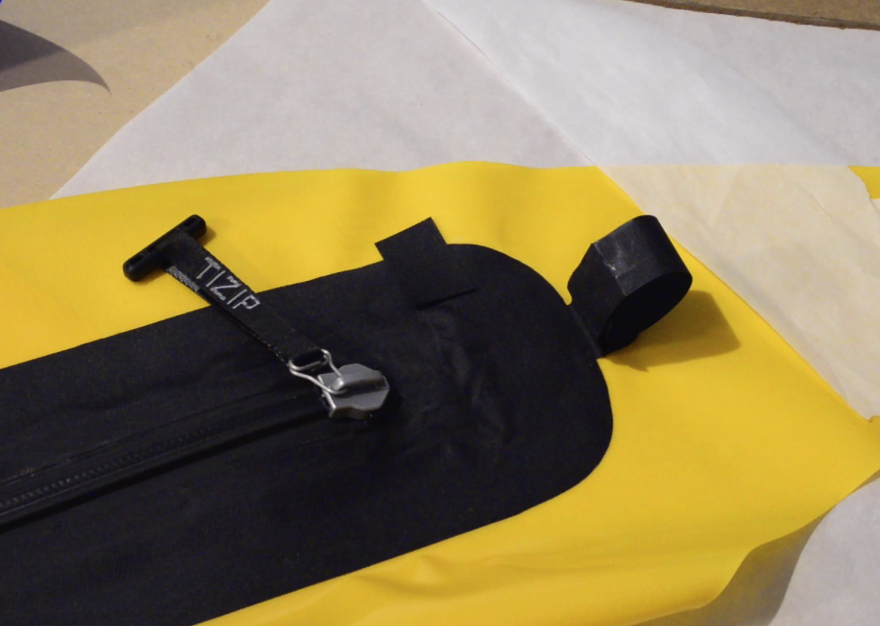
Optional grab loop:
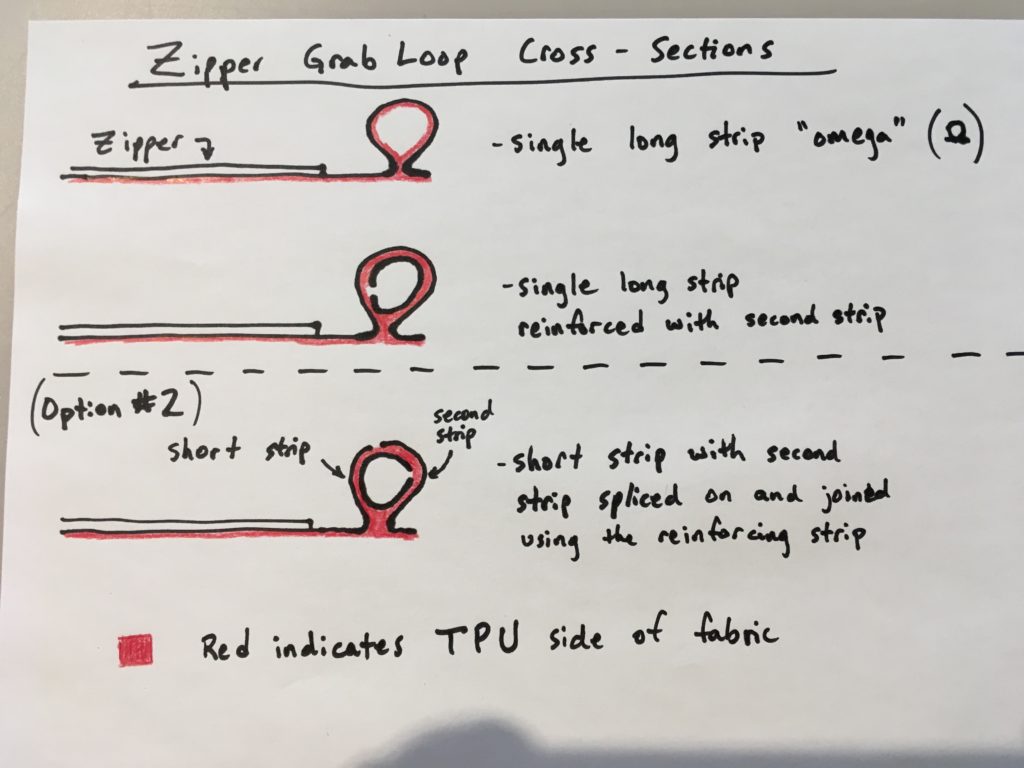
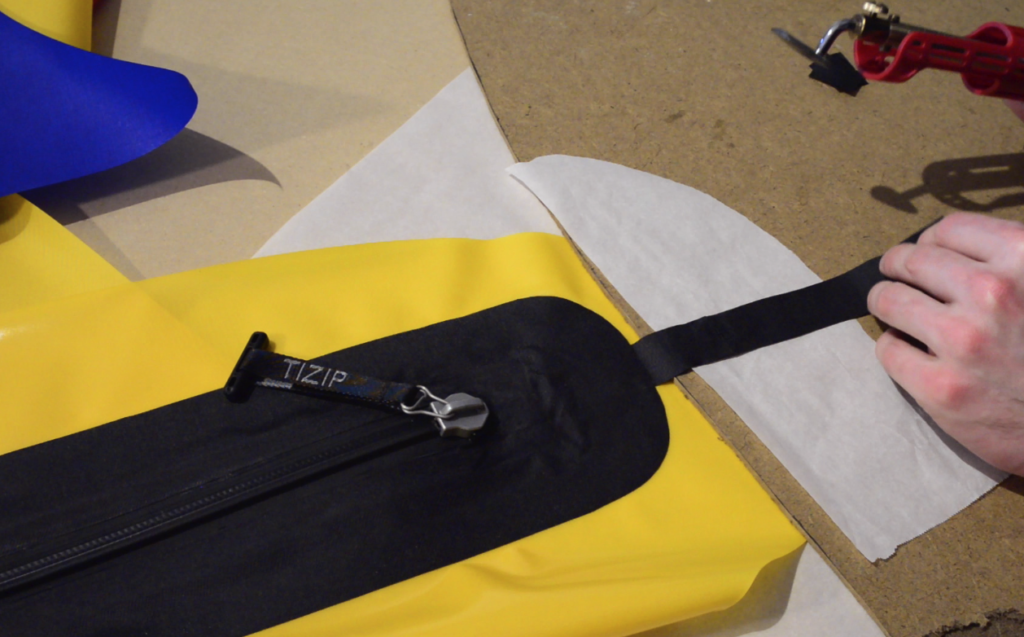
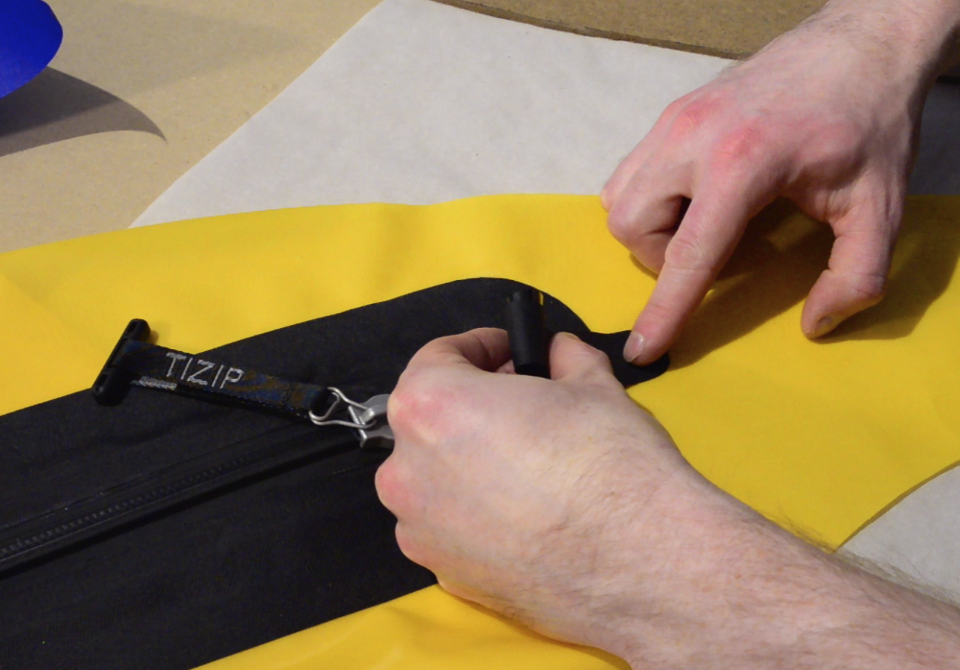
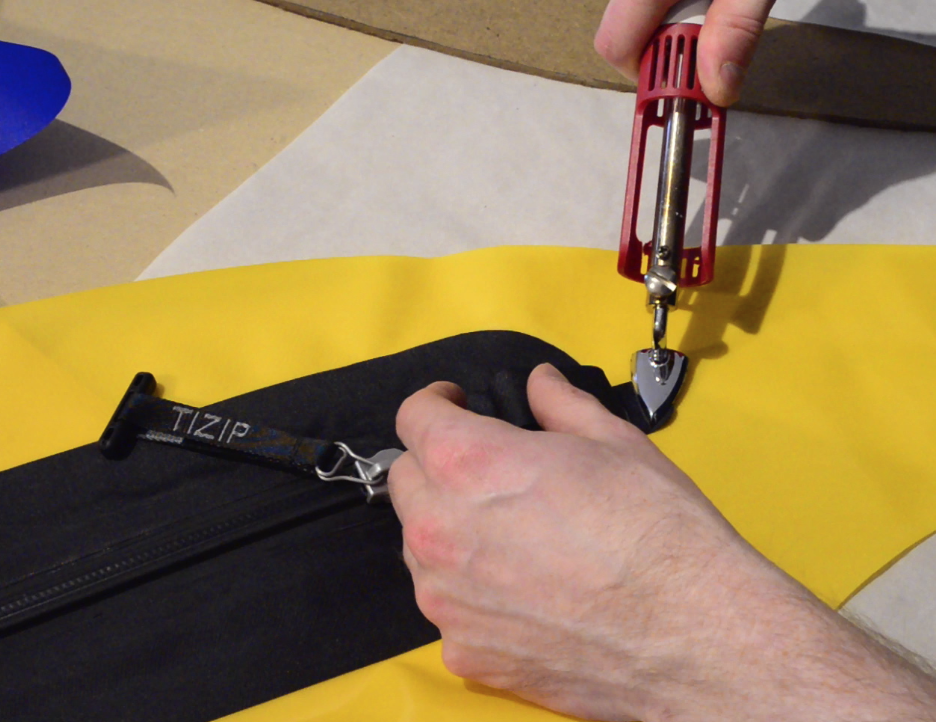
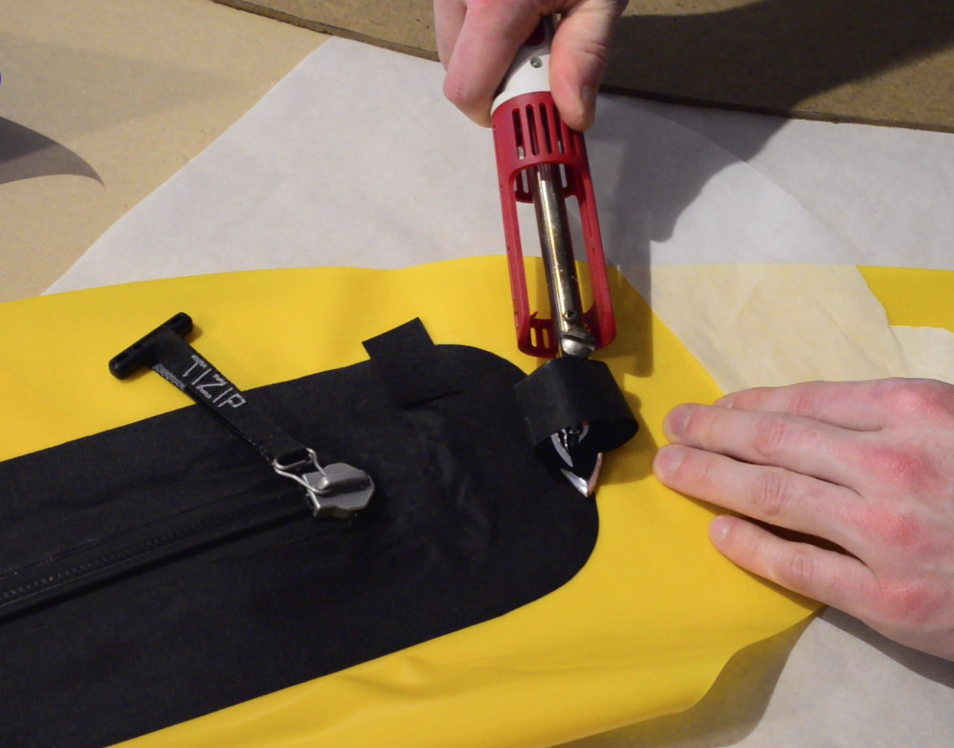
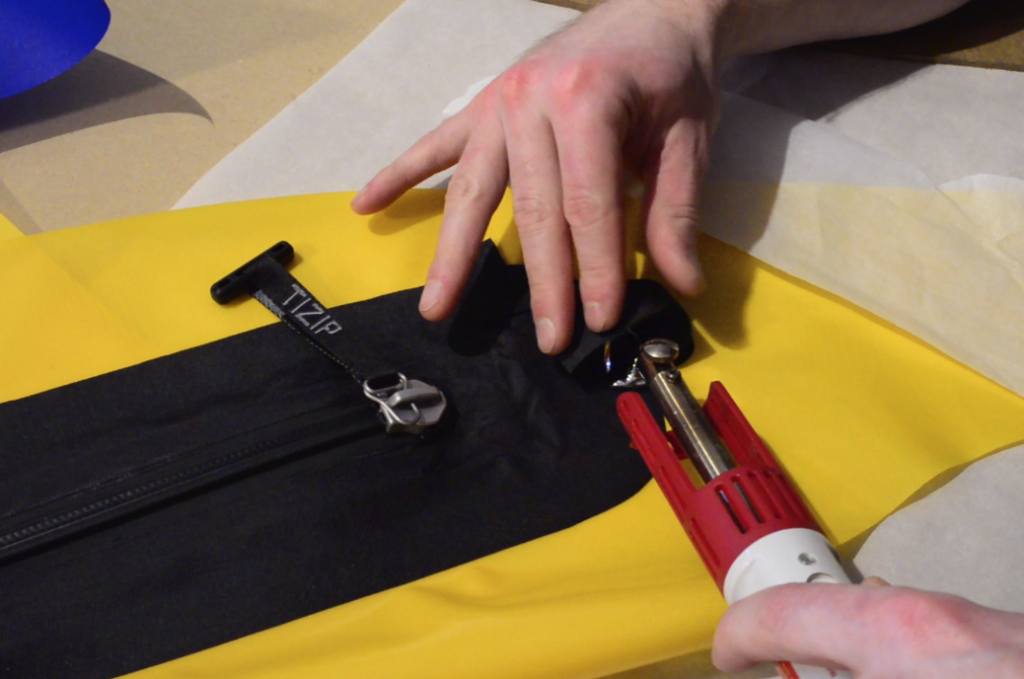
To add a grab loop to the end of your zipper, as I did in the demo, see the two different methods shown in the cross-section diagrams below.
After your packraft is complete, don’t forget to lubricate the zipper with the included silicone gel (but don’t do that until you’re finished, otherwise you might get silicone on the fabric and this could interfere with your heat-sealing). Proper lubrication is crucial for the functioning of the zipper!
If your zipper starts to leak air, see this page.
Questions? Please leave a comment below.
50 Comments
Rémi Bernier · January 26, 2025 at 5:00 pm
Est-ce qu’il y a une raison de ne pas coller le zip superseal directement PTU à PTU avec le tissu du ULpackraft sans utiliser le grand rectangle noir ?
Matt (Admin) · January 26, 2025 at 6:17 pm
You could do it with the MasterSeal (the type of zipper with the visible teeth), but not the SuperSeal, because the SuperSeal has the TPU on the wrong side of the zipper (the pull would be inside the packraft).
Mike · January 12, 2023 at 4:42 am
Hi Matt, you mention, :”In newer kits I provide a pre-scored rectangle with square corners (which you can round slightly, but not as much as the corners pictured here) and no pull tab.” Is that for the ultralight kits as well? I ask because we can’t find such and do not have enough spare to cover the waterproof zipper. We were thinking of ironing a few of the scraps together to make a piece large enough, but wanted to check with you before you do such in case we are overseeing something obvious. Thanks again.
Matt (Admin) · January 12, 2023 at 8:08 am
Hi Mike, in the Ultralight kits I provide a rectangle of heavier black fabric that is slightly larger than the zipper and isn’t pre-scored. I’ll try to make that clearer in the instructions. If you’ve used that fabric for something else then send me an email and we’ll sort it out. I’m sure that using multiple pieces could work, but it would be better to use just one.
Dayne · January 13, 2023 at 6:03 pm
Is there any reason not to use the floor fabric for a pull tab? I’m concerned that the non tpu side of the pull tab could possibly create a leak between the peice that goes around the tizip and the tube fabric. The double sided floor fabric just seems like it would seal better here. Was hopeful that one layer of the thicker fabric would safice in place of the 2 peices of tube fabric. Also is there any merit to adding a pull tab at both ends? It seems like it may be helpful but my zipper is still new and very stiff.
Matt (Admin) · January 13, 2023 at 8:04 pm
I think that would be fine, as long as you arrange the pieces so there’s no peeling force applied directly to the TPU when you pull on the loop(s).
Kris · January 8, 2023 at 10:42 am
Hi, I would like to install some attachment points inside the tubes to prevent the drybags from moving about while paddling. What do you recommend is the best way to do this, if at all possible? My packraft has only TPU coating on the outside. Thanks
Matt (Admin) · January 8, 2023 at 10:50 am
Without TPU on the inside of your packraft you will need to use an adhesive – maybe HH-66, Stabond, or something like that. You could make the attachment points along the lines of the ones shown on the Tie-Downs & Attachment Points page (under the How-To menu above), but glue them together instead of ironing if you’re using something other than TPU-coated fabric. I’d recommend first testing one of your attachment points to the point of destruction while it’s attached to a scrap of fabric (not your packraft) so you’ll be confident your attachment points will hold.
Larry · March 20, 2022 at 4:12 pm
The instructions for installing a zipper in an existing packraft say to make the positions marks and the cut(s) while the packraft is deflated and flat.
Shouldn’t it be marked while inflated, and thus the cut(s) will be on a slight bias, and the wooden bowl will be needed to seal it all together? Or is the difference too slight to matter?
Matt (Admin) · March 21, 2022 at 9:24 am
I think you will find that it doesn’t make a difference because the fabric doesn’t stretch much when it’s inflated, but one way to check would be to mark it while it’s inflated and then check to see if something changes after it’s deflated. Each tube segment is basically a flat sheet that is curved into a conical surface, so except for a tiny amount of stretch in the fabric, the geometry within the borders of a single tube segment shouldn’t change whether it’s inflated or not.
Catherine L. · February 22, 2022 at 6:03 am
Hey Matt,
I am currently contemplating where to install the tizip zipper on my 2 person packraft. I read your recommendations for placement and even consulted the gallery of photos to see how it will fit. I didn’t see any pictures of the 2 person packraft with the tizip, however there was a couple of photos of single person packrafts with the zipper. On the photos of single person packraft where the zipper is installed according to recommendations (parallel to the stern seam strip) it seems like the end of the zipper is very close to the water or maybe even sits in the water. I would ideally like the zipper to be placed in a way where the end of the zipper doesn’t sit in the water and is placed above water (in flat water). Because I am installing the zipper in the tube fabric and not on a completed packraft, I can’t inflate it to see the positioning of the zipper according to your placement suggestion. Can you tell me how far above the water the end of the zipper sits when following your placement recommendation for the tizip zipper on a 2person packraft (considering the packraft packed to full capacity in flat water) ?
Thanks,
Cat
Matt (Admin) · February 22, 2022 at 9:51 am
Hi Cat, I think you’ll be fine installing it in the recommended position as long as you distribute the weight evenly and not all at the stern (which you should do in any case). If you look at the picture here you can see that the tip of the stern isn’t in the water: https://www.diypackraft.com/shop/merchandise/kits/2-person-diy-packraft-kit/ That’s with me and about a hundred pounds of rocks on board, so you would have to add a ton of weight to sink the stern. If you’re concerned about it, you could always move the zipper a bit farther away from the tip of the stern though. Cheers
Rolf Bjørling Salomonsen · May 25, 2021 at 4:23 am
Hi Matt.
Fantastic website and resource you have created :). Am I correct, that your fabric is black at the “non-TPU” side? WHat kind of fabric is it? I can only seem to find a black GSM 450 with a Grey’ish/white backside… not the look I would like :-/.
Another thing. The overseas (Europe/EU) shipping rate is rather extreme. Would you consider using ordinary UPS/GLS or the like for shipping?
Cheers – Rolf
Matt (Admin) · May 25, 2021 at 7:33 am
Thanks Rolf – yes, it is black.
I have investigated other shipping methods many times and found no better option.
Nick · May 11, 2020 at 1:03 pm
I am in the process of building the V3. I just installed the zipper to L5, all seems are good. I welded and glued the zipper. On the back (inside) side the fabric is not bonded to the nylon of the zipper. Do you recommend also gluing this area? Masking the back side of the zipper of course. Thanks, I’m going slow but having a blast when I get a chance to work on it.
Matt (Admin) · May 11, 2020 at 1:06 pm
Excellent! It’s probably overkill, but I do glue that area too. Cheers!
Jimmy · January 10, 2020 at 7:10 pm
Hey Matt, I love you website and what you are doing, what an amazing resource! What temperature do you recommend for sealing the tizip? Thanks
Matt (Admin) · January 11, 2020 at 12:52 pm
Thanks, Jimmy! I recommend using a slightly higher temperature than for sealing the regular DIY Packraft fabrics. Temperature dials on the irons are really inaccurate though, so I hesitate to give a number… it’s best to figure it out by trial and error. Of course, you can’t destructively test the weld with the zipper fabric, so just make sure the iron is hot enough to easily seal the DIY Packraft fabric first and then it should work fine on the zipper fabric. When you’ve sealed a bit of DIY Packraft fabric to the zipper, let it cool and then gently try to peel it back. It should be pretty easy to tell if the TPU layers have fused together or if they can be peeled apart without ripping. Cheers!
Joep · June 16, 2019 at 3:51 am
Hi,
any tips on how to weld (as in without adding glue) the ridged/textured parts at the ends of the zipper in an air tight way? or is adding auqaseal the only option here?
thx
Joep
Matt (Admin) · June 17, 2019 at 8:48 am
I just try to push the fabric into the contours with the tip of the iron to make a good seal until it looks like it’s airtight. If there’s a leak there after the packraft is complete, you can go over it again with your iron or just spread a bit of Aquaseal or Seam Grip over the area on the inside of the packraft so it’s not visible from the outside. Cheers!
d.sushkov · June 14, 2019 at 5:11 am
Tell us, those who installed Tzip, what width for a slot in the tube fabric did you choose? Tzip has a width of 70 mm. Will I do the right thing if I make a 70 mm slot? In the manual, Matt wrote: “”Mark the location of the zipper and then cut a slot in the tube fabric a few cm wide and slightly longer than the zipper (the exact dimensions aren’t critical).”
Matt (Admin) · June 14, 2019 at 8:07 am
Yes, 70 mm is good. You can see in the second video above how I traced the zipper and cut out a slot the same width as the zipper fabric.
Nele · April 25, 2018 at 2:28 pm
I glued the edges before I heat sealed the zipper. Can I still heat seal over the glue?
I find that my zipper has wider edges than yours. I hope 1,5 cm is enough to seal the zipper to the packraft?
Matt (Admin) · April 26, 2018 at 7:04 am
Yep, 1.5 cm should be fine. I’m not sure about heat sealing over glue.
Adam · May 1, 2018 at 12:14 pm
Nele,
I have tried to get the TPU to bond to Aquasela with no luck… HOWEVER… if you find there is an overhang you can add a little glue to the previously glued area and press the TPU side of the fabric that won’t bond in it. Also, the dimensions of the TIZIP completely uninstalled is the dimensions you want to cut in the tube fabric. The dimensions Matt has above for the ‘slot’ in the black fabric that bonds to the tube fabric is correct.
d.sushkov · June 11, 2019 at 7:18 am
“Also, the dimensions of the TIZIP completely uninstalled is the dimensions you want to cut in the tube fabric”.
I correctly understood that the dimensions of the ‘slot’ should correspond to the size of the uninstalled TIZIP, that is, 550×70 mm?
Adam · April 23, 2018 at 8:54 am
So there are 2 things I’d highly recommend. Wait until you’ve attached the TZIP to the packraft (yellow in the example above) fabric before adding aqua seal to the back. If you add it before, like in the example above to the black fabric, you just cover up the amount of area that you can bond the TPU.
When installing the grab loop. Make the first example on the white board. The ‘omega’ with TPU on the inside then just iron it flat to form a grab ‘tab’. It’s way easier and puts less pressure on the bonded joint.
Matt (Admin) · April 23, 2018 at 9:20 am
Thanks, Adam – I’ve added the tip about the order of operations to the written instructions above. Excellent point!
Mark · February 16, 2018 at 3:42 pm
Do you have any measurements for where to place the zipper on a V3 raft?
Thanks!
Matt (Admin) · February 19, 2018 at 9:04 am
Hi Mark – if you place the zipper on piece #5 (left or right) with the zipper’s end stop (the black plastic square) about 12 cm (~5″) from the tip of piece #5 and the metal slider (in the closed position) equidistant between the edges of piece #5 (roughly 15 cm or ~6″ from the nearest point on each edge), that will give you enough room around the edges of the zipper to install it without interfering with the seam strip near the tip of piece #5 and the zipper will be out of the way if you decide to install a spray deck later. You can bias it a bit towards either side if you want; just make sure there’s enough space around it to fit the seam strips, and avoid placing it too far from the tip of the stern or it will wrap up and around into the cockpit. If you want, you can wait to install it after the packraft is finished so you can place it exactly where it suits you best. Cheers!
Nils Endrestøl · September 12, 2017 at 1:14 pm
Hi
Looks like 55cm long strip will be just short, since the zipperfabric is 55cm itself.
Wouldn’t it bee nice with a grab loop in both ends? Or is the zipper much easier to close than to open?
Matt (Admin) · September 12, 2017 at 2:39 pm
Hi Nils – thank you for the correction! I have changed the “55 cm” to “60 cm”.
The zipper is much easier to close than to open, and will loosen over time, but you could add a second grab loop if you like – just make sure it won’t drag in the water (it wouldn’t slow you down much, but it could catch on something).
Thanks again!
Chris · July 25, 2017 at 5:43 pm
Hi Matt, thanks for a great writeup. I’m about to install a TiZip on a Yak, and wonder if you recommend or have had an experience with just gluing it, rather than welding? I’m considering gluing it from the inside of the tube, using something like Bostik 999, which I’ve used for tiedowns, and it seems to be bulletproof.
Not sure though, there might be something I haven’t thought of, or the pressure too high for the glue to hold in shear like that.
I’m all set up for welding, but just thought it may be simpler just to glue.
Thanks for any advice!
Matt (Admin) · July 25, 2017 at 6:16 pm
Hi Chris, TIZIP cautions against using glue to mount their zippers, but I don’t know how much stronger a welded bond is (if at all). I do remember seeing somewhere online a DIY installation of a zipper in a packraft using glue, and over time the glue failed, but I can’t remember the type of glue or packraft that was used. I haven’t tried gluing anything to the inside of an Alpacka, so I would start by testing your glue on that side of the fabric, as adhesives will react differently with the nylon on the inside of the tubes compared to the TPU on the outside. Assuming the test goes well, I don’t see any reason not to use glue if you want to avoid ironing, as the glue will be strongest in shear. If you go ahead with it, just be sure to cover both sides of the zipper mechanism with tape before gluing, as accidentally getting glue in the zipper could ruin it’s ability to form an airtight seal. Cheers!
J-F · January 9, 2018 at 10:46 am
I’m really curious,did you finally glue the zipper on the inside tube fabric?if yes,still good after some use?
any tip about installation?
thanks
Robby · July 20, 2017 at 8:22 am
If I were to add a zipper to a prebuilt pack raft are a there different sequence of steps to install the zipper?
Matt (Admin) · July 20, 2017 at 8:36 am
The procedure is basically the same, but start by inflating your packraft and holding the zipper against it to figure out exactly where you want it, and then mark the location before deflating it and cutting out the slot. Most of the major brands have TPU on the outside of the tube fabric, so the same heat sealing procedure will work; I believe Supai is one exception, with TPU film on the inside of their tubes. TPU on the inside makes installing a zipper even easier because you can seal the zipper directly to the tube fabric without adding a second piece of fabric. Cheers!
Steven Shapiro · April 24, 2017 at 9:55 pm
Matt- I bought a tizip from you and I was trying to unzip it (haven’t gotten to the step of installing it) to test it out and I cannot get the darn thing unzipped! Why is it stuck? Have you ever run into a stuck zipper? I mean, it won’t even budge….
Matt (Admin) · April 24, 2017 at 10:22 pm
Hi Steven, the zippers are very tight when new – so tight you may need to hold the end in a (padded) vice or pliers to open it for the first few times. After opening it the first time, apply some of the included lubricant, and that will help it slide, but it will still be quite stiff. Over time, it will loosen up a bit, but the tightness is what makes it airtight, so it will always require some effort. That’s why I like to add a grab loop on the packraft at the end of the zipper so I have something to pull against. Cheers!
Rob · March 7, 2017 at 7:42 am
Hi Matt,
Do you think a 620mm zipper would be too long to fit on a packraft sensibly?
Rob
Matt (Admin) · March 7, 2017 at 8:08 am
Hi Rob,
I chose the 50 cm TIZIP because it was the longest zipper I could sensibly fit. In this picture you can see where a 50 cm zipper fits when located as close as possible to the tip of the stern. A 620 mm zipper will extend 12 cm farther down the back rest area towards the floor of the boat, which would preclude the installation of a spray deck and might interfere with a back rest (or a back rest might interfere with it), and if you didn’t use a back rest, you would have the zipper slider and pull digging into your back. You might be able to wrap the zipper down around the underside of the tube on the outside, but that would expose it to abrasion from below, add drag to your packraft, and make it difficult to roll up your boat without folding the zipper (a definite no-no, as the zipper will be damaged!). Placing the zipper across a seam would add a higher level of complexity because it could not be heat sealed in place, and again, it would be difficult to pack the boat into a tight roll without folding the zipper. Placing a zipper on a side tube would solve all these problems, but of course you’d only have access to one side of your boat!
Cheers,
Matt
Steven Sloat · July 24, 2022 at 5:33 pm
Hi Matt. You just touched on a question that I was going to ask. Besides losing easy access to one side of the boat, are there other disadvantages to mounting the TiZip on the L3/R3 of a Skeena? What about mounting a TiZip on each side? I’m thinking it would be perhaps easier to locate, plus locating it further inboard keeps it safer from snags. Thoughts?
Matt (Admin) · July 25, 2022 at 11:54 am
I’ve never tried it, so I can’t speak from experience, but adding a zipper to each side would add cost, complexity, weight, and an extra potential failure point. You’d have to locate it in just the right place – if it’s on the top of the tube it might be annoying because you could brush your paddle/knuckles against it while paddling, but if it’s too far inside the cockpit then the raised bumps would press against your thighs, which could be uncomfortable.
To minimize the chance of snags it would be easier to replace the T-shaped zipper handle with a short length of cord or webbing. I’ve actually never heard of anyone snagging a zipper while paddling though – maybe it happens, but if so, it must be pretty rare.
Steven Sloat · July 25, 2022 at 9:13 pm
hmmm…points to ponder. As always, thanks Matt!
Thor · February 9, 2017 at 11:32 pm
Hi Matt, After watching the video a million times, I cannot figure out how to make the loop. It looks like your strip is initially a single layer about 15cm long. But then later it appears to be a double layer strip, perhaps folded in half (???). At one point there seems to be a strip coming out from inside the loop, which you then cut shorter. I don’t understand where that came from.
If I seal a single strip to the tab, the tpu side of the strip ends up facing out. That means I’m sealing non-tpu side of the strip to tpu side of the tube. That’s not going to work. And then, since I have non-tpu side of the strip on the inside of the loop, I can’t seal an extra layer of fabric to the inside of the loop to bridge the joint.
There’s something I’m missing. Help!
Matt (Admin) · February 10, 2017 at 12:42 pm
Hi Thor,
Sorry it wasn’t clear – I will update the page with a diagram! The way I did the one in the pictures and video is a bit more complicated than it needs to be because I didn’t leave a long enough strip for the loop, so I had to splice two pieces together using a third piece on the inside of the loop. If your fabric is long enough, I recommend making the loop from a single strip bent in the shape of a capital Greek letter omega, and then reinforcing that with a loop of fabric inside the loop of the omega… diagram to follow!
Matt
Thor · February 10, 2017 at 9:55 pm
Thanks Matt.
I am having a lot of trouble getting the fabric to bond to the T-zip. No matter how long or hard I press the mini iron, it does not bond. The only way I’ve managed to get any sort of bond (only patchy and not very strong) is to use my household iron, get it really hot, remove the iron (the fabric curls up and away from the t-zip) and then press down really hard on the hot fabric for a minute. The problem is that I might be wrecking the tpu where I need to bond the fabric strip to the kayak tube, and if I try and go over a section again, re-heating just un-bonds what was previously bonded. This is really just a comment. From your videos, it looks like you are not having any trouble. I will do the best I can to bond, use a lot of glue, and hope for the best.
Matt (Admin) · February 11, 2017 at 9:37 am
Hi Thor,
It sounds like your mini iron might not be hot enough… what sort of mini iron are you using? Feel free to send me pictures if you think that might help diagnose the problem.
In some situations it is necessary to press down on the fabric after removing the heat source in order to keep it in place while it cools – usually this happens if the iron is very hot (the TPU loses its stickiness if it liquefies) or if there is tension on the fabric so it won’t stay in place. As you mentioned, reheating the bond will un-seal it, so try to avoid reheating areas that have already been sealed unless you need to re-position the fabric.
If you are going to apply glue around the zipper, I recommend covering the zipper with tape first (inside and outside) so you don’t accidentally get glue on it!
martin carmichael · July 11, 2024 at 4:10 pm
hello
I need to replace the tizip slider as it does not close well
do you know how to and where tho get replacement parts?
thank you
I have a superseal tizip
Matt (Admin) · July 16, 2024 at 5:08 pm
Hmm, I don’t know if TIZIP offers that. I’ve never seen parts for sale, and I don’t know how you would replace the slider because it appears to be built into the zipper (you might have to replace the whole unit).