Note: These instructions are for an older, discontinued version of the DIY Packraft (the V2). Do not attempt to follow them when constructing a V3 DIY Packraft or any of the newer designs (Skeena, Telkwa, Ultralight, 2-Person, etc.).
Step 0.5 – Practice Heat-Sealing
Step 1 – Joining Tube Pieces to Floor
Step 2 – Joining Tube Pieces Together
Step 3 – Join Completed Tubes to Floor
Step 4 – Double-Layer Floor or Joint Reinforcement
Overview:
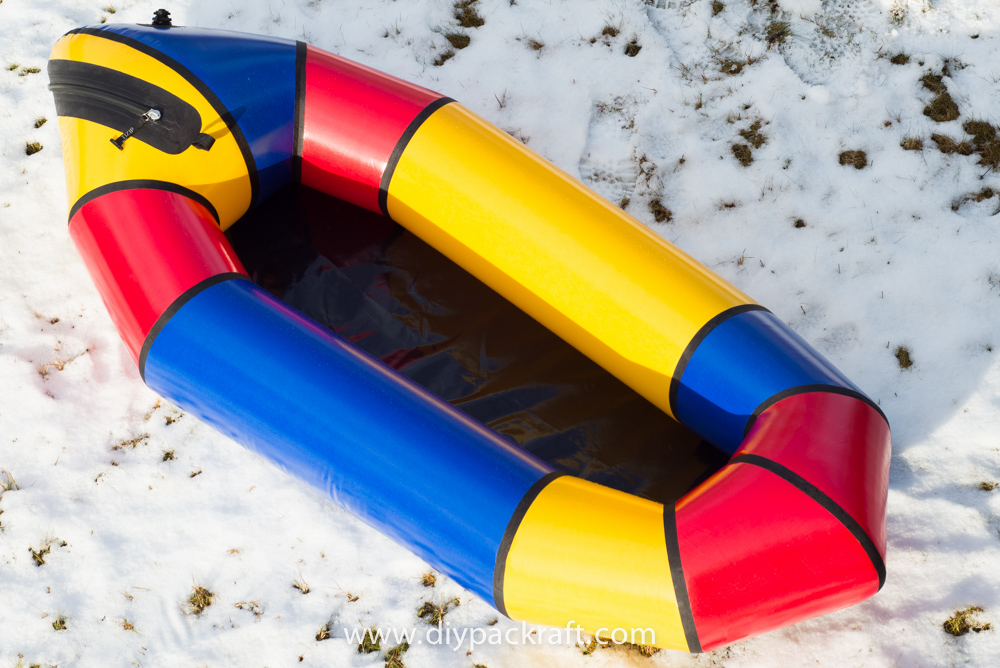
In these instruction pages, I show in detail how I put together this packraft from a DIY Packraft Kit:
In the video below, I use a paper model to show how the pieces of a DIY Packraft kit fit together to make a packraft:
If you have ordered plans and raw fabric (as opposed to a kit), you’ll start by cutting out the paper shapes on the plans and tracing them out on your fabric. There are six shapes – the floor and five tube sections, and you’ll be tracing the tube sections twice – once for the left side of your packraft, and once for the right. After the pieces are cut out, you’ll start heat-sealing them together.
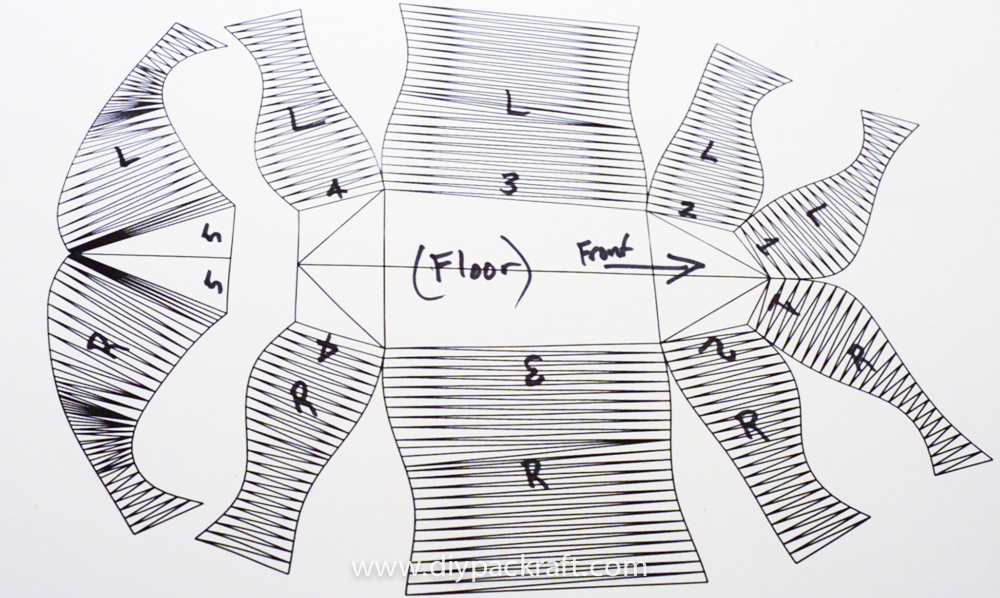
The tubing sections on the kits and plans are numbered 1 through 5 to correspond with labels on the floor piece, so you’ll know how they fit together.
Before you begin bonding things together, lay out the Floor with the TPU (shiny) side up and then lay out the ten side pieces TPU side down in their appropriate positions, to make sure you’ve got them all and you know how they fit together (this is where the “Left”, “Front”, and number labels come in handy on the plans/kit pieces). The array will look like this:
As you work through the instructions in the links above, you’ll bond each tube piece to the floor and to each other to create a segmented airtight ring around the floor of your packraft.
After installing an inflation valve, you’ll be able to inflate your packraft and go on amazing packrafting trips!


9 Comments
William Archibald · June 2, 2021 at 8:34 pm
Hi Matt, I just got a packraft and am starting to build it.
Few minor questions:
i) My floor did not come with dots to match up the sides corners to. Are these 5cm in?
ii) Also the many corners of the hexagon floor have a triangle cut into the corner rather than just being a corner. Do I cut into these?
Matt (Admin) · June 2, 2021 at 9:42 pm
Hi William, are you sure you’re looking at the right instructions? I don’t have your name in my customer database so I don’t know what model you have, but the V2 was discontinued years ago…
William Archibald · June 3, 2021 at 7:52 am
My friend friend and I bought 2 packrafts together to save on shipping.
I purchased a Red 1 person Skeena at 130cm.
I have the page for access to instructions but can not find it on your site.
Matt (Admin) · June 3, 2021 at 8:13 am
Quoting from that letter: For assembly instructions, please visit “Instructions – Skeena & Telkwa Kits” under the How-To menu at https://www.diypackraft.com.
Please slow down and read the instructions or you will make mistakes that are difficult to fix – especially anything in bold/red, like at the top of this page where it says not to follow these instructions if you have a Skeena kit. This is very important.
William Archibald · June 3, 2021 at 4:49 pm
Thank you Matt I have managed to navigate to your instructions.
I will ensure I take my time as I do not want mistakes to occur.
Cam · August 9, 2017 at 5:37 am
Hey Matt,
Very long winded multiple questions scenario here, sorry in advance.
Is it possible to have the floor and tube cutouts 1-4 all as one piece? Eliminating the need to weld one side of the tube? I would assume you’d need a piece of seam strip(possibly wider to get the strength the same)to have TPU to TPU sides touching from the inside of the tube to the inside of the floor. Reason being is I’d like to keep the nylon on the outside to protect the TPU from the elements and being roughed up by getting shoved in and out of my bag.
I figure 5L/5R could also be shortened and strips added to both sides to keep the TPU on the inside. Only issues I can see is it would be harder to seal tube sections to each other and center seams since seam strip would have to be on inside. Or is it advantageous to have TPU on the outside, other than for ease of fabrication?
Great site, I’m definitely going to do this as I already own an alpacka, but would like to DYI a more minimal version instead of buying their scout model.
Cheers,
Cam
Matt (Admin) · August 9, 2017 at 9:43 am
Hi Cam, I have made a packraft with the TPU on the inside of the tubes, with the floor and tube sections cut out of one piece as you describe (check out the original V1 instructions at the bottom of the How-To menu). After trying both configurations, I prefer having TPU on the outside, but check out the V1 design and if decide you want to go that route, send me an email and I’ll see if I have any of the original plans lying around (or you can modify the current design fairly easily). Cheers!
Cam · August 14, 2017 at 4:53 am
I’m currently weighing my options/preferences. I checked out V1 and I can see that the nylon will stay wet longer having it exposed instead of the TPU which would be less desirable to me. I like the addition of the double sided 420d in V3, is there a double sided 240d fabric that your supplier has/you know of? I feel like in a perfect world that would shut me up(since TPU would also be on inside of tube so outside coating has an inside redundancy)
Matt (Admin) · August 14, 2017 at 9:28 am
Working with double-TPU fabrics in the tubes would require a different bonding method because you wouldn’t be able to seal it with an iron (the iron can’t touch the TPU). A hot air welder would be the way to go. Because each fabric is custom made and the minimum order quantities are very large, I cannot supply that for you. I recommend purchasing a fabric sample pack so you can see how tough the current fabrics are – that may put your mind at ease.